Search Knowledge Base by Keyword
How to Change Caller ID
How to Change the Caller ID
The caller ID is updated in a campaign or on the master dial page. When you update the master dial settings, all campaigns using the master dial defaults update with the new number. If you only need to change the caller ID for one campaign, then you can go to its settings to make the update. Follow these steps to change the caller ID.
Step 1.
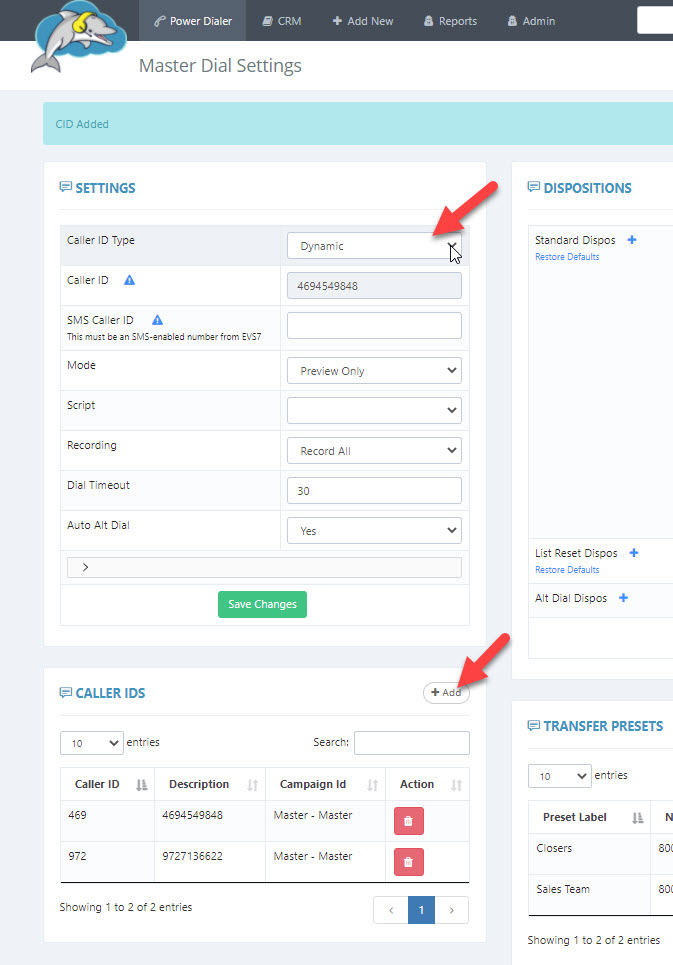
Let's first look at how to change the master dial caller ID. Select admin and then click on the master dial settings. 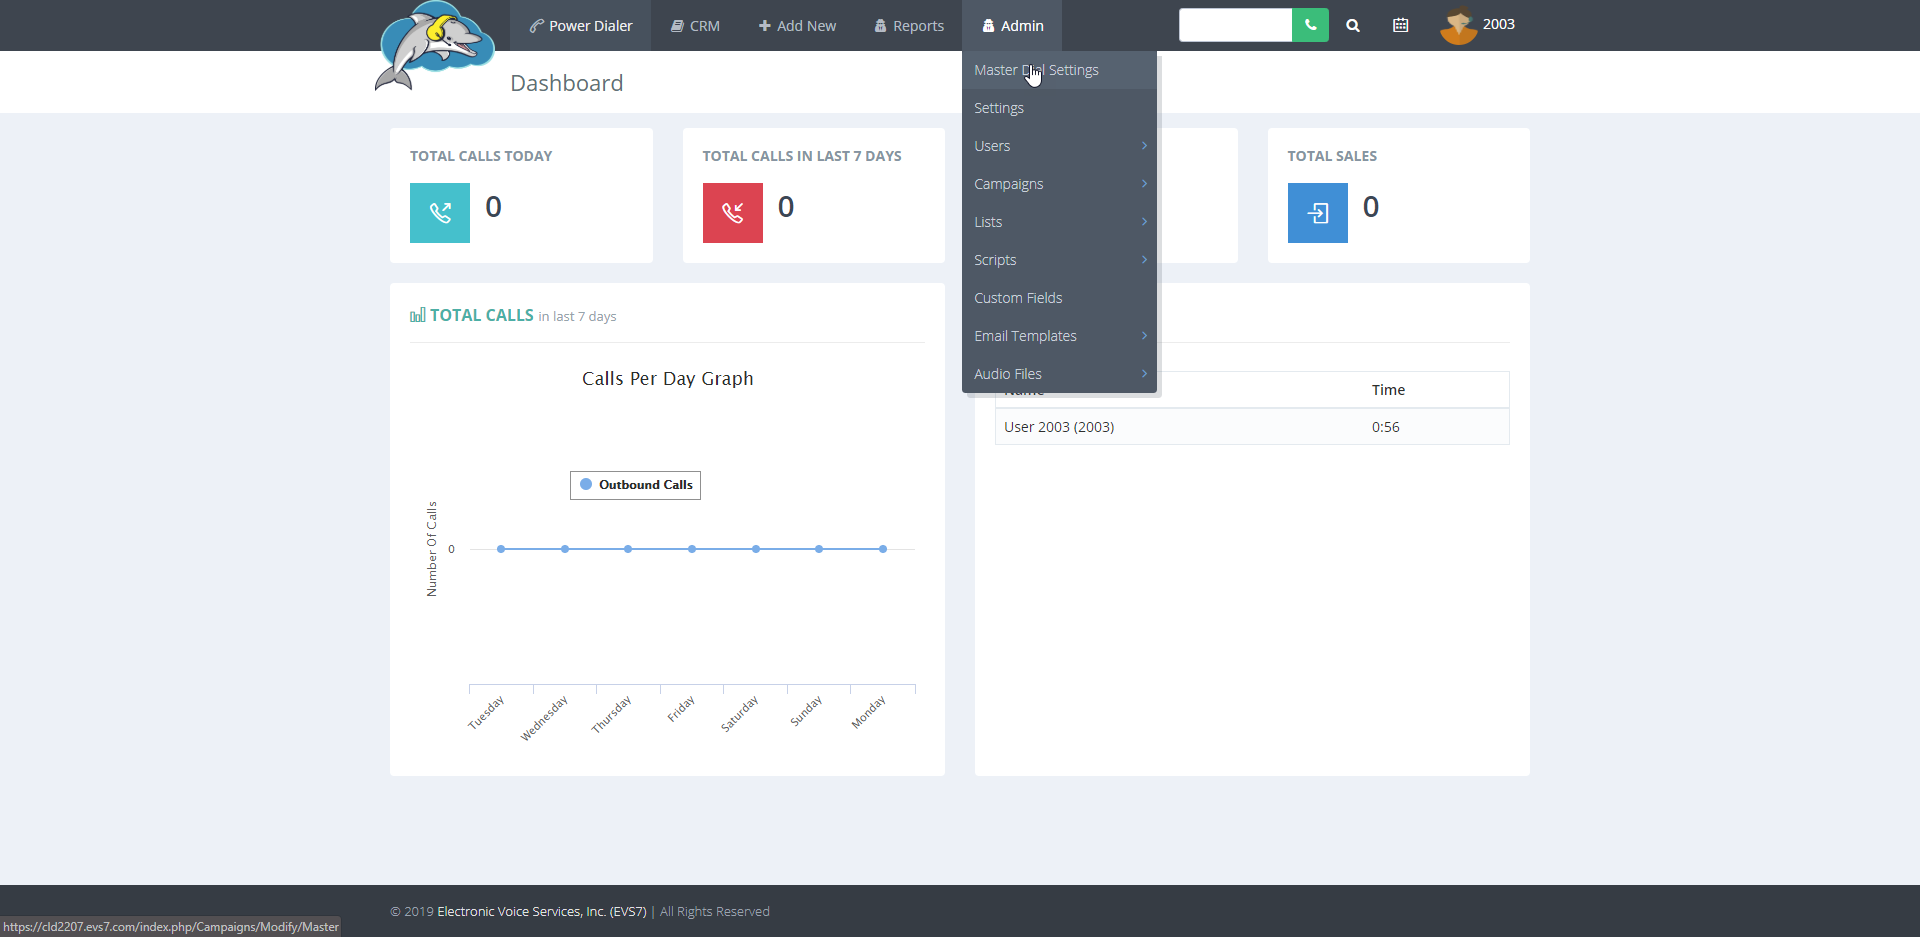
Step 2.
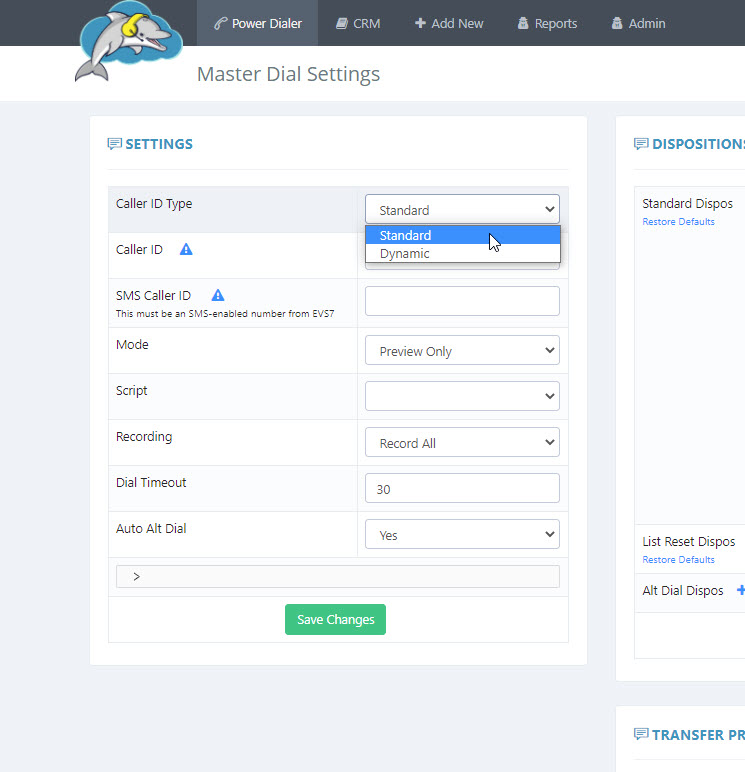
Let's look at the settings on the top left of the page. The caller ID type is set to standard.If you own more than one number and would like the dialer to change the caller ID often, select dynamic.
You will learn how to set this up in the next step.
Step 3.
Enter a valid number in the caller ID field. The format is numbers only, no need to use dashes.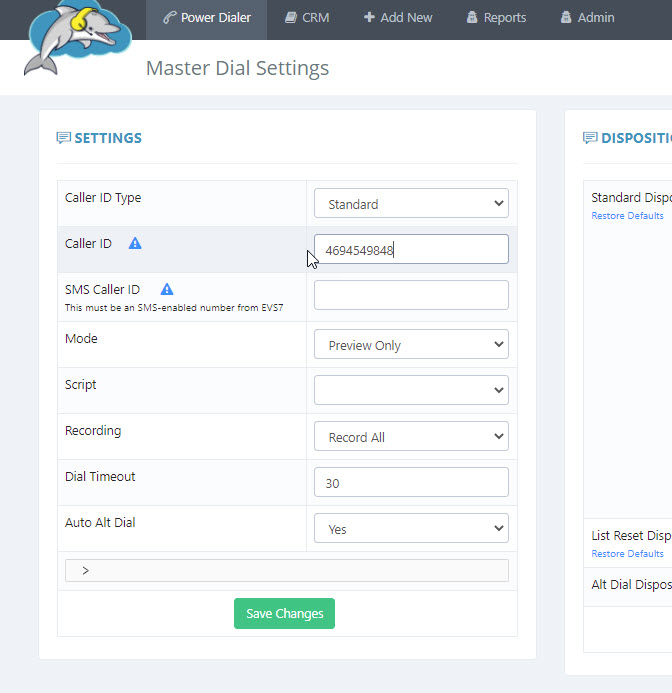
If you chose dynamic, enter the numbers you will use in the caller IDs section by clicking on the add button.
You can find this under the settings section. You may need to scroll down your page to find this.
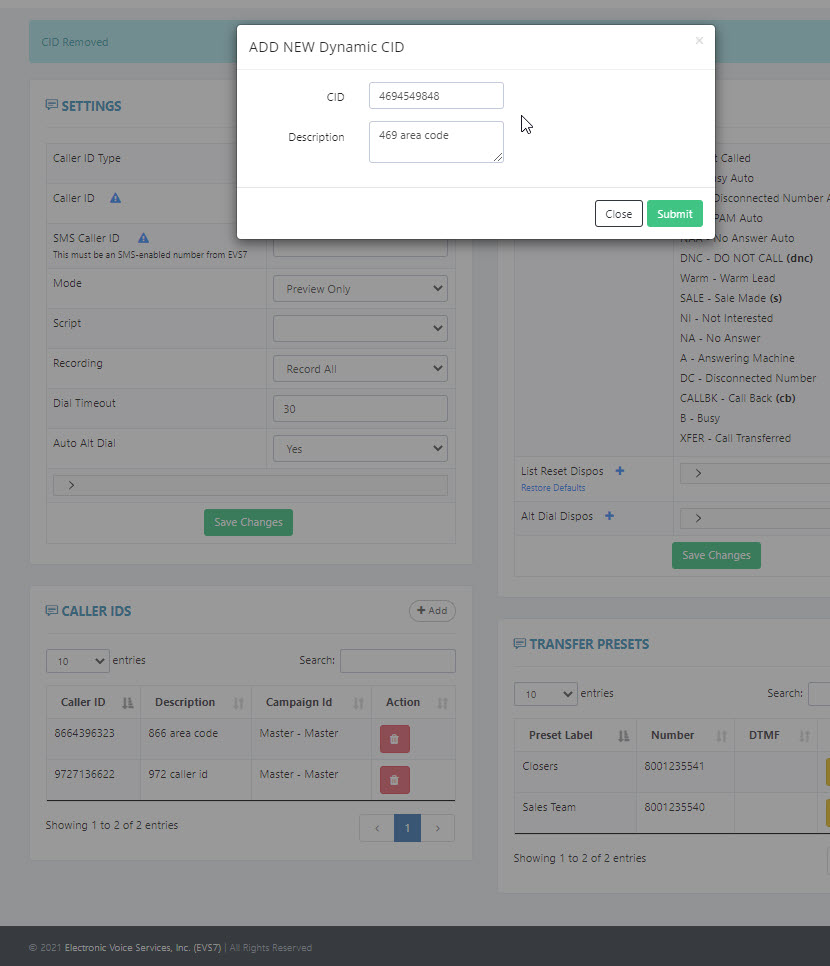
After clicking on add, you should see the add new dynamic CID setting slide down.
Enter the number in the CID field.You can also add a description.
Click submit and repeat the steps to add the rest of your caller ID's.
Step 4.
Click on save changes to save the new settings.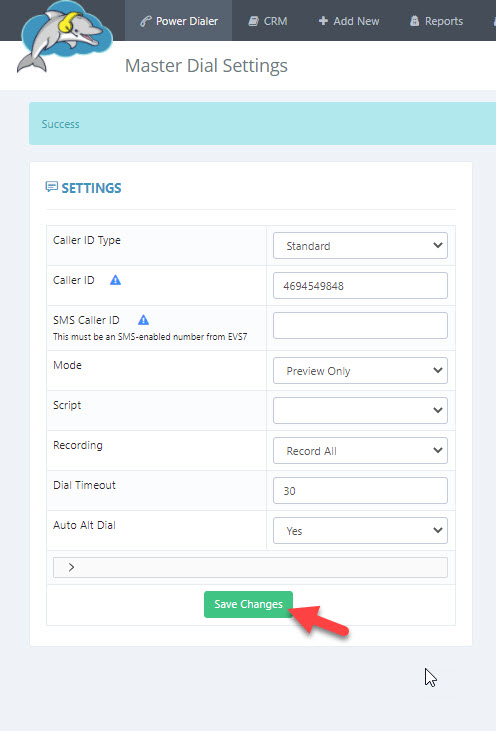
Step 5.
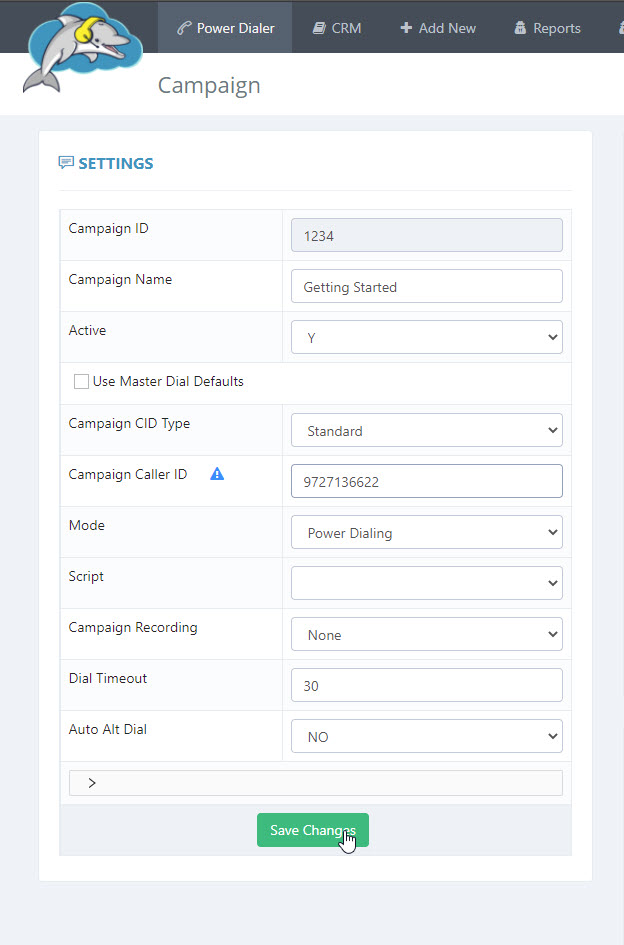
If you change the caller ID of a campaign, it will not change the number saved in the master dial settings. You can change the caller ID of any campaign.
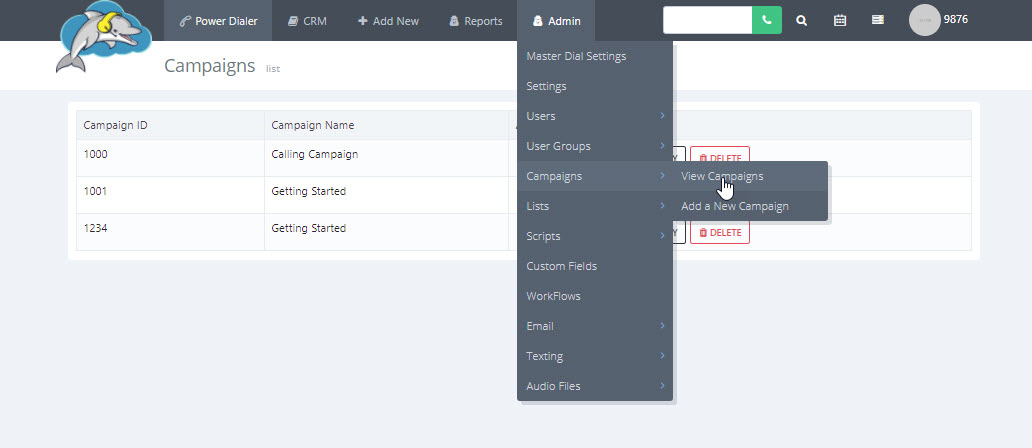
Go to admin and then campaigns, and select view campaigns.
Step 6.
Click modify to the campaign you want to change the caller ID on.
Step 7.
Make sure the master dial defaults is unchecked so you can edit the locked fields.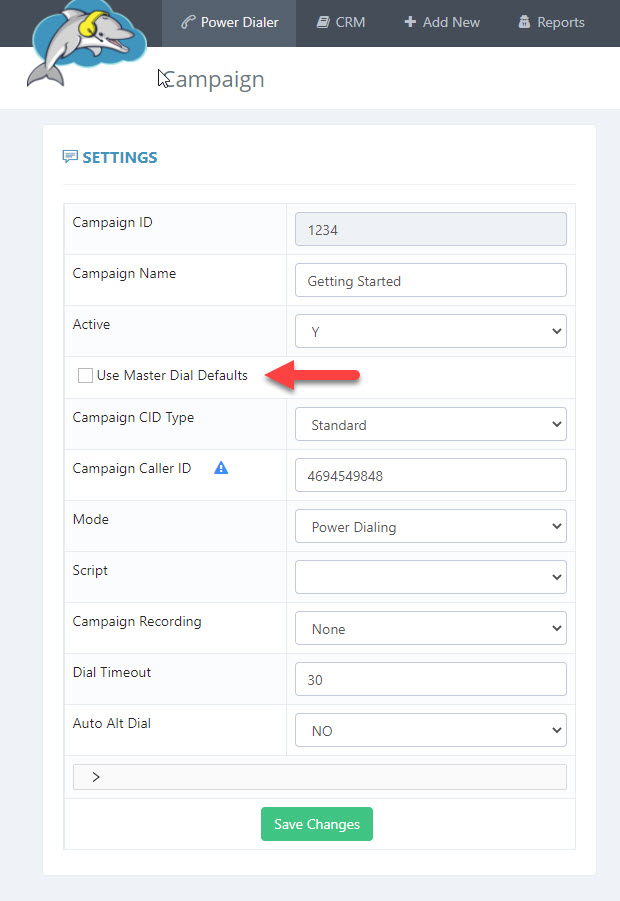
Step 8.
Repeat steps 2 - 4. Click save changes and you're done!The caller ID shows on the campaign you made changes on.