Search Knowledge Base by Keyword
How to Import Leads into a List
How to Import Leads to a List.
This tutorial will walk you through the steps of adding your lead files to a list within the Dolphin Cloud. Make sure you are working with CSV files only.
Step 1.
From the Dolphin navigation bar, select admin and then lists. Click on import leads from the next drop down menu.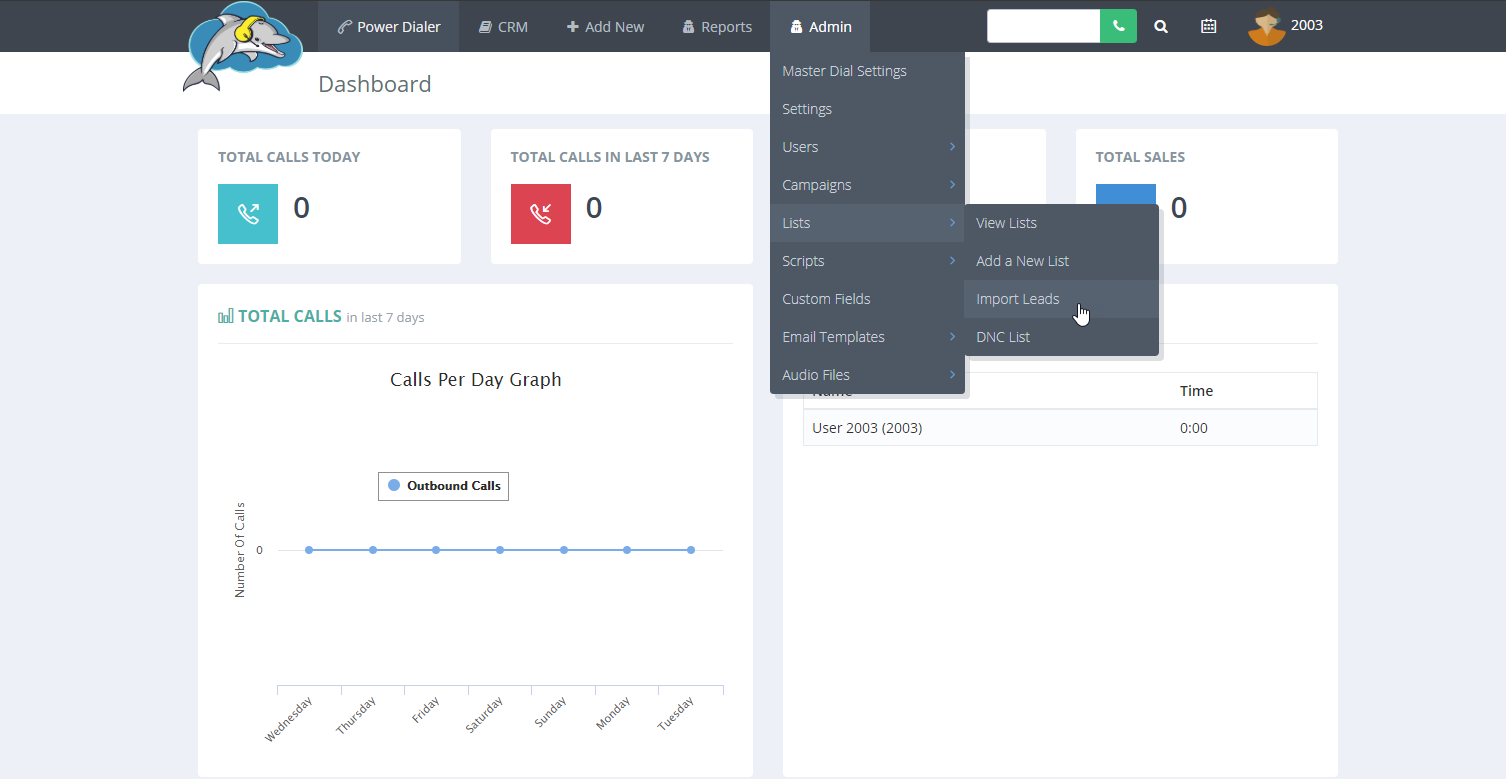
Step 2.
Select the list you want to import your leads into. Click on next to move on to step 2.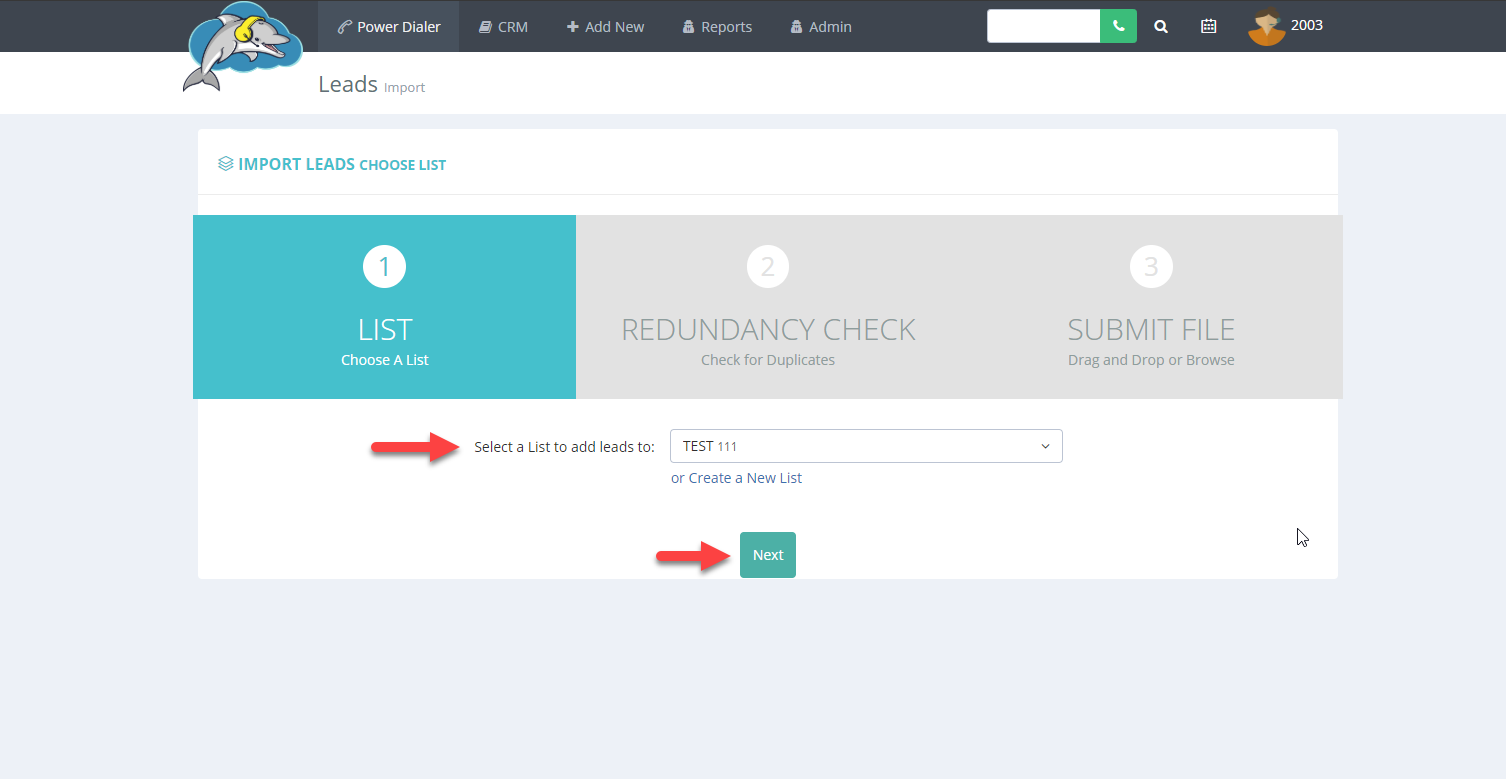
Step 3.
On this next step, you have the option to check for duplicates by selecting Y from the drop-down menu. Click next to continue to the final step.
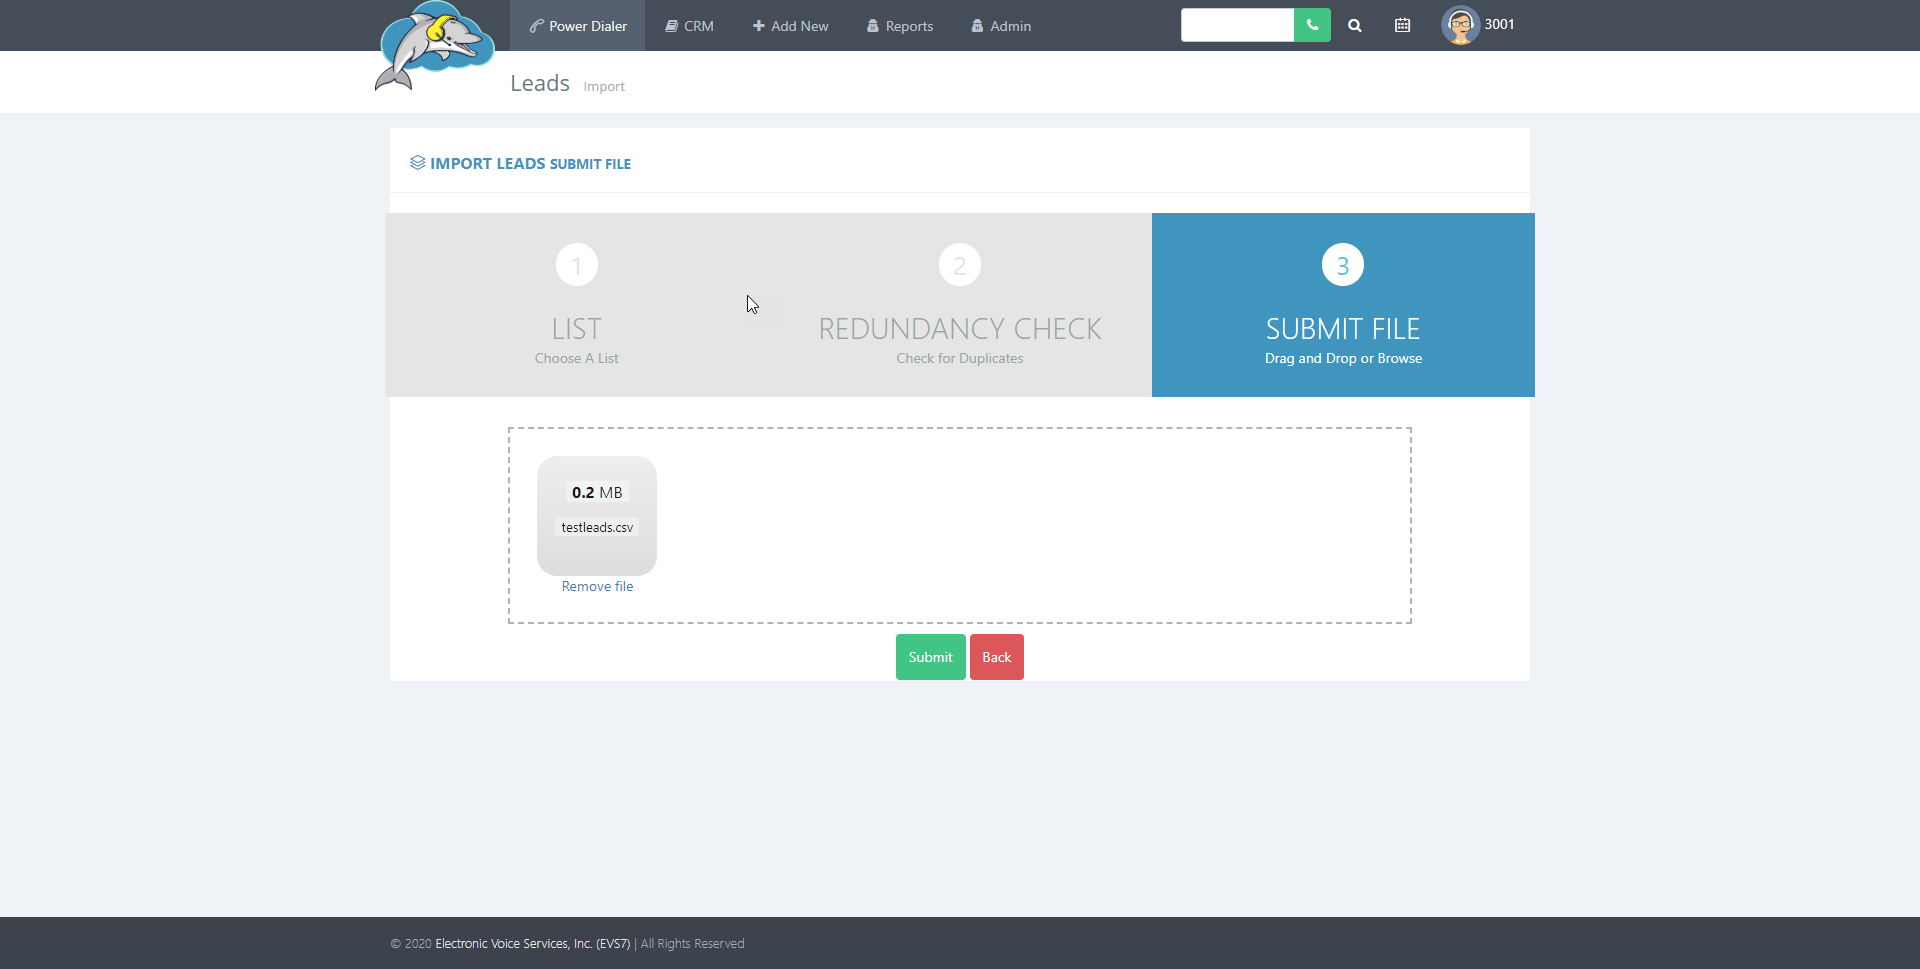
Step 4.
On this step, you will choose your CSV file to import. Select submit to continue.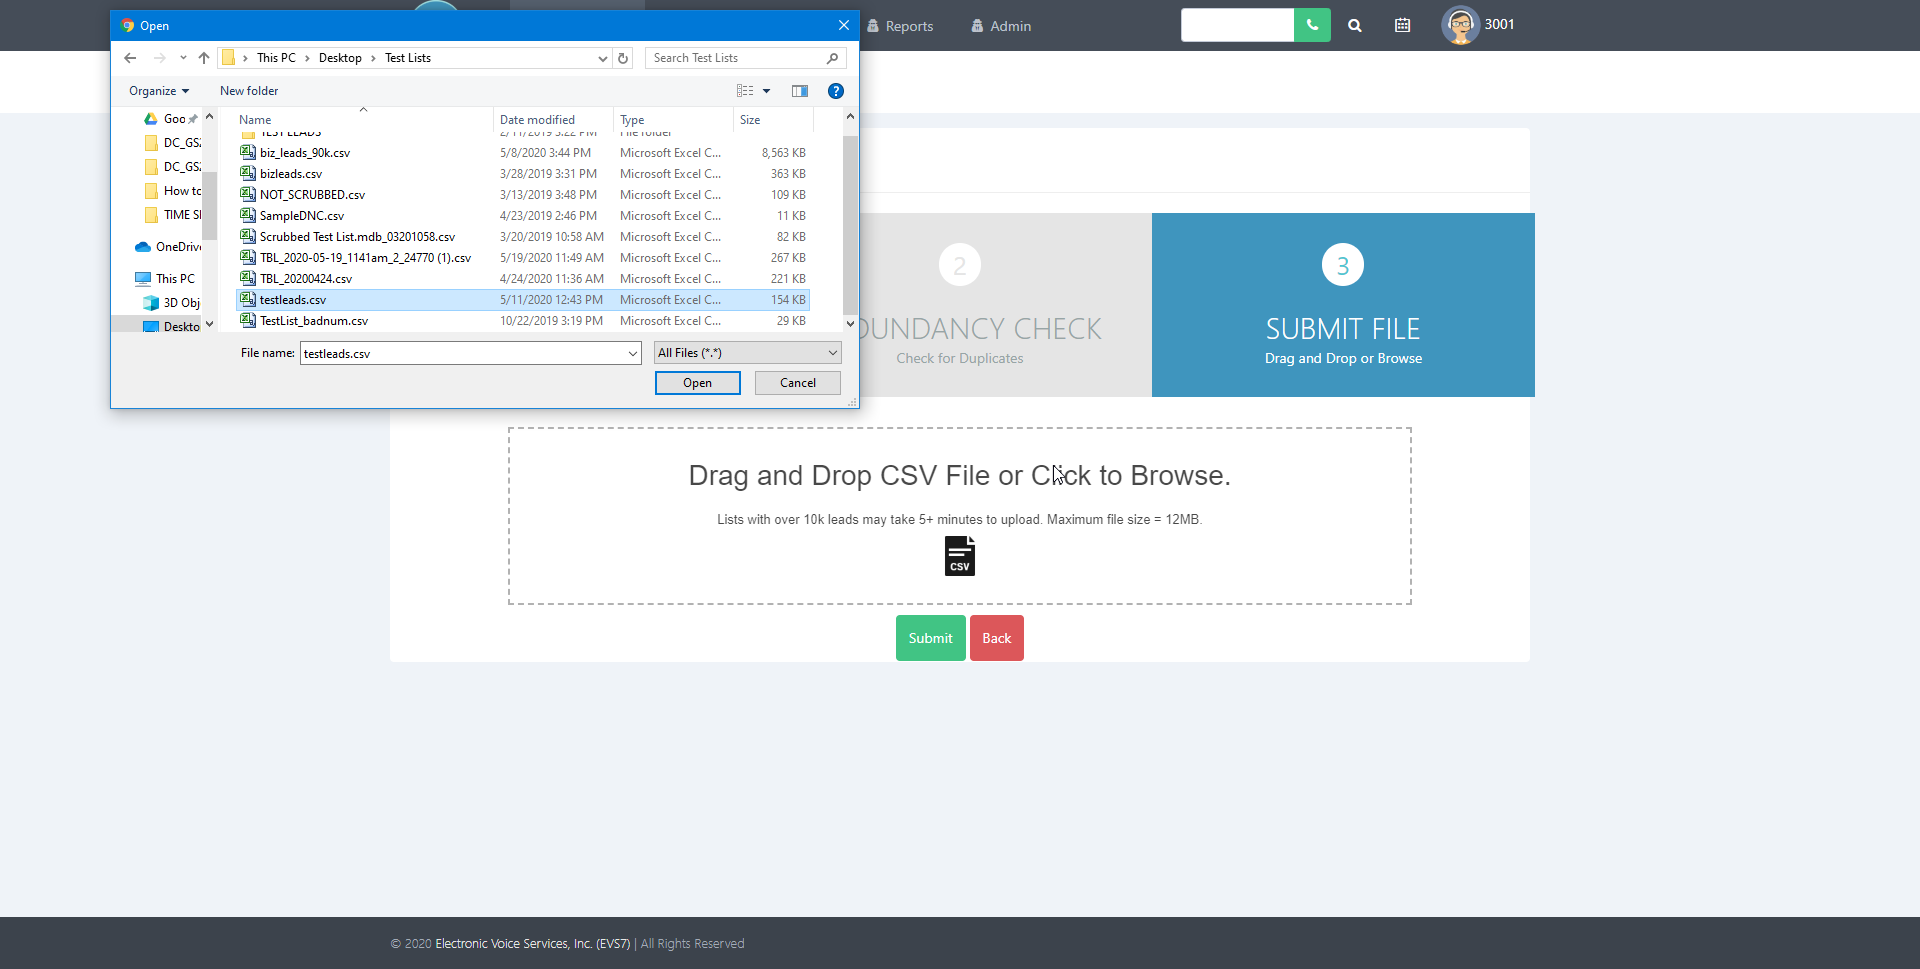
Step 5.
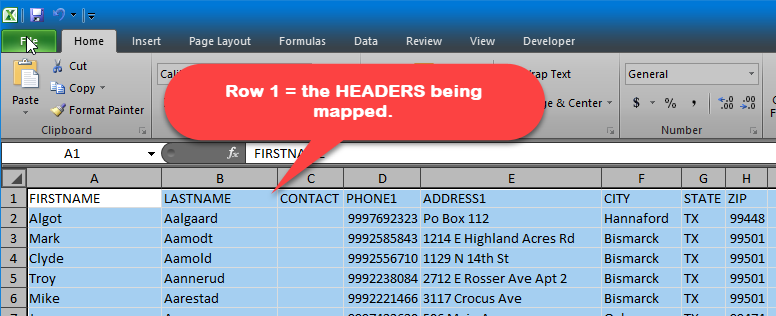
On this final step, you will map the labels for the dolphin fields. The drop down under list header will pull information from the first row of your CSV file. Map the fields that you want to view from the agent calling screen. Click submit to continue.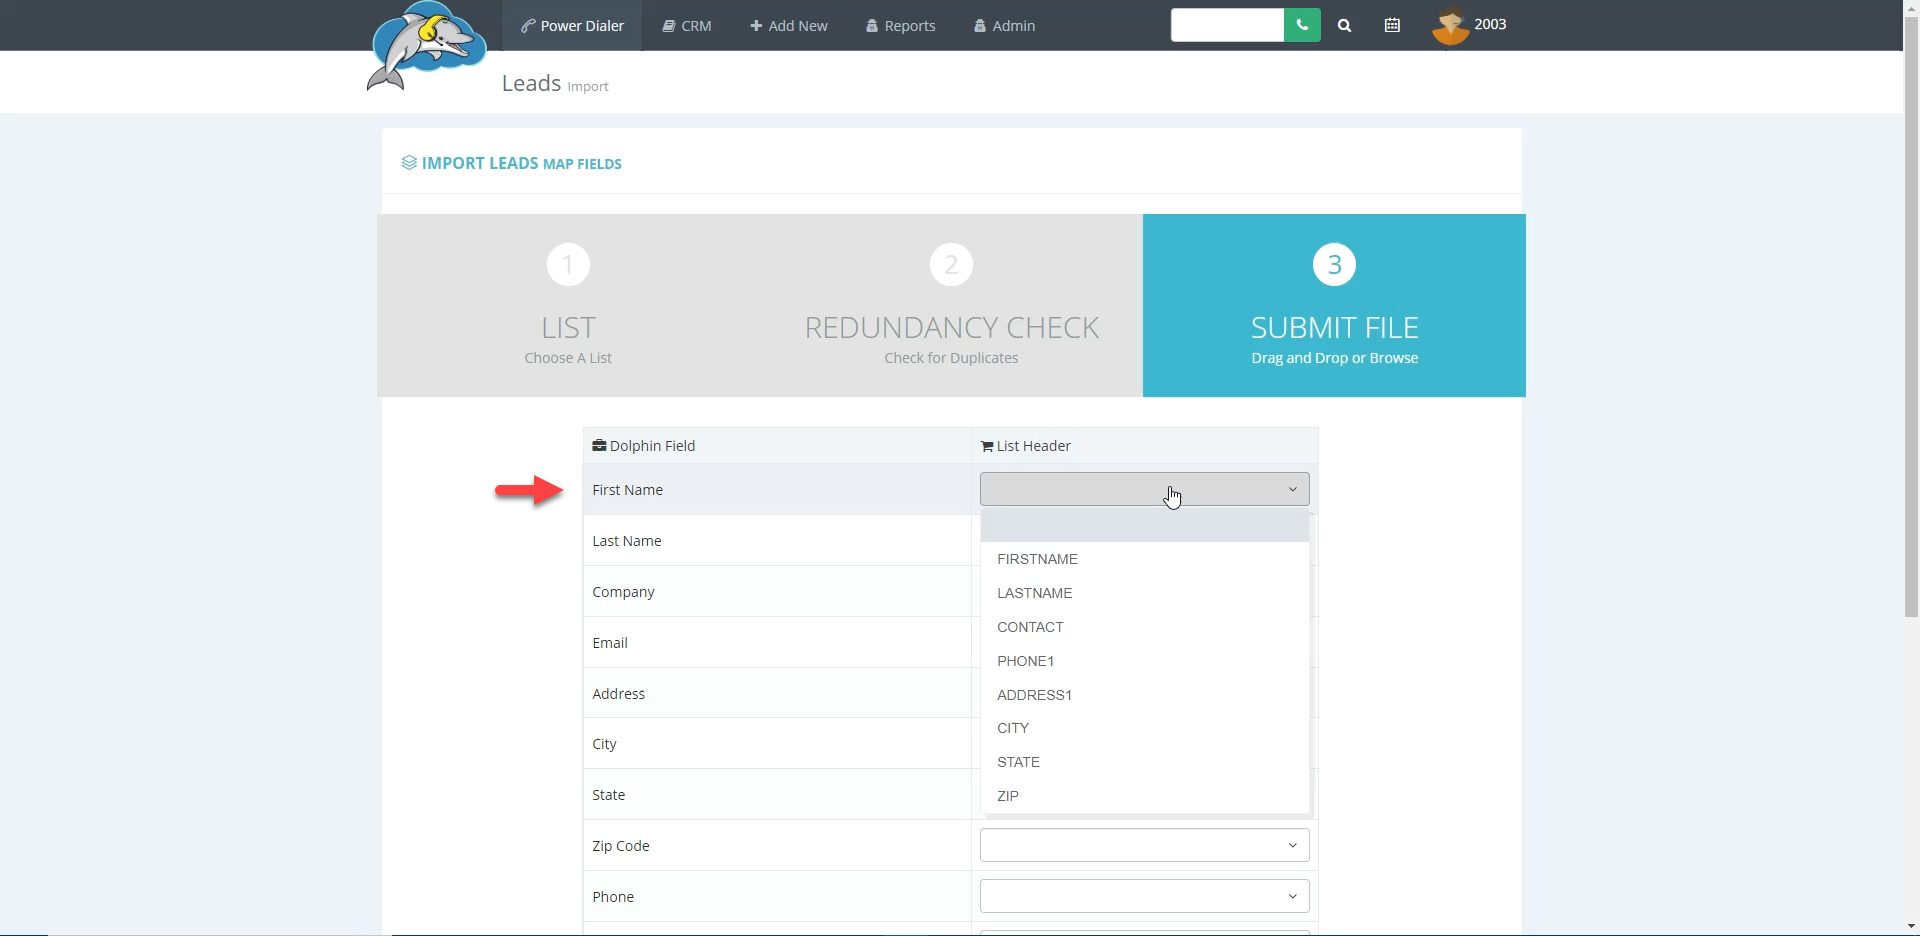
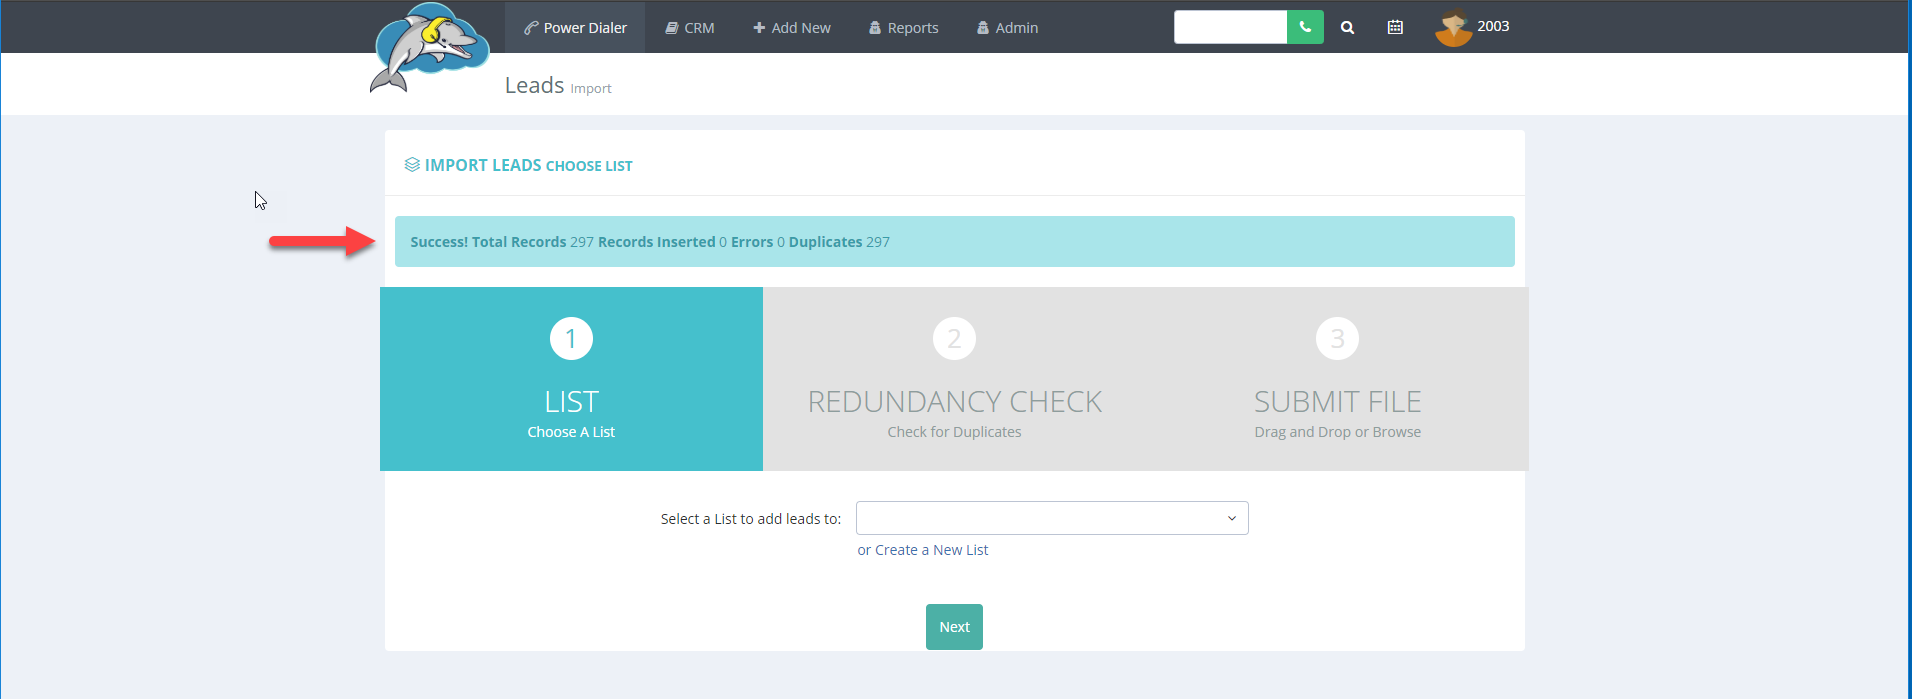
Step 6.
After mapping is completed, a blue status bar will appear on the next page. This will show you the number of duplicates or errors found in your file.