How Can We Help?
-
1. Getting Started
-
2. Campaigns
-
- How to Change the Auto Dial Level in Ratio Mode
- How to Change the Dial Method
- How to Change the Hopper Level
- How to Change the List Order
- How to Reset the Hopper
- How to Setup Alternate Number Dialing
- How to Setup Alternate Number Dialing in Manual Mode
- How to Setup Dialing According to Lead's Time Zone
- How to Setup Preview Dial
- Types of Dial Methods
- What is the Hopper?
-
3. Leads
-
Users
-
Inbound
- Getting Started with Inbound
- How to Assign an In-Group to a Campaign
- How to Assign Users to an In-Group
- How to Auto Launch a Script or Webform for Inbound Calls
- How to Configure Inbound After Hours Settings
- How to Configure Inbound Calls in Queue
- How to Configure No Agent Available Settings
- How to Configure Users to Receive Inbound Calls
- How to Create an In-Group
- How to Route a DID Number to an In-Group
- How to Setup a Welcome Message
- How to Setup Inbound Queue Hold Music
-
Scripts
-
Audio
-
Call Times
-
Reports
-
Troubleshooting
-
For Agents
< Back
You are here:
Print
How to Assign an In-Group to a Campaign
How to Assign an In-Group to a Campaign
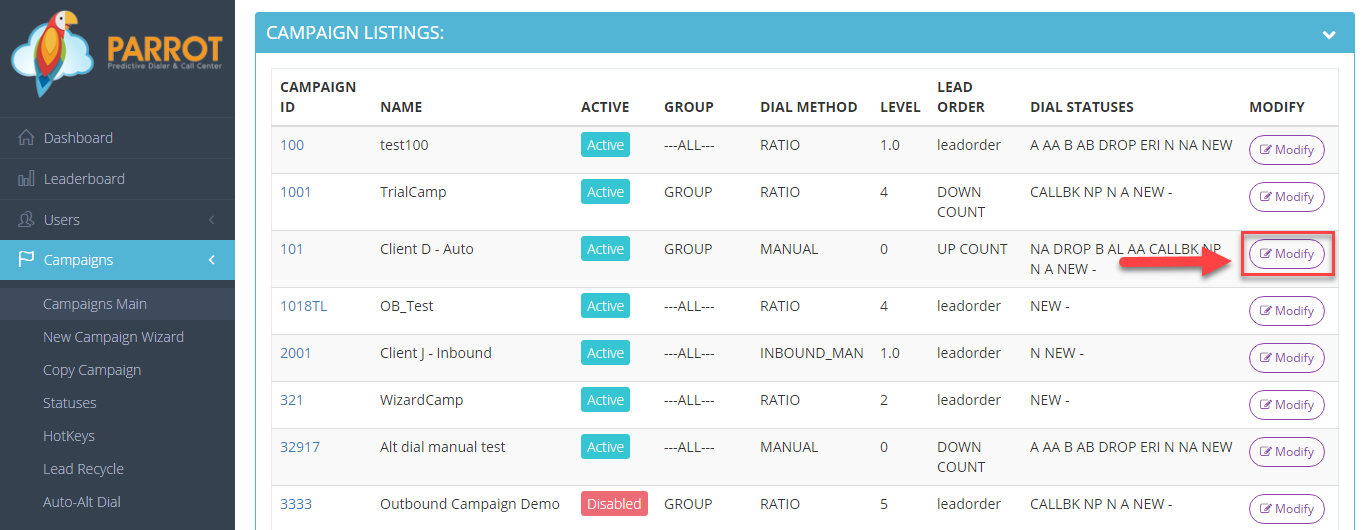
When you receive a DID number from EVS7, an in-group is created by default for the requested number. After the in-group is created, the in-group needs to be assigned to a campaign so that agents may receive inbound calls for the requested number. Step 1. Login to your manager portal using your Admin credentials. Step 2. Click on Campaigns and then Campaigns Main in the left menu.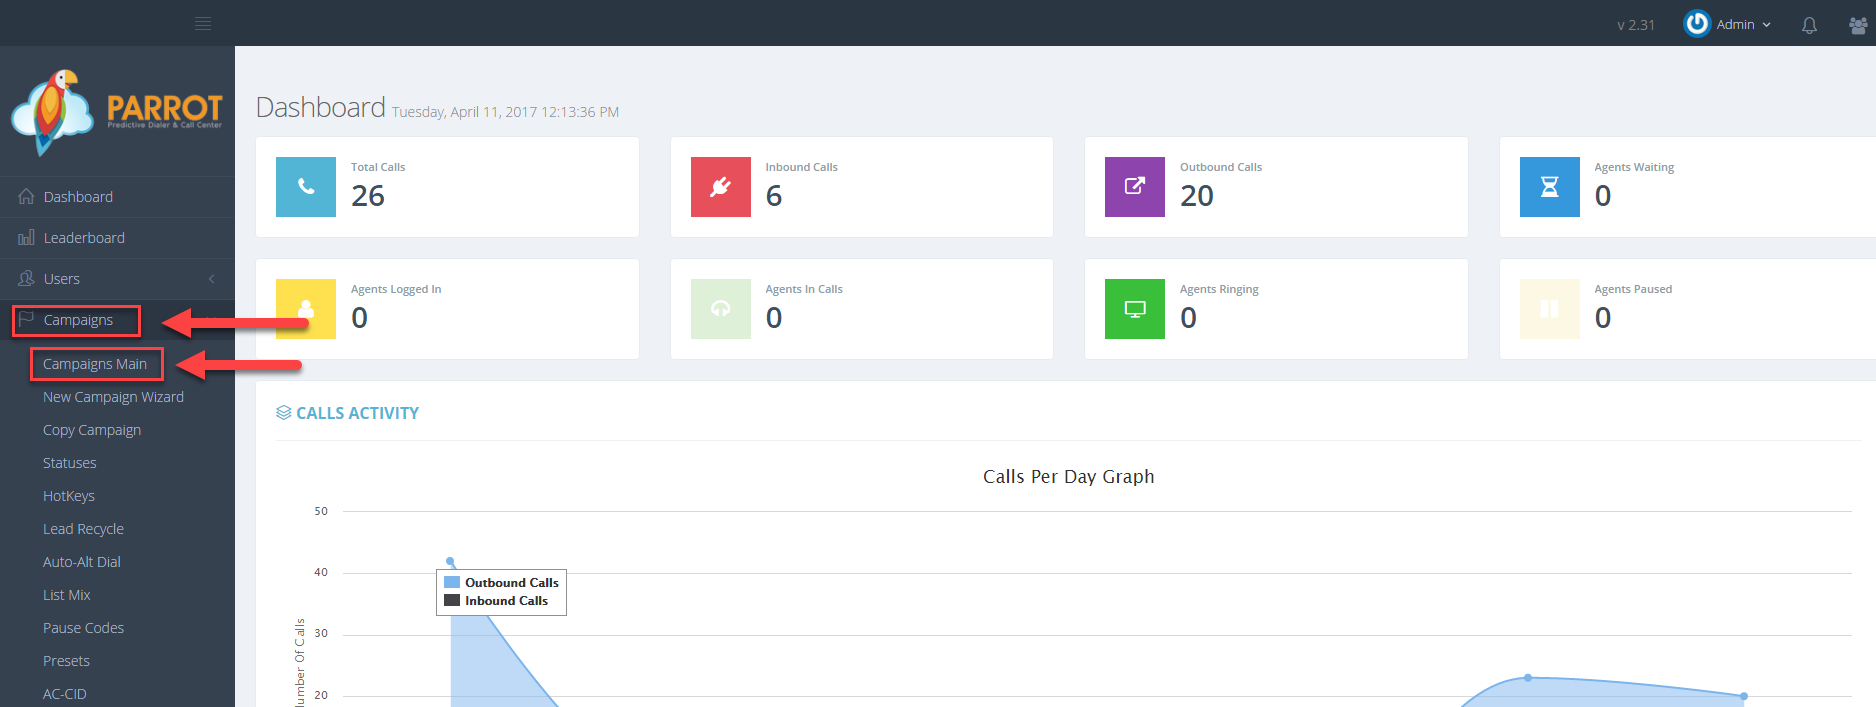 Step 3. Select the Campaign that you would like to change the caller id and click the Modify button for that campaign.
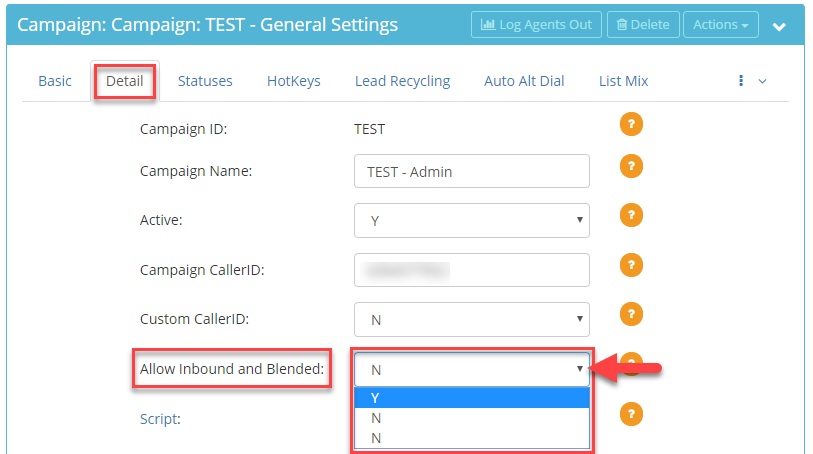
 Step 4. Go to the General Settings – Detail tab to view the Allow Inbound and Blended field. Select Y from the drop down.
 Step 5. Scroll to the bottom of the Detail tab and click Save Changes. The field Allowed Inbound Groups will now appear in the Detail tab along with any in-groups that were created.
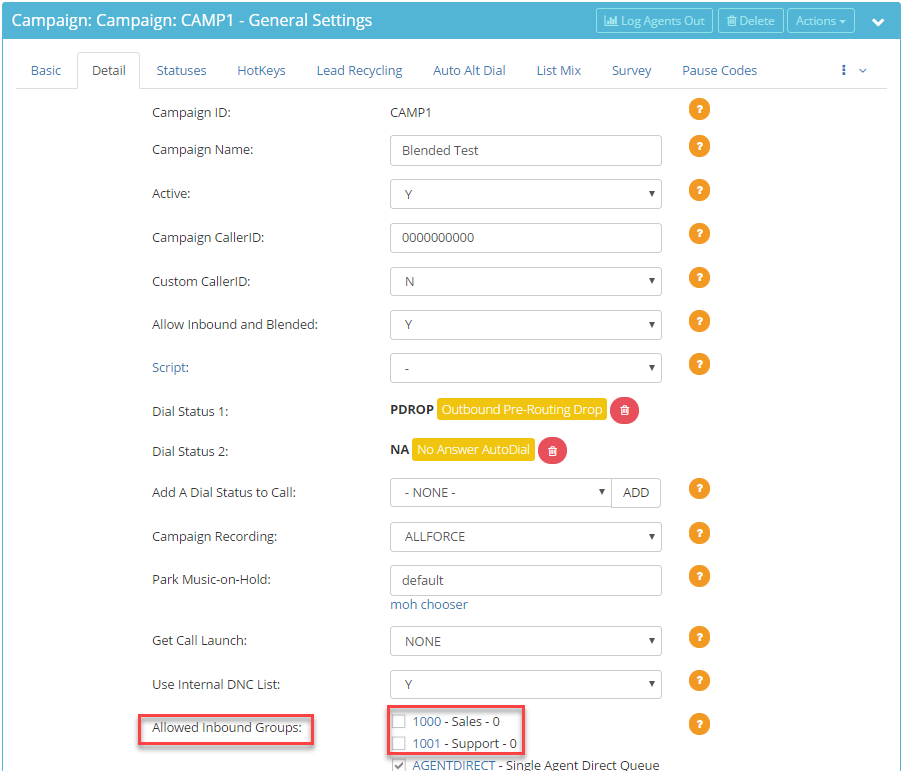 Step 6. Select the desired in-group(s) checkbox to allow agents to receive calls into the in-group.
 Step 7. Click Save Changes.