How Can We Help?
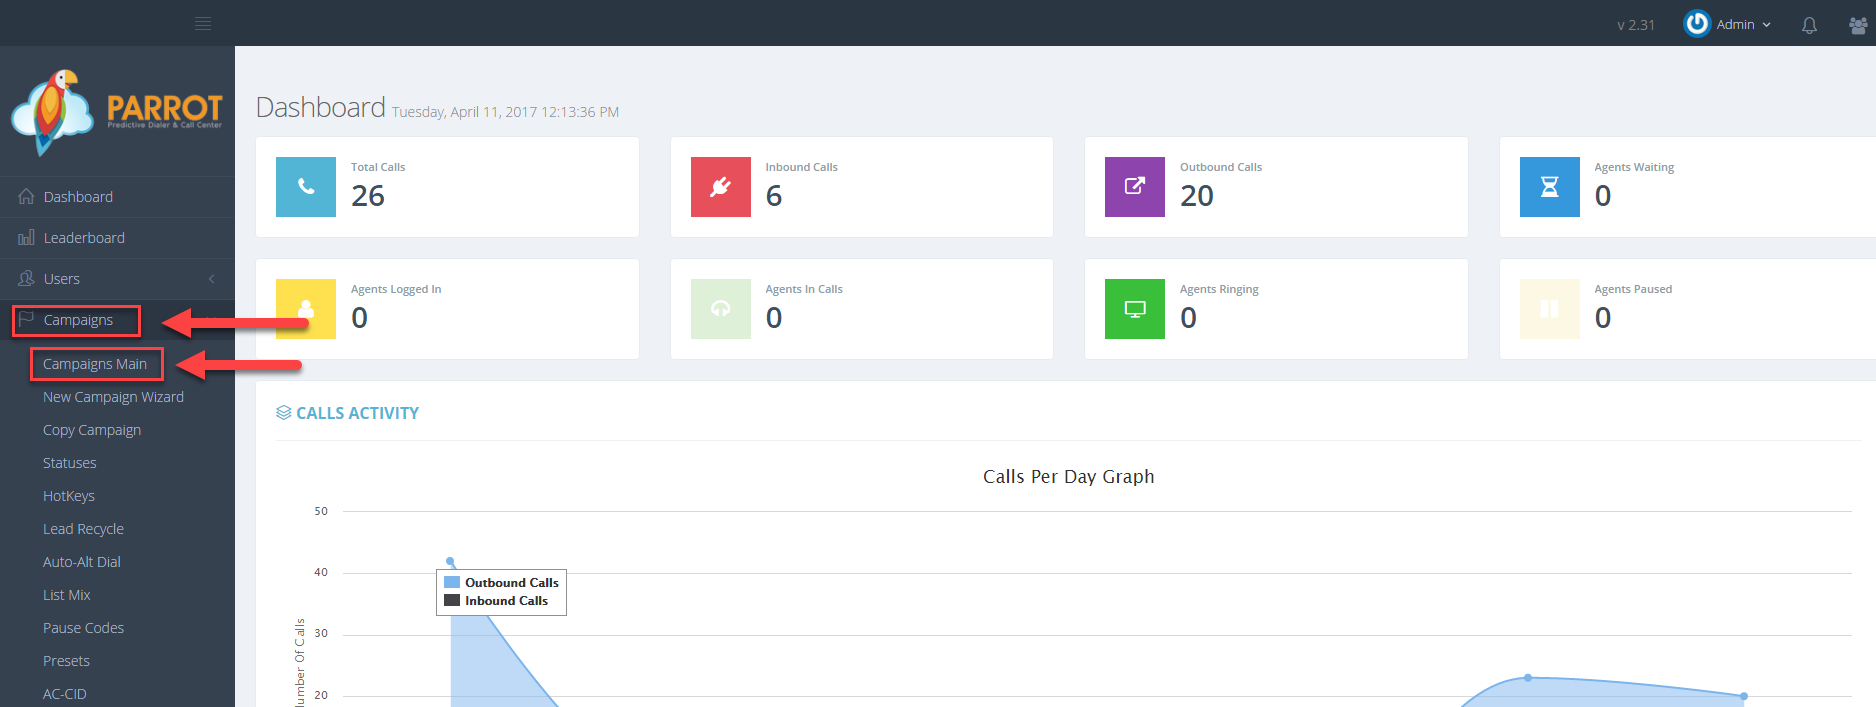
How to Change the Campaign Caller ID
How to Change the Campaign Caller ID
The Campaign Caller ID field controls the number that appears on the lead’s caller ID when making outbound calls. Note: Certain settings will override the number that appears on the lead’s caller id. These settings or features include:- Local presence numbers
- List ID Override enabled
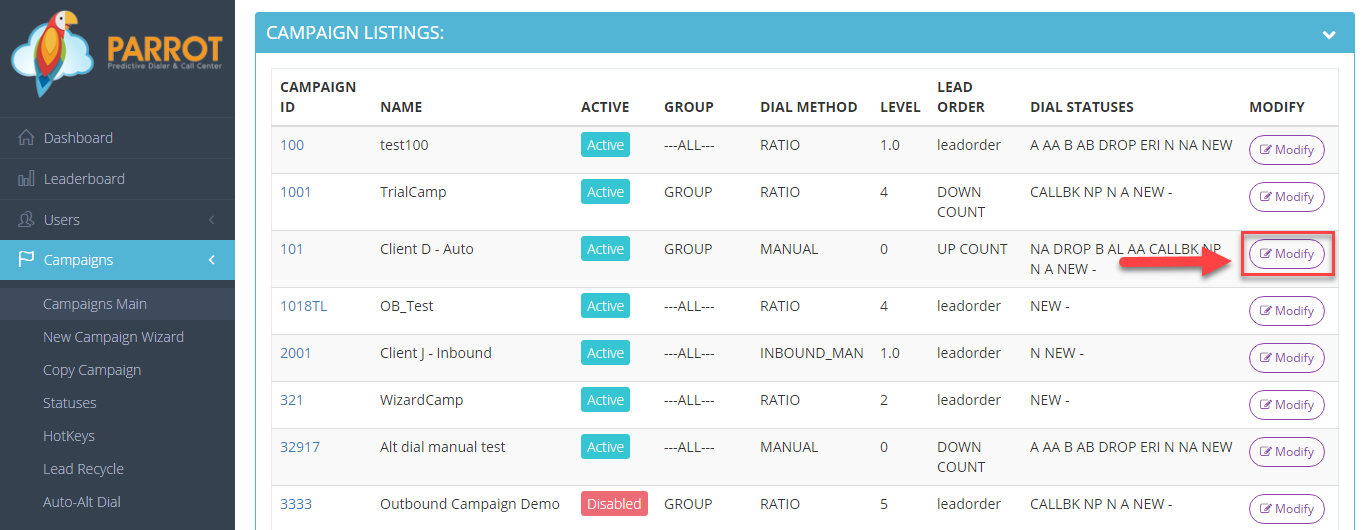
 Step 3. Select the Campaign that you would like to change the caller id and click the Modify button for that campaign.
 Step 4. Go to the General Settings – Detail tab to view the Campaign Caller ID field.
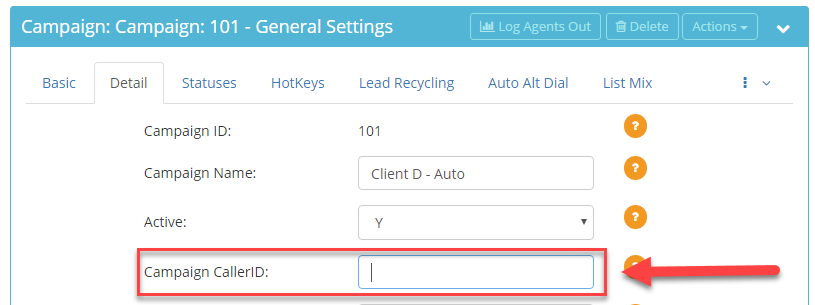
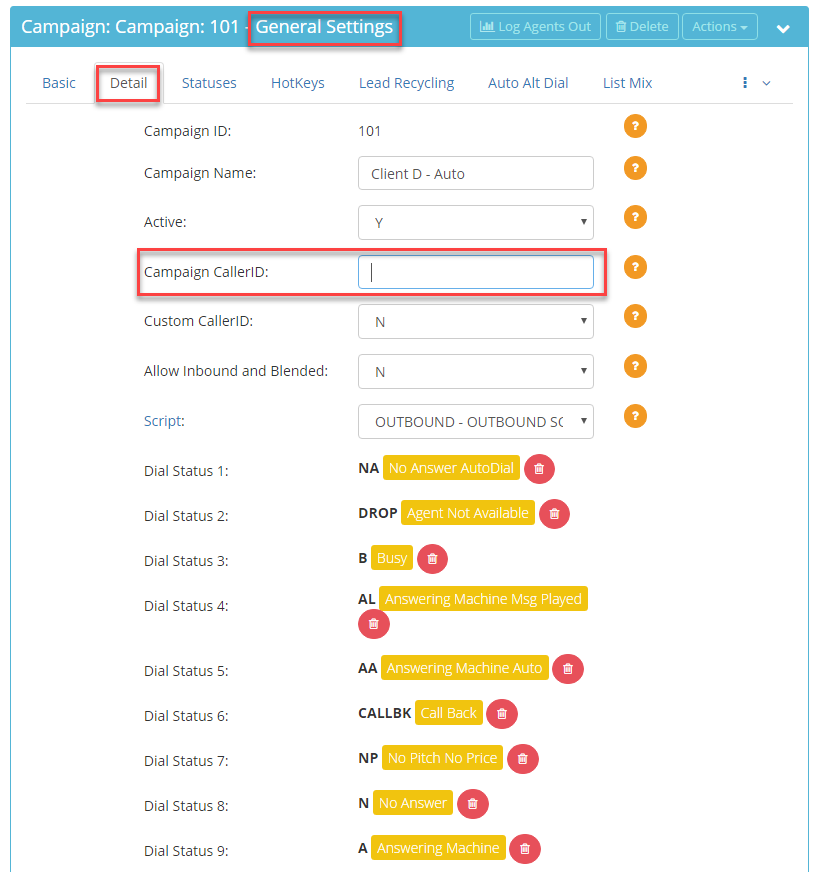 Step 5. Enter a number or modify the number shown in the Campaign Caller ID field.
 Ensure the phone number you enter meets the following criteria:
- Valid phone number
- 10 digit phone number
- No spaces or special characters