Introduction to Campaign Settings
This tutorial will provide you with a walk through on how to configure introductory campaign settings that are either required or will be helpful to setup your campaign. By default, a campaign is already created for you and you will just need to modify the following settings:
- Campaign Name
- Allow Inbound and Blended dialing
- Caller ID
- Dial Statuses
- Dial Method and Dial Level (if using Ratio dial method)
- Scheduled Callbacks
- Answering Machine Detection
Step 1. Login to your manager portal using your Admin credentials provided by EVS7 via email when you activated your server.
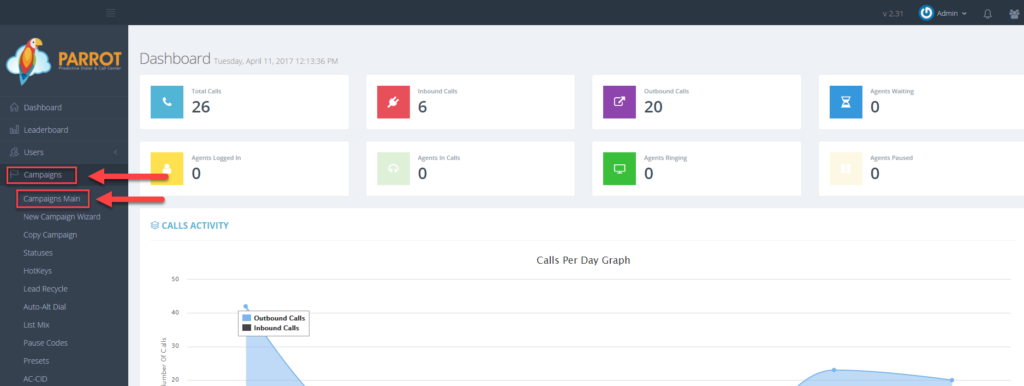
Step 2. Click on
Campaigns and then
Campaigns Main in the left menu.
 Step 3.
 Select the default campaign and click
Modify.
 Step 4.
 Go to the
General Settings – Detail tab to view the
Campaign Name field.
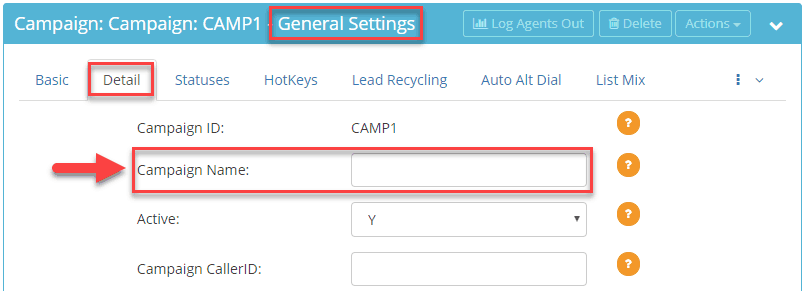
Enter a name between 6-40 alphanumeric characters.
Step 5. Scroll down to the
Allow Inbound and Blended field.
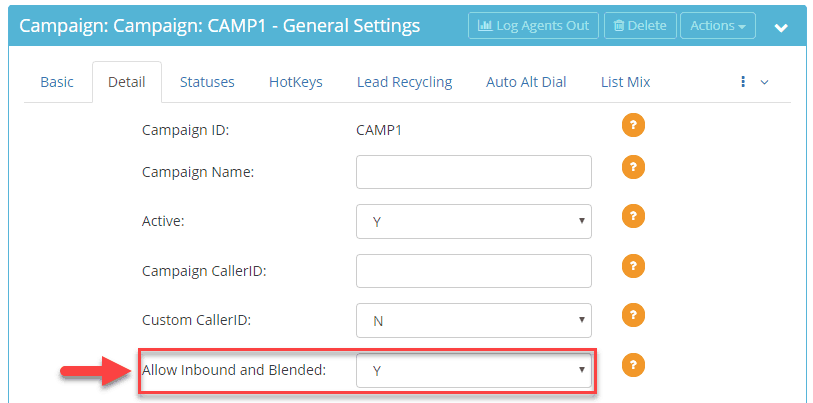
From the drop down select:
Y – Campaign will allow inbound calls and/or agents can perform agent to agent internal transfers.
N– Campaign will only allow outbound calls and agents cannot perform agent to agent internal transfers.
Step 6. Go to the
Campaign Caller ID field. The phone number entered will display on the lead’s caller id when outbound calls are made.
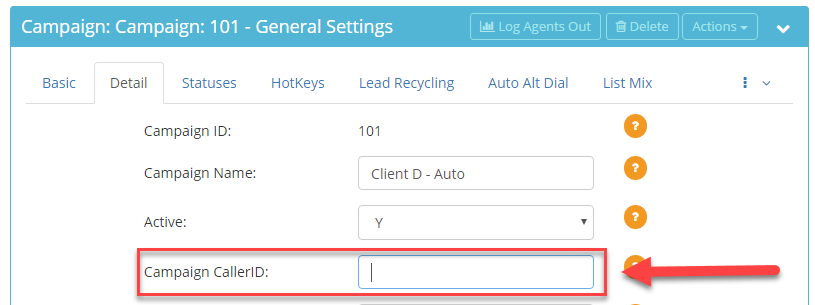 Option 1:
 Enter your own ten digit number that you would like to appear on the lead’s caller id when making an outbound call. Make sure the number you enter is a valid 10 digit number with no spaces or special characters.
Note: If you enter an external number such as your business or cellphone number in the caller id field, incoming calls will be received on your external phones, not the Parrot system.
Option 2: Enter the DID (phone number) that you received from EVS7 to appear on the lead’s caller id. Need a DID? Contact
support and include amount of DIDs and whether you would like a toll free (844 numbers only) or particular area code. 800 numbers can be obtained for a $25 fee.
Note: If a ring group (ingroup) was created for the DID, the ring group is allowed on the campaign, and if a lead decides to call back the phone number seen on their caller id, the call will be received into the Parrot system.
 Step 7.
 Scroll down to the
Dial Status fields.
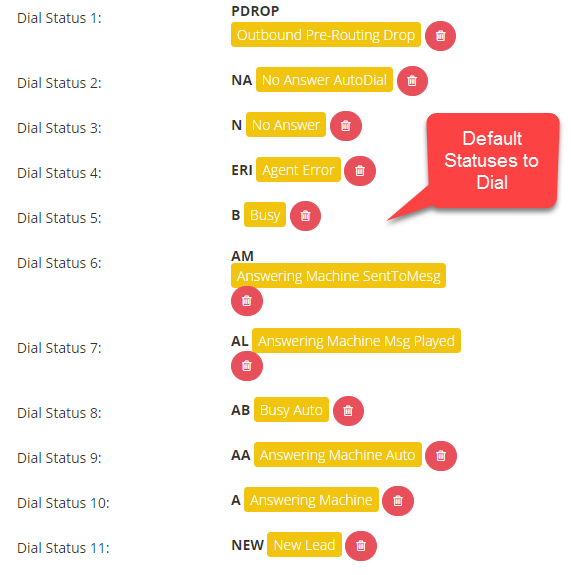
These are the default dial statuses that will be dialed automatically by the system when leads are uploaded or when a list is reset: PDROP, NA, N, ERI, B, AM, AL, AB, AA, A, and NEW.
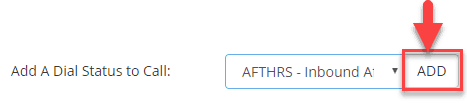
Go to the
Add a Dial Status to Call field and choose one of the statuses from the drop down and click
ADD if you want to add a status to the list of statuses to call.
 Note:
Note: This section is NOT where you create custom statuses. This section is only where you assign default and custom dispositions after they have been created. To learn how to create system or campaign specific statuses please visit the
Statuses section of our knowledge base.
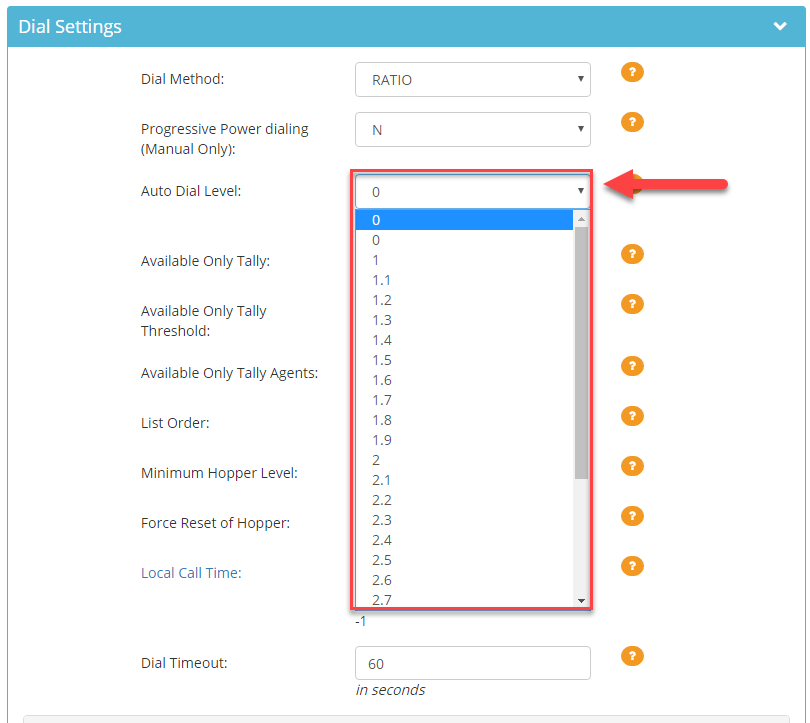
Step 8. Go to the
Dial Settings section to view the
Dial Method field.
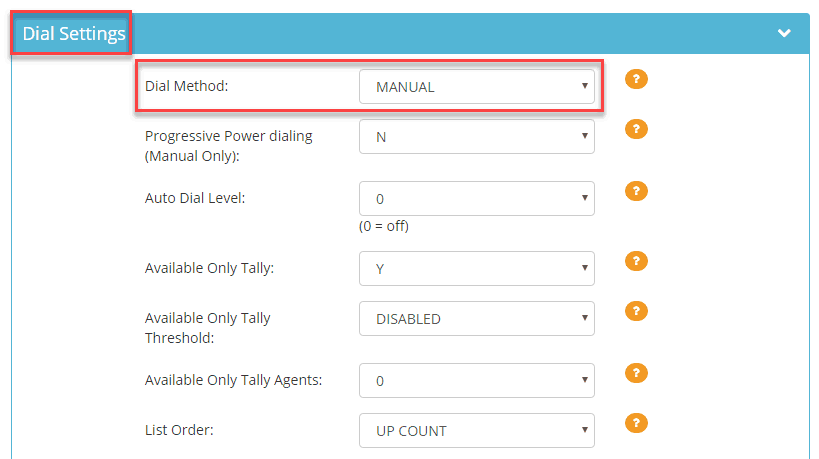
Select the desired dial method from the drop down.
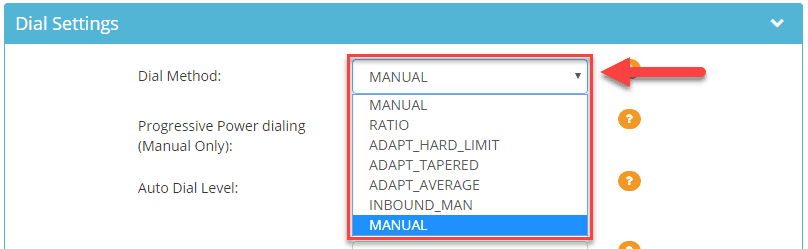 Ratio
Ratio – Manager controls how many lines the system dials at a time per agent. Often used for cold leads or contacting as many leads as possible. In this mode, the agent hears a “bloop” sound indicating that someone on the other line has already picked up and said “hello.”
Go to the
Auto Dial Level field and select the dial level from the drop down.
Example: If you have your dial level set to 4 and 3 agents are logged in, the dialer will dial a total 12 lines. We recommended starting at level three and adjust the level depending on your wait time or drop rate.
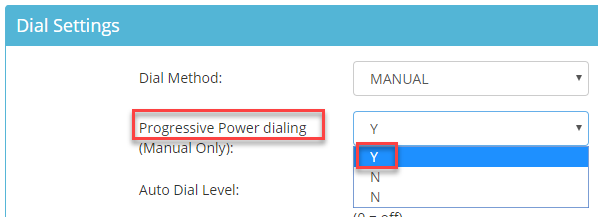
 Manual
 – Also called “click to call,” agents initiate the phone call by clicking the “dial next number” button so agent will have complete control when the lead is called. This method works best for warm or hot leads to ensure there are no dropped calls or delays. In this mode, the agent actually hears the phone ring and hears the lead answer the phone and say “hello” like a typical telephone call.
Inbound Man – The same as manual mode with the ability to receive inbound calls*.
Progressive Power Dialing – System dials one line at a time automatically. There is no need for the agent to click “dial next number.” To enable Progressive Power Dialing, ensure you have selected the
Manual or
Inbound_Man dial method. Select
Y in the
Progressive Power dialing drop down.
 Step 9.
 The system can be configured to call a lead only during certain hours specified. See
How to Setup Dialing According to the Lead’s Time Zone
Step 10. The system can also be configured to dial alternate numbers of your lead if there was no contact for the main number. See
How to Setup Alternate Number Dialing
Step 11. Go to the
Agent Settings section to view the
Scheduled Callbacks field.

Select
0 to
disable agent callbacks or
1 to
enable agent callbacks from the drop down.
Note: If you disable callbacks, the callback disposition button will still appear but the calendar to schedule the callback will not. If you would like to remove the callback disposition button from the agent screen you also need to modify this disposition to make it non-selectable for the agent.
Step 12. Scroll down and go to the
AMD, Voicemail, and IVR section to view the
Answering Machine Detection field if you are using the Ratio dialing method.
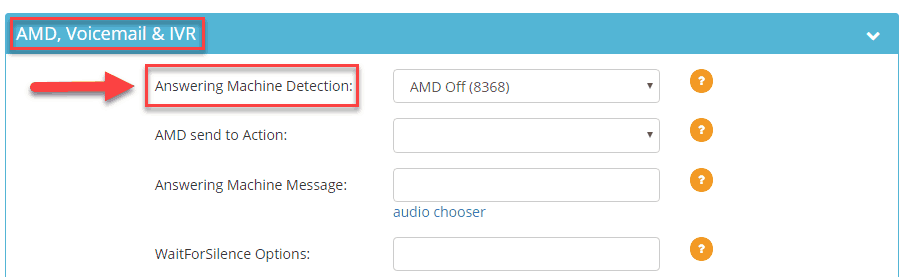
Answering Machine Detection (AMD) screens out calls that get sent to voicemail inboxes or answering machines.
- AMD works only in ratio and predictive dialing modes
- AMD is NOT 100% accurate and your agents may still receive a few voicemails from time to time
- Your leads may experience a 3-4 delay due to the time it takes the system to determine whether the call is answered by a live person or an answering machine
Note: While AMD should eliminate the number of answering machines encountered and increase the number of live human answered calls, the technology is not perfect. We recommend keeping AMD off, however, if you decide to turn AMD on, be aware of some of the issues you may encounter. See
What is Answering Machine Detection
Select
AMD Off (8368) to
disable Answering Machine Detection or
AMD ON (8369) to
enable Answering Machine Detection.
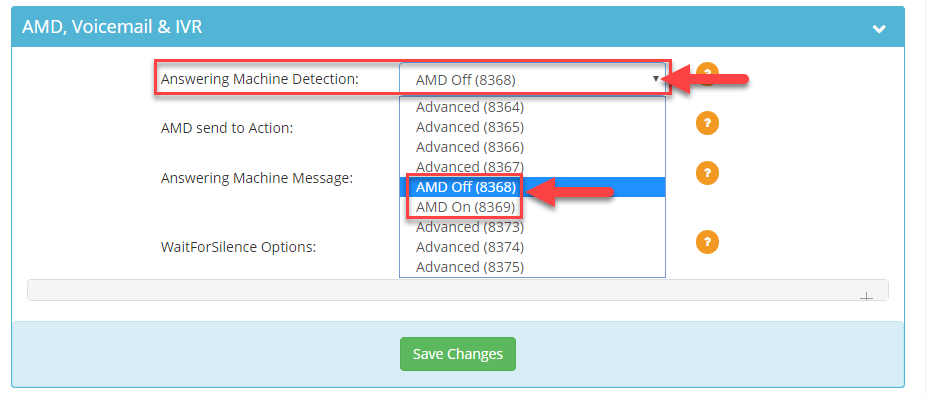 AMD Off (8368):
 This setting will route calls with answering machines or voicemails to agents. The agent then has the option to disposition the call as “A-Answering Machine” or any desired disposition.
AMD On (8369): This setting will route only live calls to agents. When the system detects an answering machine, the call will automatically be dispositioned as “AA-Answering Machine Auto,” “AL-Answering Machine Played Msg Played,” or “AM-Answering Machine Sent to Msg Played,” depending on whether you have voicemail drops configured or not.
Note: AMD is not 100% accurate and your agents may still receive a few voicemails from time to time.
Step 13. Scroll to the bottom and click
Save Changes.

For more information on setting up common features such transfer options, voicemail drop, system statuses and more, visit the Manager Knowledge Base.
 Step 3. Select the default campaign and click Modify.
 Step 4. Go to the General Settings – Detail tab to view the Campaign Name field.