How to Setup the Agent Link for Agent to Agent Transfers
How to Setup the Agent Link for Agent to Agent Transfers
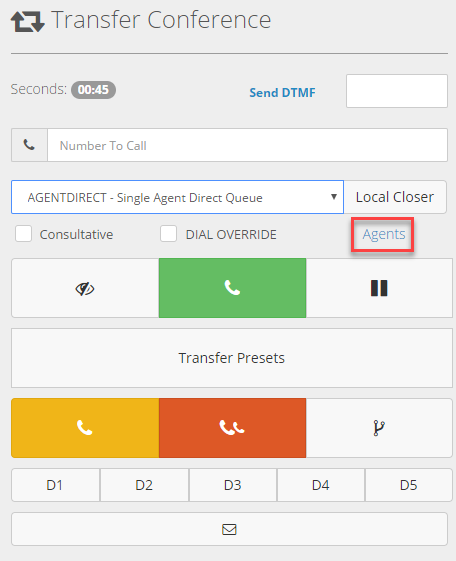
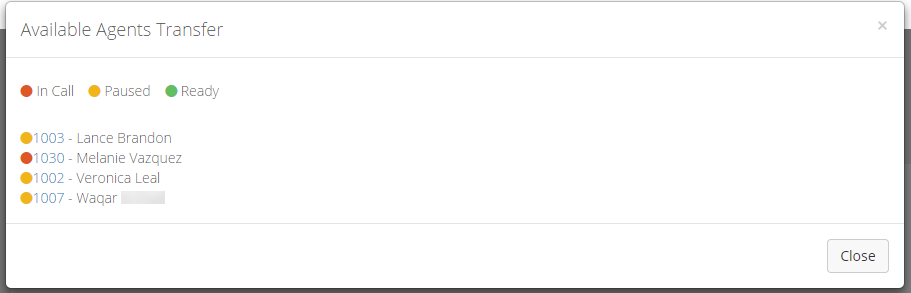
A blue agent link can be added to the Agent Conference Interface to show if an agent is available or not for a transferred call. This link works in combination with the AGENTDIRECT ingroup, an ingroup that is setup by default. The purpose of the AGENTDIRECT Ingroup, also called Single Agent Direct Queue Ingroup, is to allow an agent to transfer a lead to another agent within the system along with the lead’s information either from the customer information or form tab.
Other settings such as which users are assigned to this ingroup, whether the campaign has been configured to allow this ingroup, and ingroup settings within the ingroup will need to be configured.The following tutorial demonstrates how to enable the ingroup within a campaign and how to add users to this ingroup.
Step 1. Login to your manager portal using your Admin credentials.
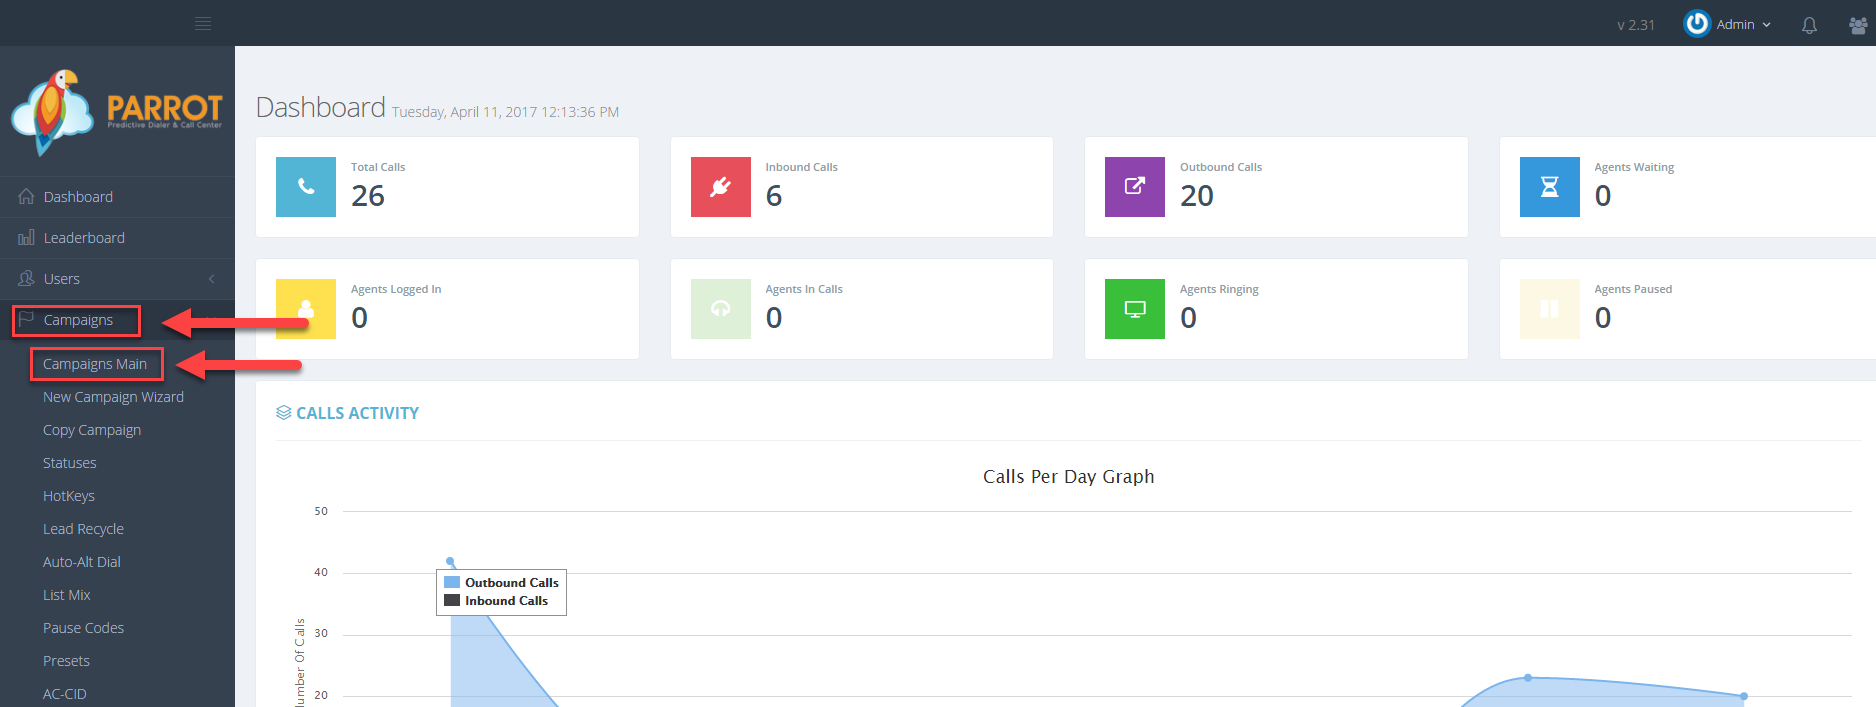
Step 2. Click on Campaigns and then Campaigns Main in the left menu.
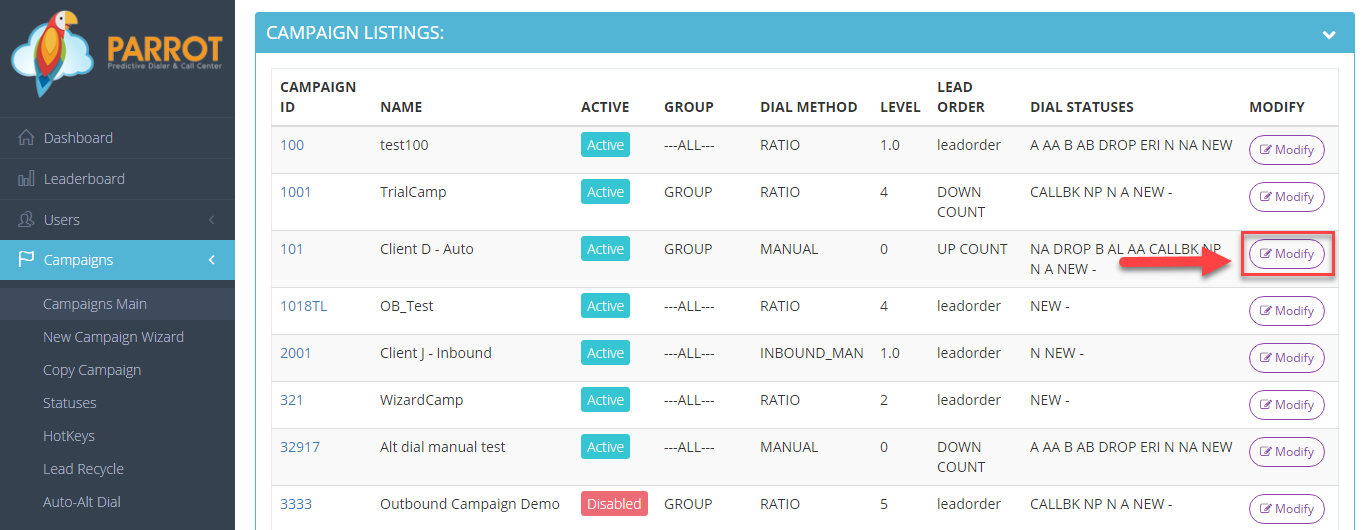
Step 3. Select the Campaign that you would like to setup the Agent Link and click the Modify button for that campaign.
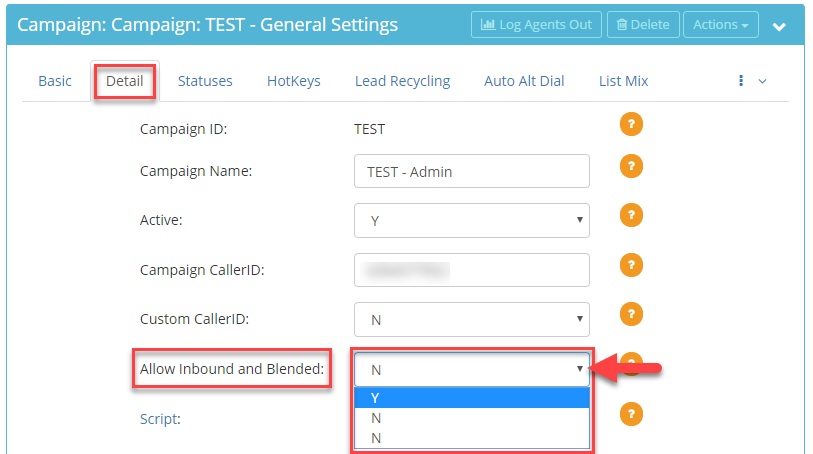
Step 4. Go to the General Settings – Detail tab to view the Allow Inbound and Blended field. Select Y from the drop down menu.
Step 5. Scroll to the bottom of the Detail tab and click Save Changes. The field Allowed Inbound Groups will now appear in the Detail tab along with any ingroups that were created. Step 6. Select the AGENTDIRECT checkbox to allow agents to be able to receive calls from agents within the system.
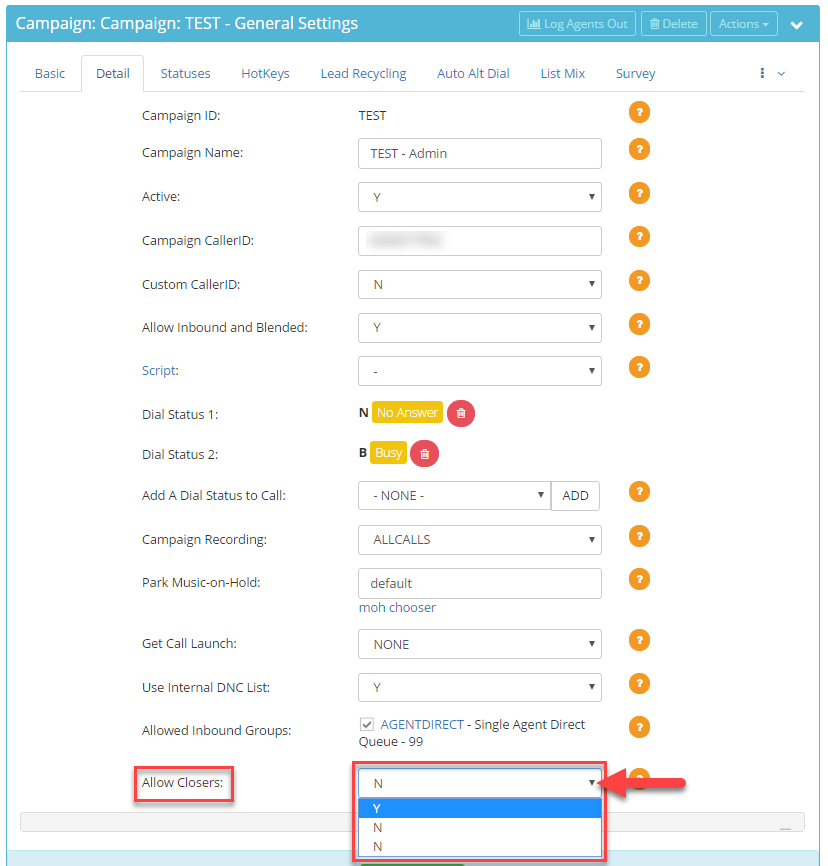
Step 7. Select Y from the drop down of the Allow Closers field to allow agents to send calls to closers. Click Save Changes.
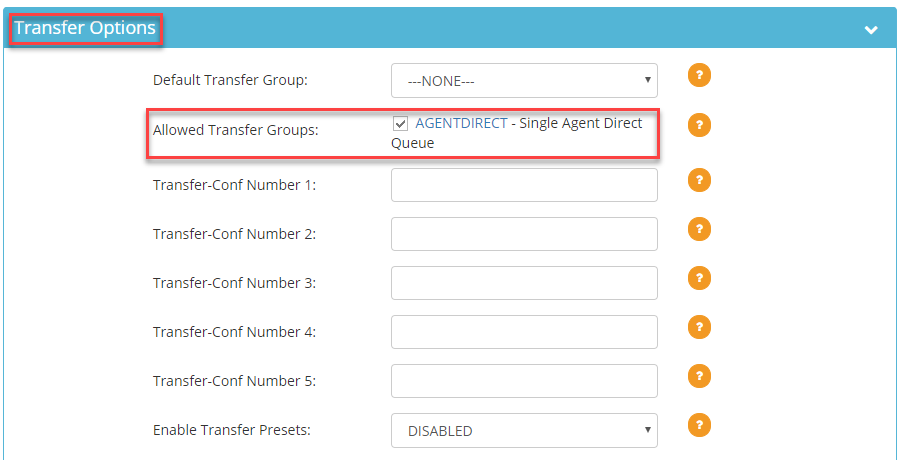
Step 8. Go to the Transfer Options section to view the Allowed Transfer Groups field. Select the AGENTDIRECT checkbox to allow agents to transfer calls to this ingroup. Note: Closers must be enabled and changes saved for this option to appear. See Step 7.
Step 9. Click Save Changes.
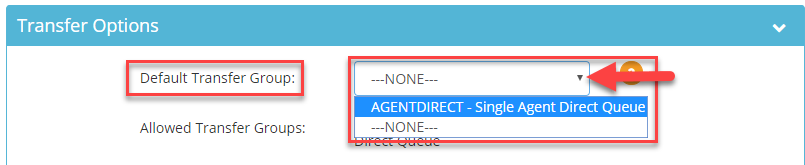
Step 10. Optional: If you have several inbound groups and would like the AGENTDIRECT ingroup to be selected by default from the closer group drop down menu in the Agent Transfer Conference Screen, select AGENTDIRECT from the drop down of the Default Transfer Group field. This will also ensure the the Agent Link appears by default as well. Click Save Changes.
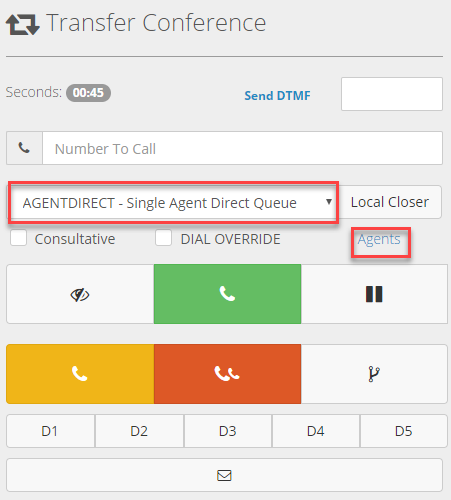
The agent conference screen will appear automatically as below.
Step 10. Click on Inbound, In-Groups, and then Show In-Groups in the left menu.
Step 11. Click the Modify button for the AGENTDIRECT ingroup.
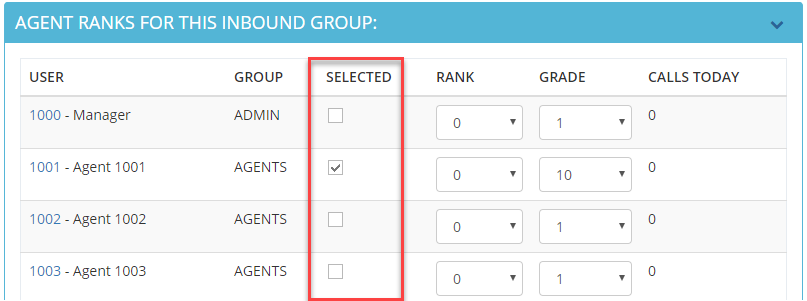
Step 12. Scroll down to the AGENT RANKS FOR THIS INBOUND GROUP section and click on the arrow to expand . Select the checkbox by the user(s) that you want included in this ingroup to receive transferred calls from agents within the system.
Step 13. Click Save Changes.
 Other settings such as which users are assigned to this ingroup, whether the campaign has been configured to allow this ingroup, and ingroup settings within the ingroup will need to be configured.The following tutorial demonstrates how to enable the ingroup within a campaign and how to add users to this ingroup.
Step 1. Login to your manager portal using your Admin credentials.
Step 2. Click on Campaigns and then Campaigns Main in the left menu.
Other settings such as which users are assigned to this ingroup, whether the campaign has been configured to allow this ingroup, and ingroup settings within the ingroup will need to be configured.The following tutorial demonstrates how to enable the ingroup within a campaign and how to add users to this ingroup.
Step 1. Login to your manager portal using your Admin credentials.
Step 2. Click on Campaigns and then Campaigns Main in the left menu.
 Step 3. Select the Campaign that you would like to setup the Agent Link and click the Modify button for that campaign.
 Step 4. Go to the General Settings – Detail tab to view the Allow Inbound and Blended field. Select Y from the drop down menu.
 Step 5. Scroll to the bottom of the Detail tab and click Save Changes. The field Allowed Inbound Groups will now appear in the Detail tab along with any ingroups that were created.
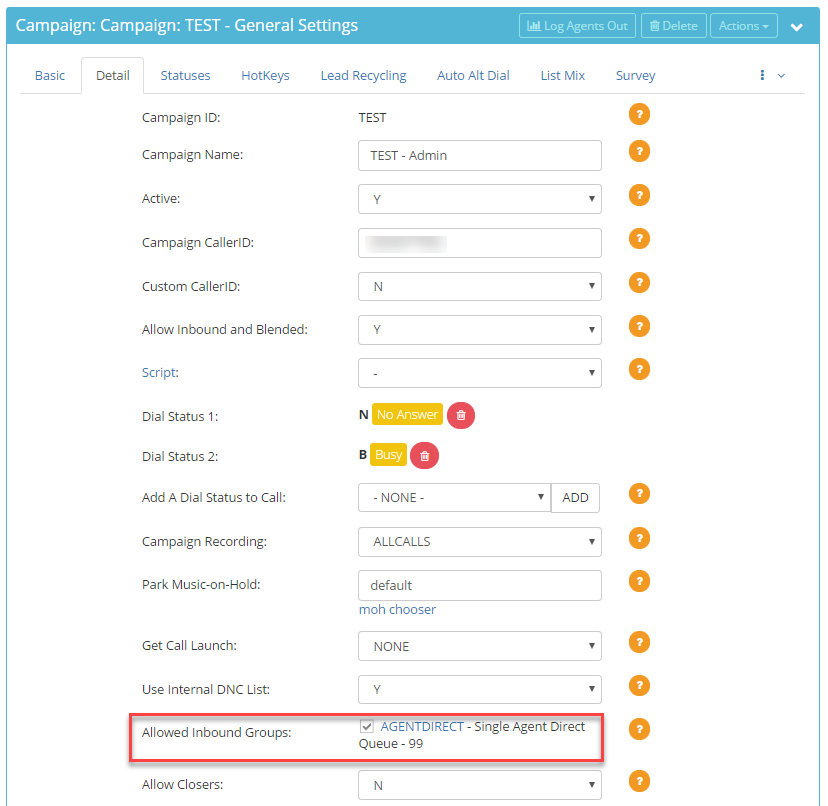 Step 6. Select the AGENTDIRECT checkbox to allow agents to be able to receive calls from agents within the system.
 Step 7. Select Y from the drop down of the Allow Closers field to allow agents to send calls to closers. Click Save Changes.
 Step 9. Click Save Changes.
 The agent conference screen will appear automatically as below.
 Step 10. Click on Inbound, In-Groups, and then Show In-Groups in the left menu.
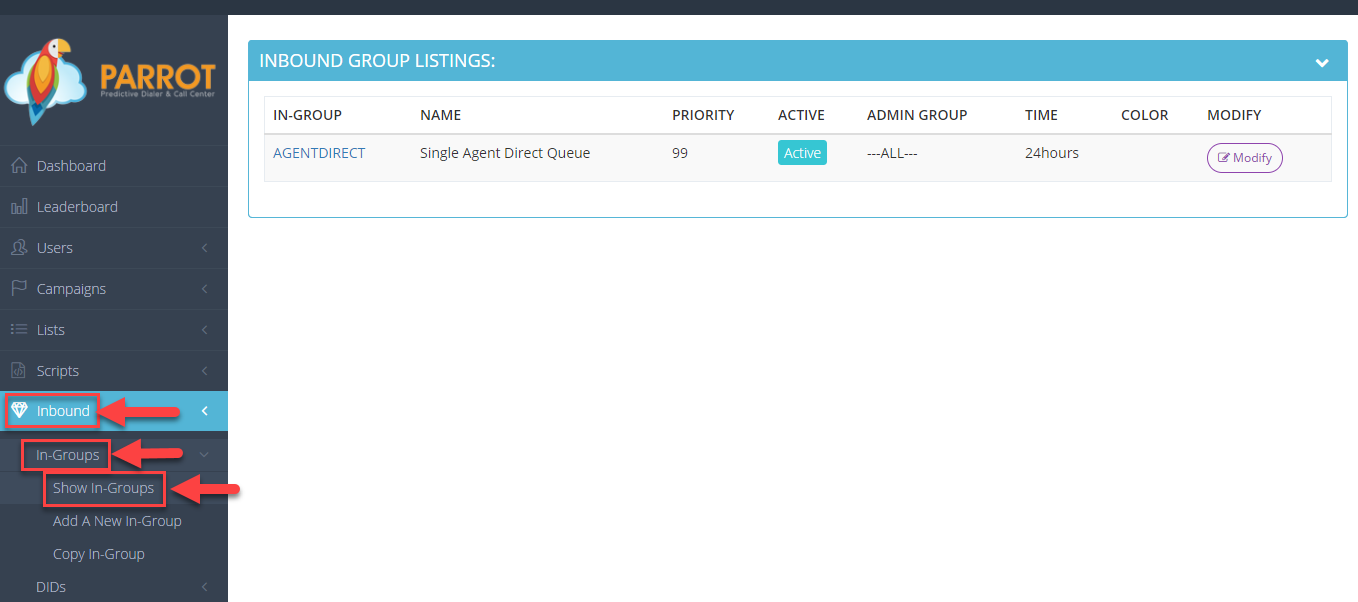 Step 11. Click the Modify button for the AGENTDIRECT ingroup.
 Step 12. Scroll down to the AGENT RANKS FOR THIS INBOUND GROUP section and click on the arrow to expand . Select the checkbox by the user(s) that you want included in this ingroup to receive transferred calls from agents within the system.

 Step 13. Click Save Changes.