How Can We Help?
How to Create a New Campaign
How to Create a New Campaign
How to create and set up a new calling campaign.
Step 1. Login to your manager portal using your Admin credentials.
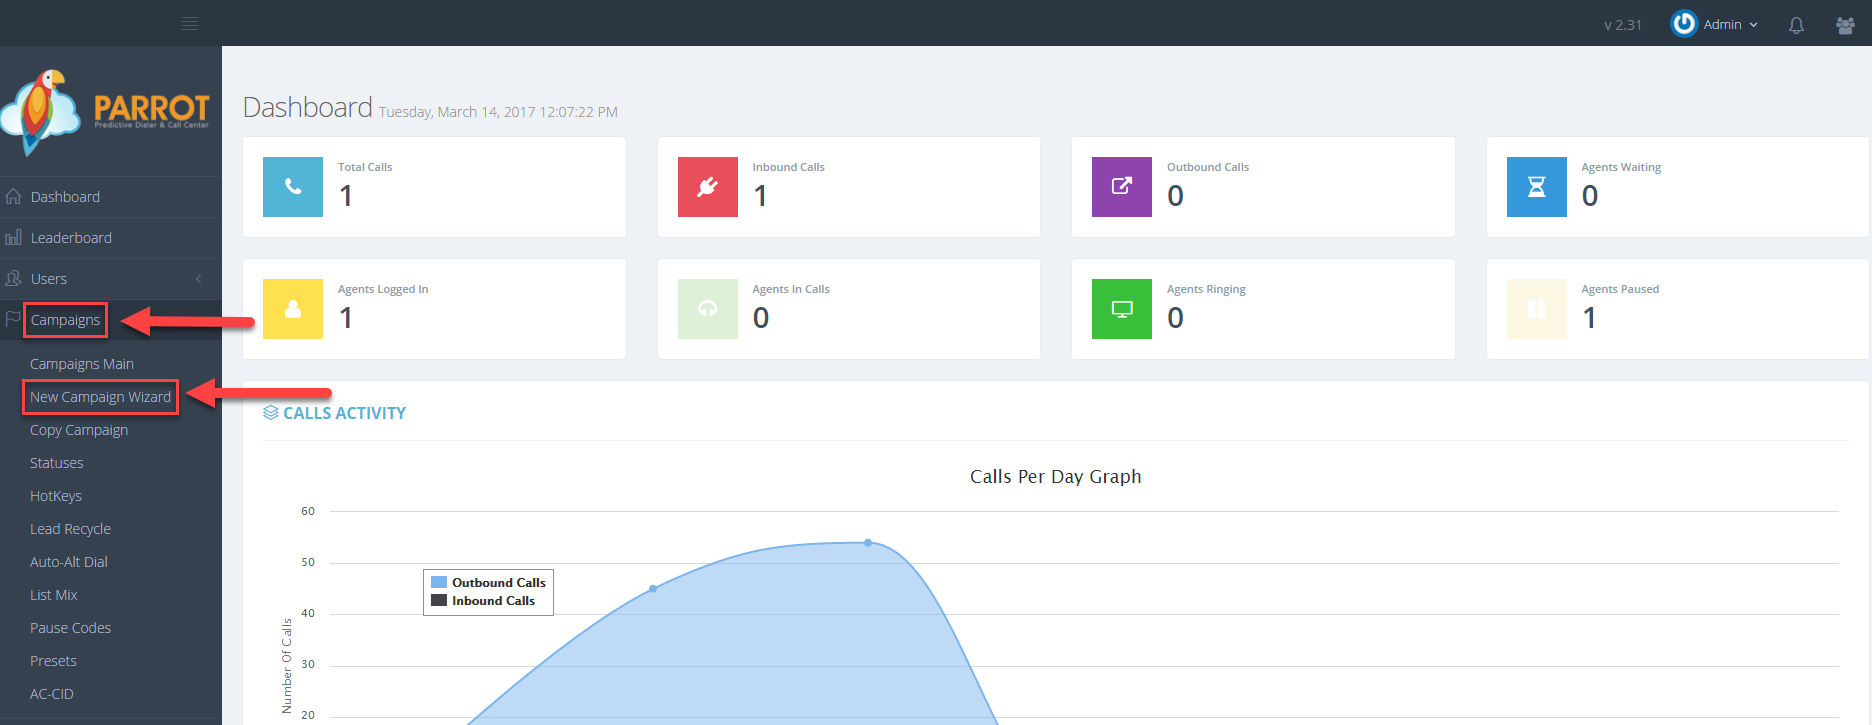
Step 2. Click on Campaigns and then New Campaign Wizard in the left menu.
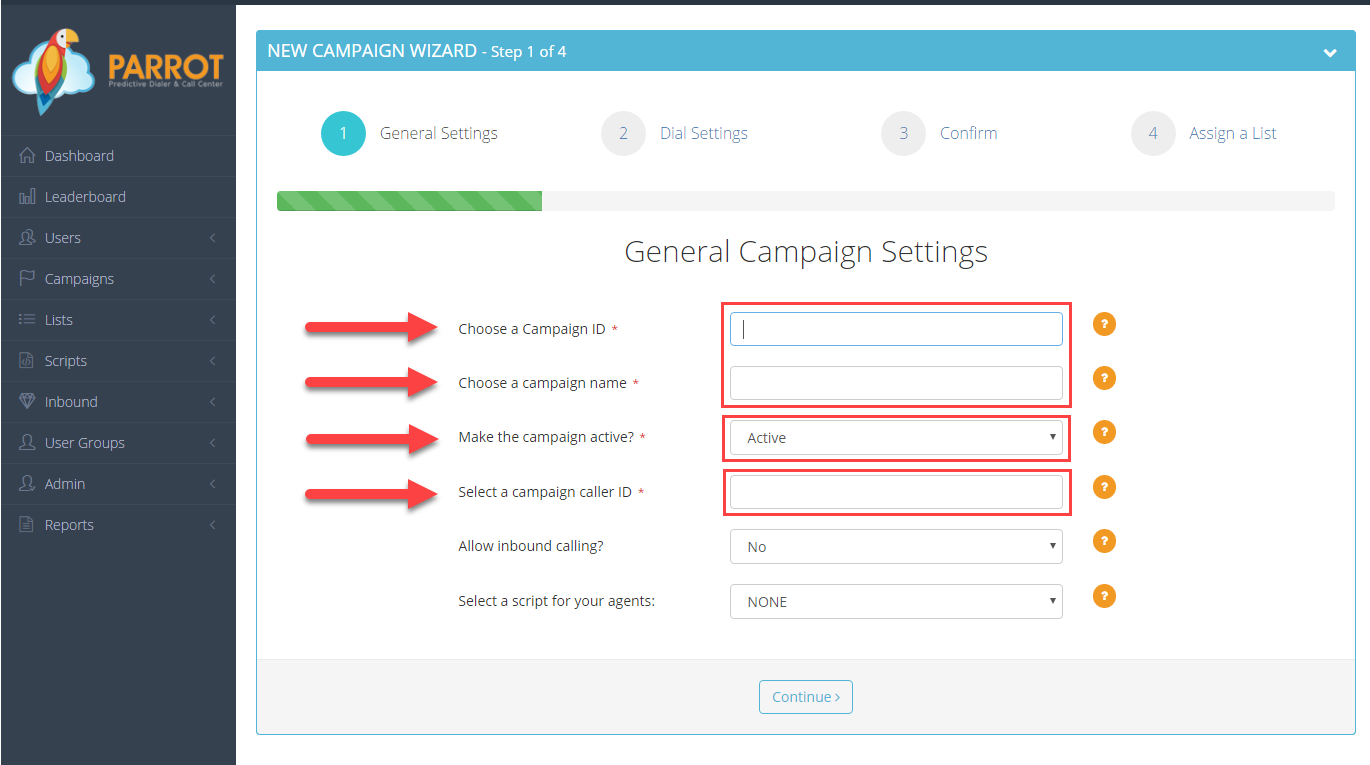
Step 3. Enter a short name for the Campaign ID and a Campaign Name. Campaign ID cannot be edited after initial submission. Enter a phone number in the Caller ID field.
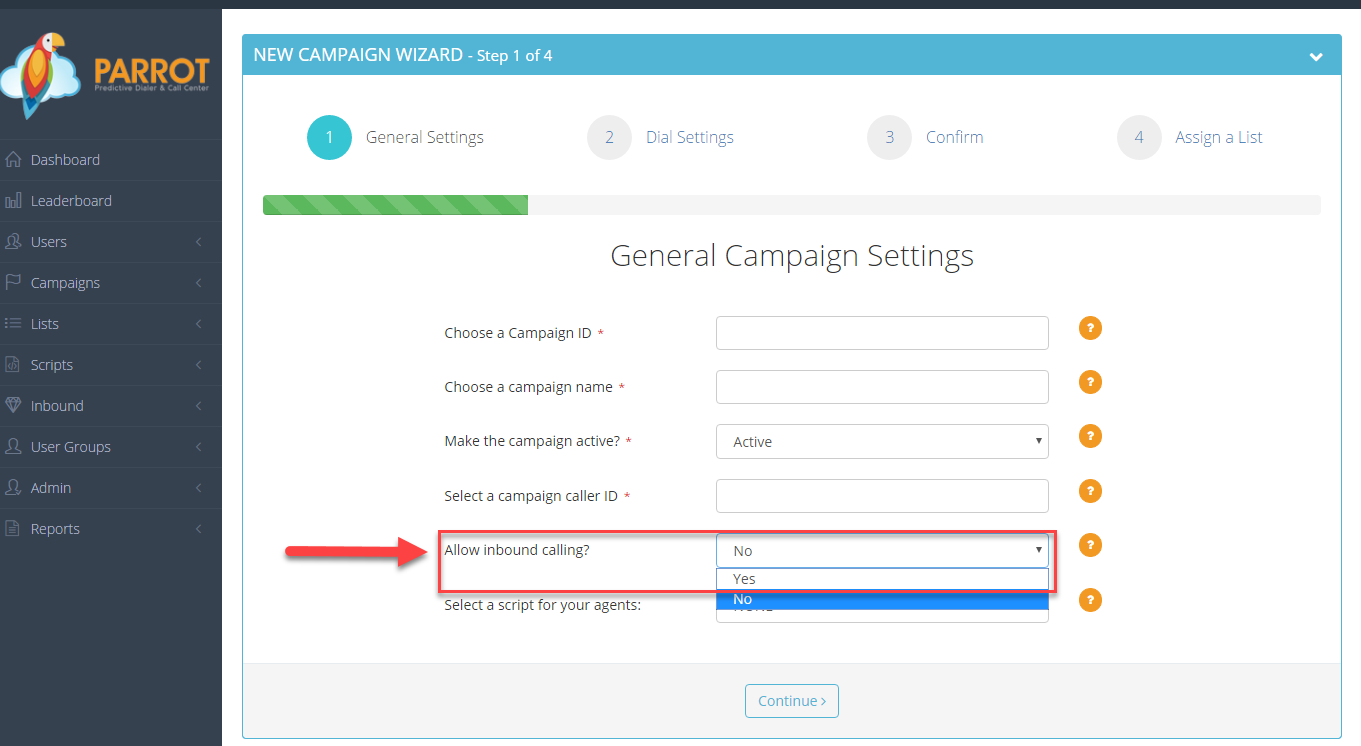
Step 4. Select Yes or No from the dropdown menu to indicate whether to Allow Inbound Calling. If you selected Y to allow inbound calling, inbound groups will appear. Select the checkbox next to AGENTDIRECT to allow internal transfers. If you already created in groups, these will be available to select as well.
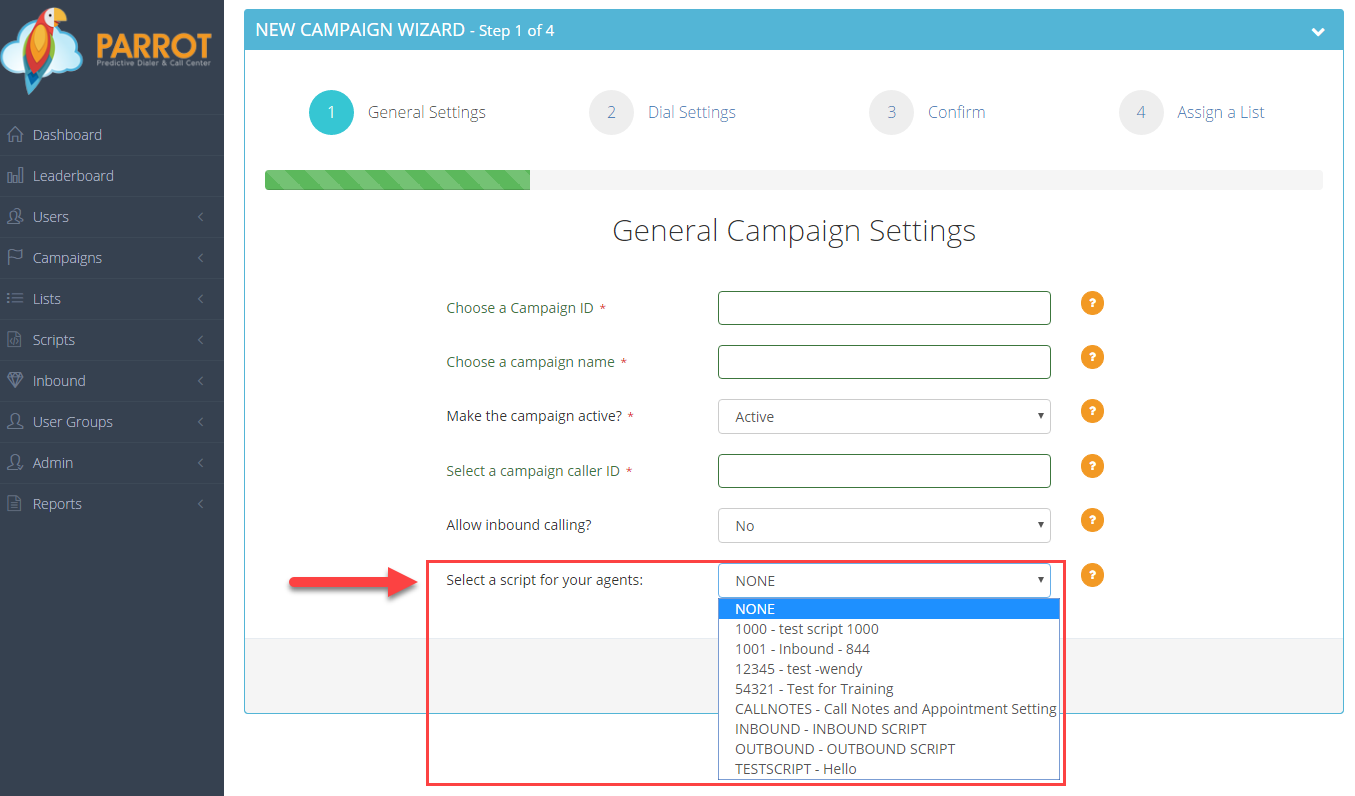
Step 5. Select a script from the dropdown menu if you have created a script for your agents. If no script has been created, select NONE.
Step 6. Click Continue.
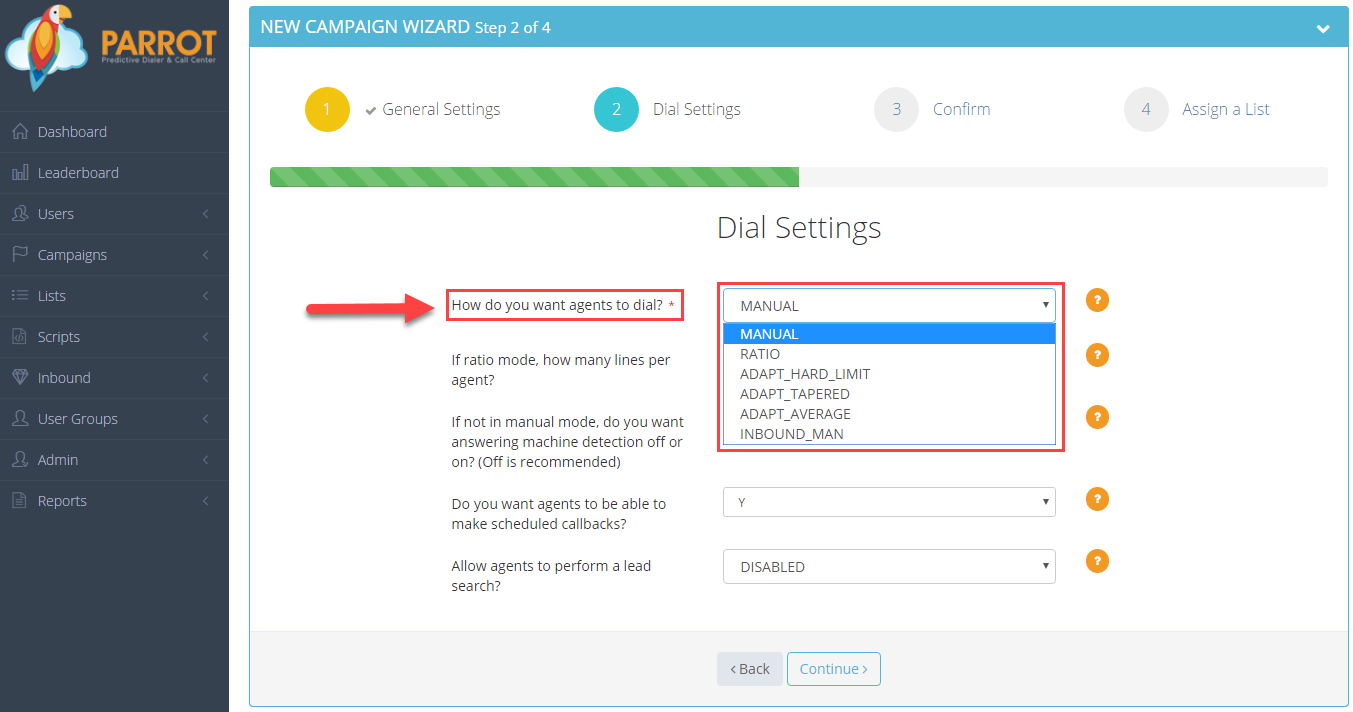
Step 7. Select the dial method that you would like your agents to dial from the dropdown menu.
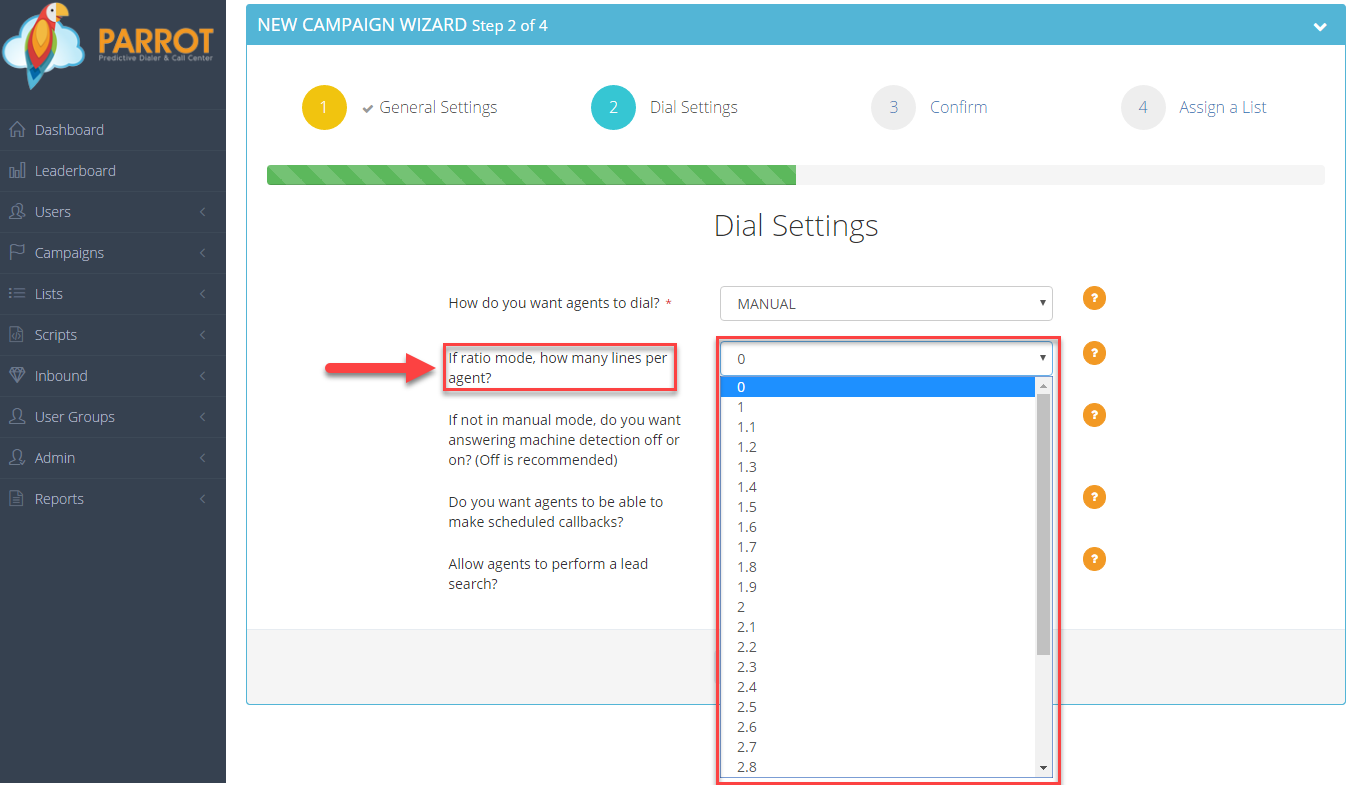
Step 8. Select how many lines to dial per agent if the Ratio dial mode was selected.
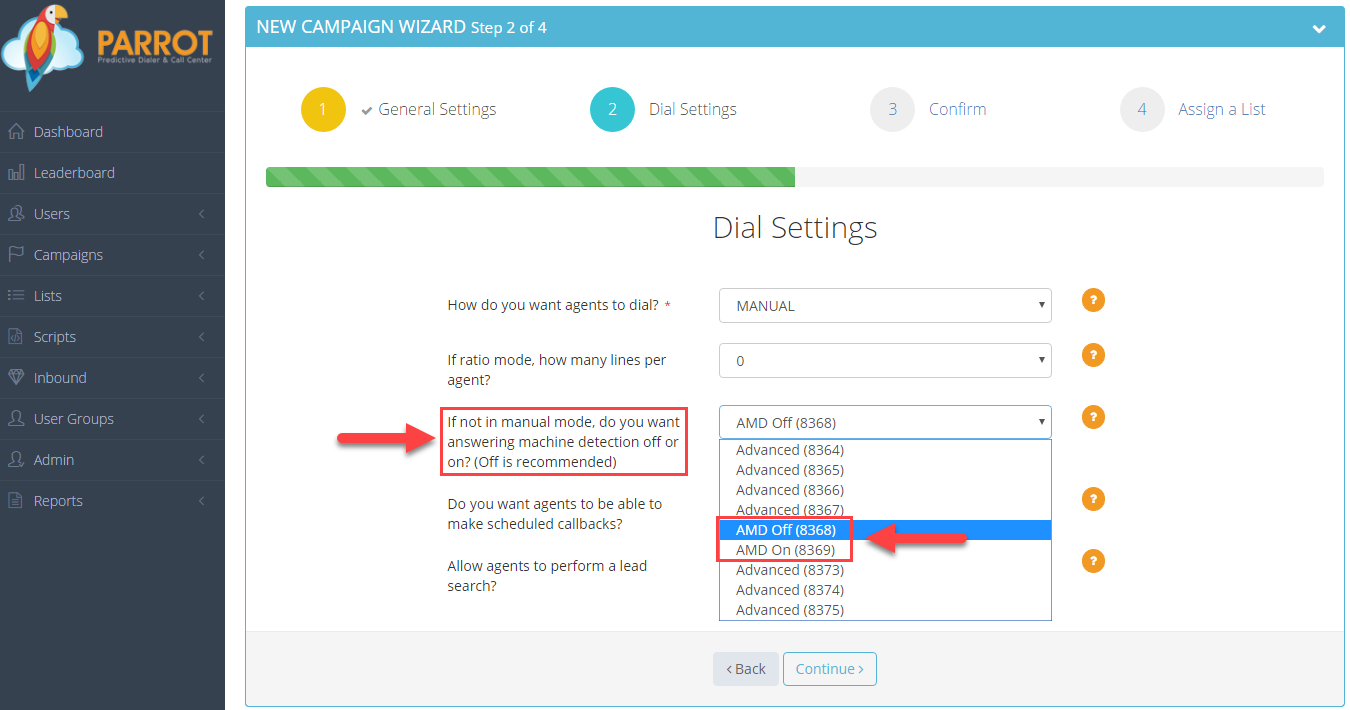
Step 9. Select AMD OFF to leave answering machine detection off or AMD ON to turn answering machine detection ON.
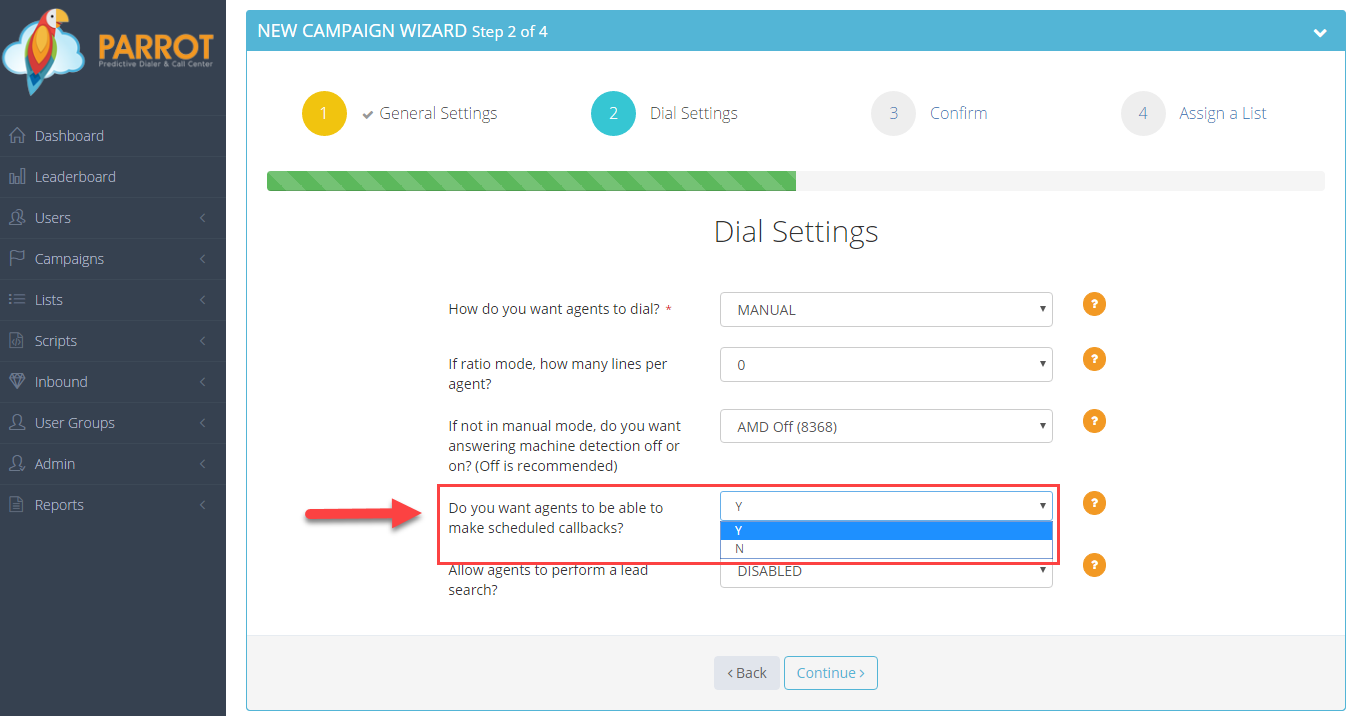
Step 10. Select Y or N from the drop down menu depending on if you want your agents to be able to make scheduled callbacks.
Step 11. Select the desired option from the drop down menu regarding whether you would like to allow your agents to perform a lead search.
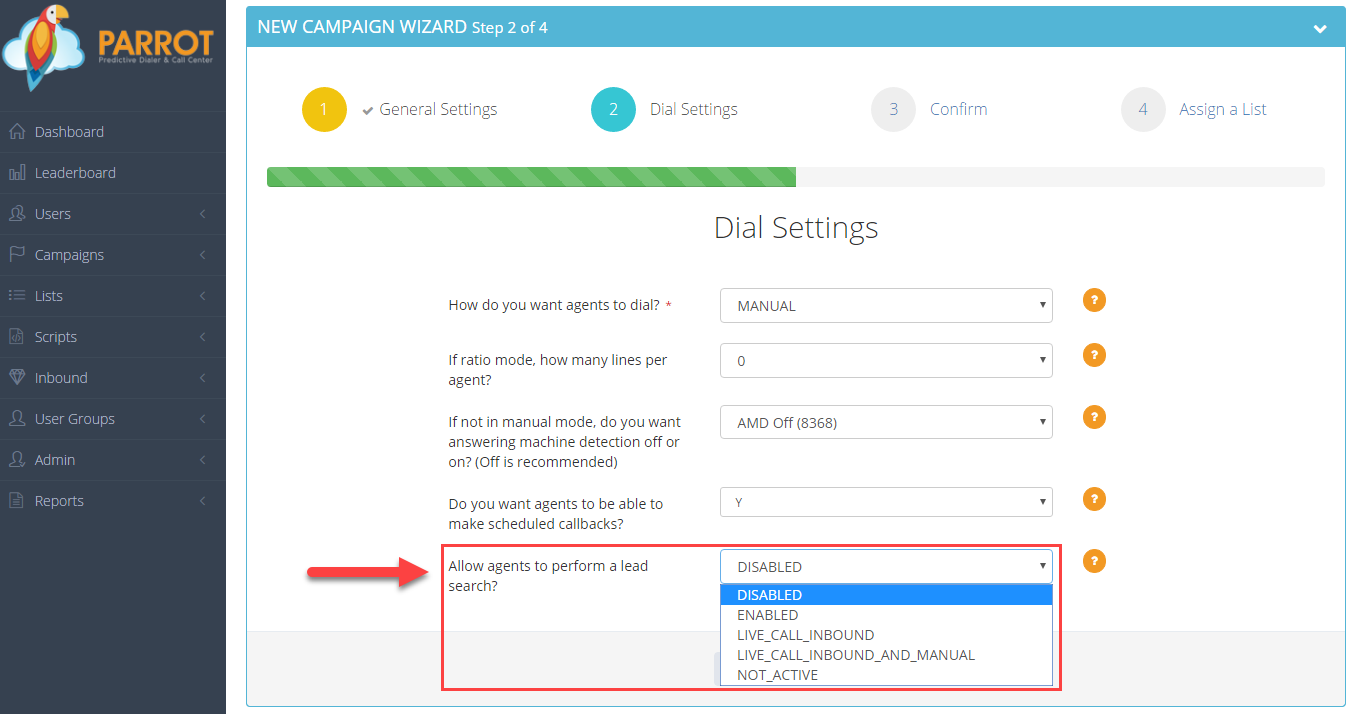
Step 12. Click Continue.
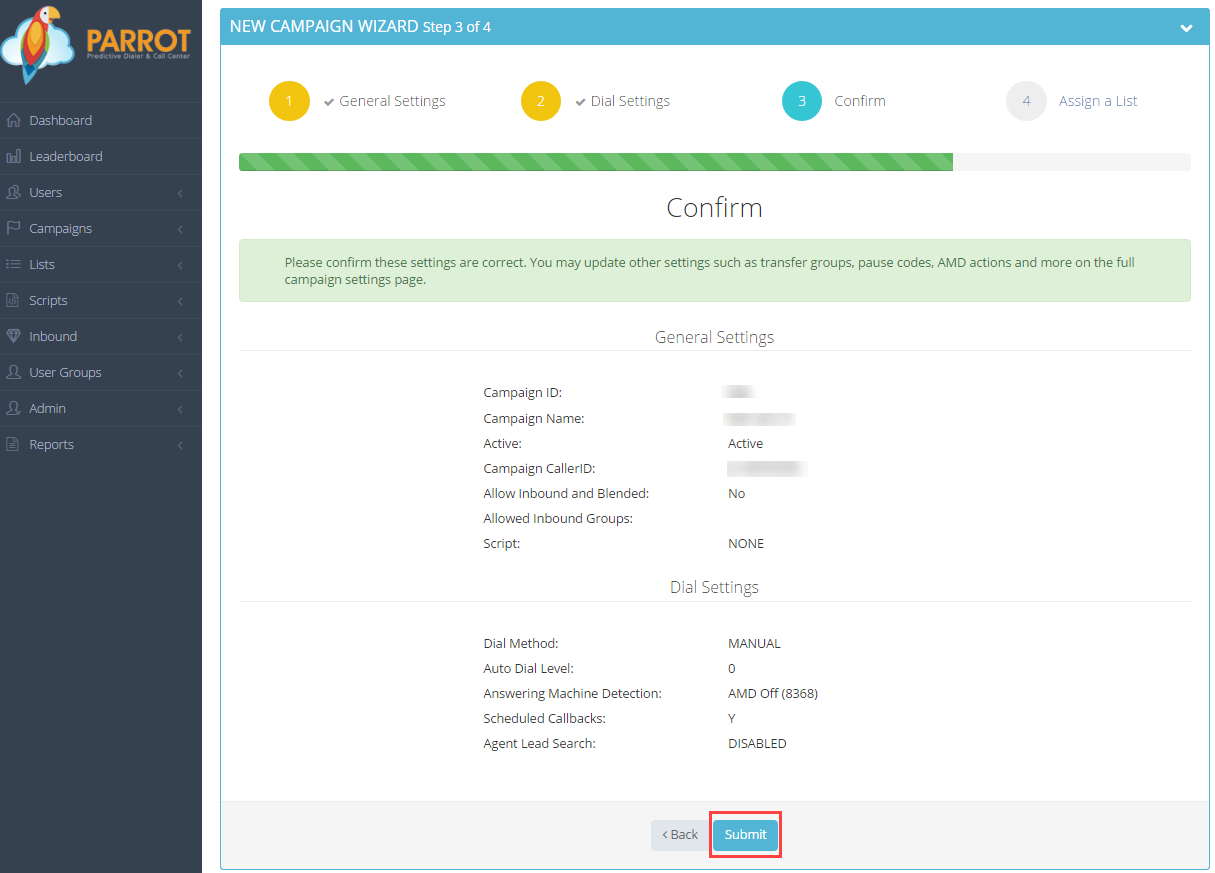
Step 13. Review your settings and click the Submit button.
Step 14. A confirmation message will appear if creating the campaign was successful. You can continue to Assign List, Create a New List, or Skip this Step to go to the Campaign settings to further configure.
