How to Enable or Disable Callbacks
The callback feature allows an agent to schedule a date and time to schedule a callback for a lead. There are many options available for agents to handle callbacks. The following will demonstrate how to enable or disable callbacks. By default callbacks are enabled for each campaign and for each user.
Step 1. Login to your manager portal using your Admin credentials.
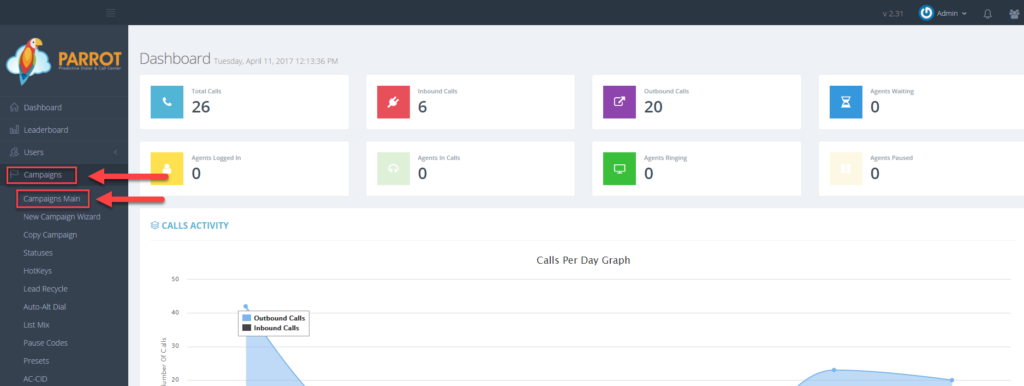
Step 2. Click on
Campaigns and then
Campaigns Main in the left menu.
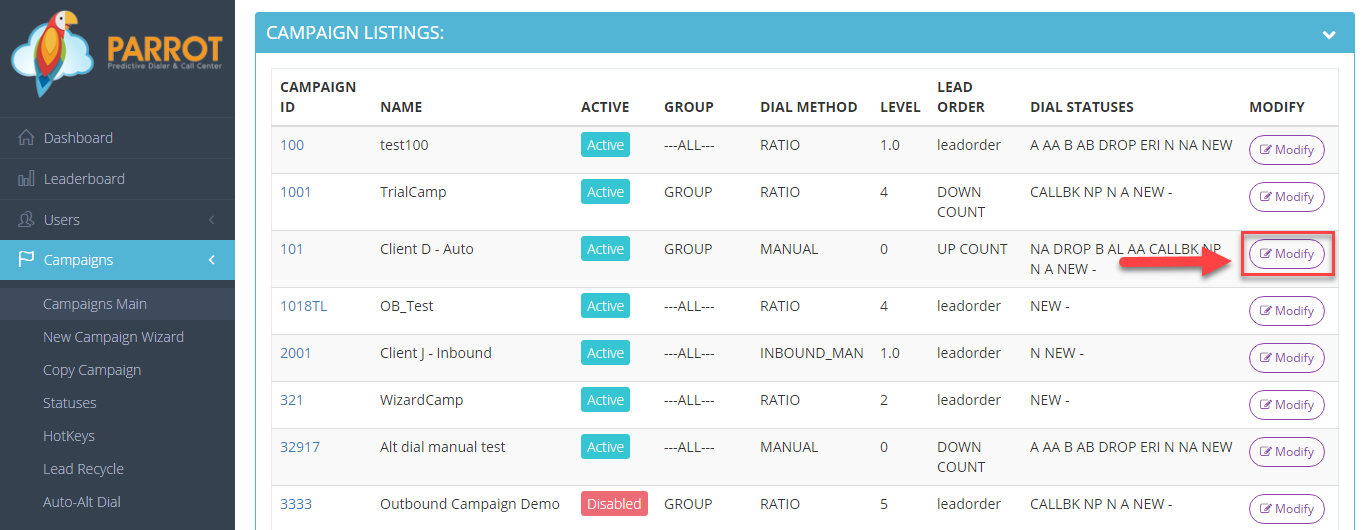
 Step 3.
 Select the Campaign that you would like to configure the callback settings and click the
Modify button for that campaign.
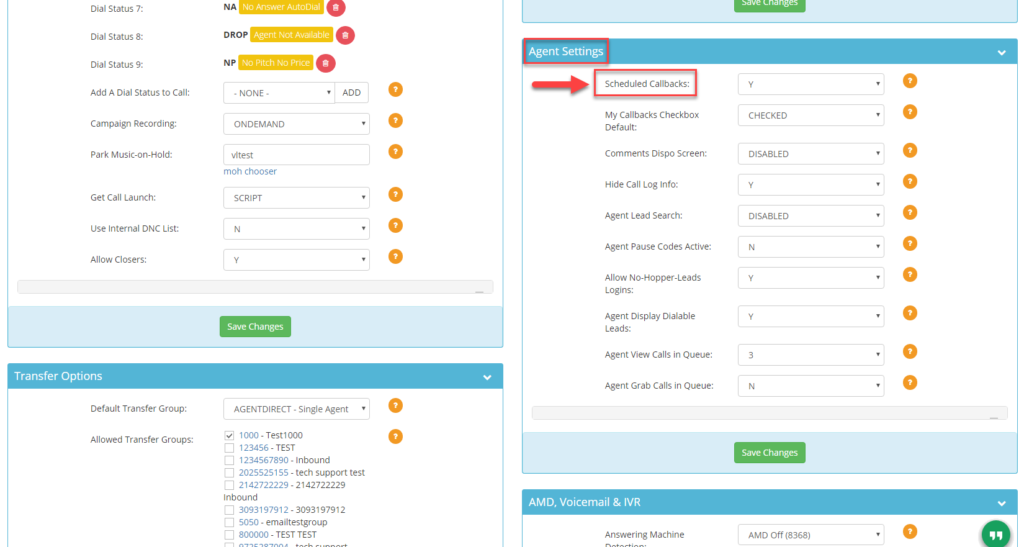
 Step 4.
 Go to the
Agent Settings section to view the
Scheduled Callbacks field.
 Step 5.
 Select
0 to
disable agent callbacks or
1 to
enable agent callbacks from the drop down.
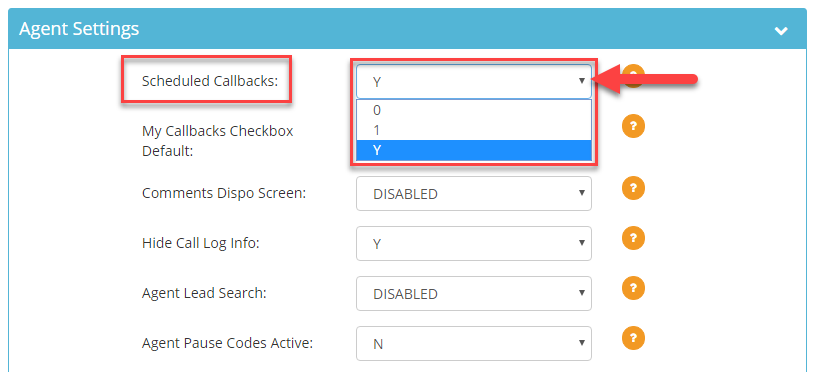
Note: If you disable callbacks, the callback disposition button will still appear but the calendar to schedule the callback will not. If you would like to remove the callback disposition button from the agent screen you also need to modify this disposition to make it non-selectable for the agent.
Step 6. Scroll to the bottom of the
Agent Settings section and click
Save Changes.
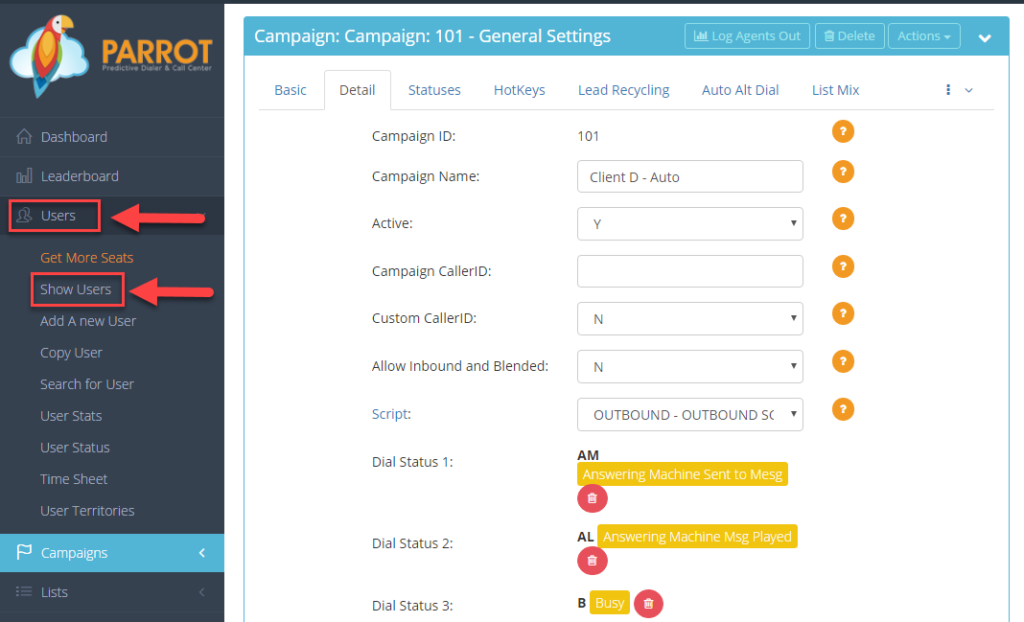
 Step 7.
 Go to
Users and then
Show Users.
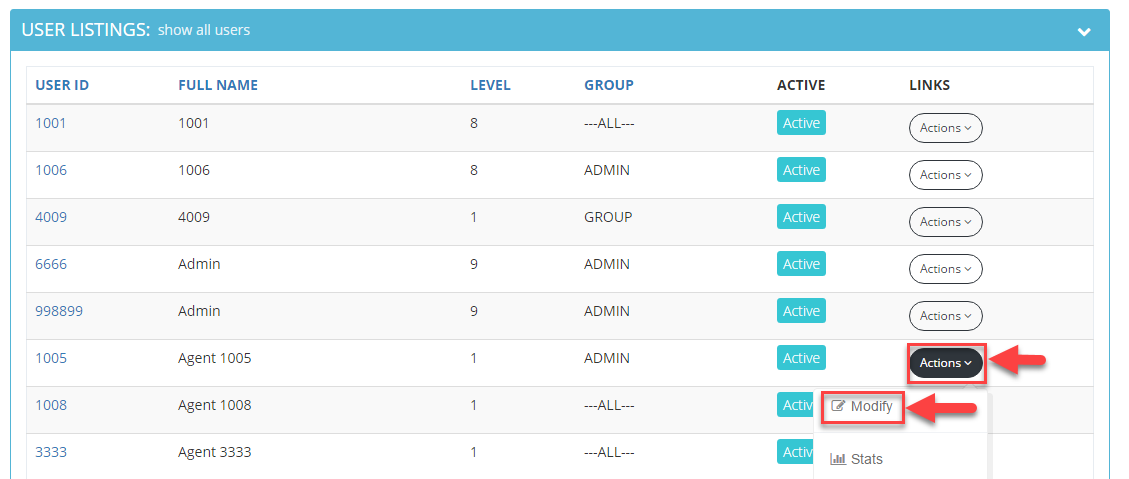
 Step 8.
 Click
Actions and then
Modify by the user you would like to disable or enable callbacks.
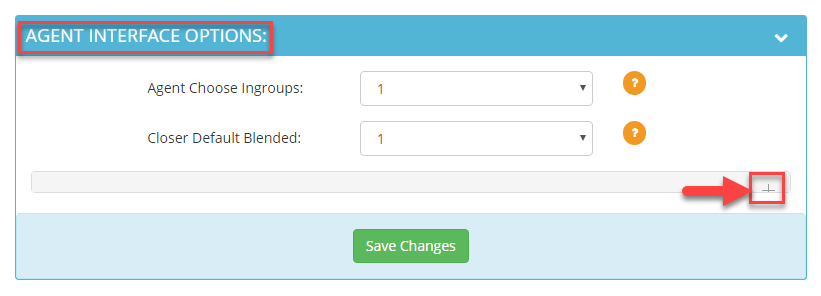
 Step 9.
 Go to the
Agent Interface Options section and click the plus sign to expand the section to see additional settings.
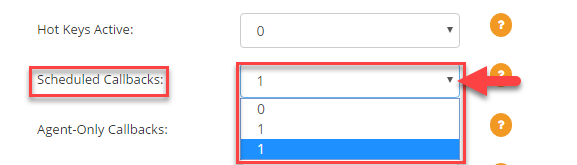
 Step 10.
 Go to the
Scheduled Callbacks field and select
0 to
disable agent callbacks or
1 to
enable agent callbacks for this particular user.
 Step 11.
 Scroll to the bottom of the
Agent Interface Options section and click
Save Changes.
 Step 3. Select the Campaign that you would like to configure the callback settings and click the Modify button for that campaign.
 Step 4. Go to the Agent Settings section to view the Scheduled Callbacks field.
 Step 5. Select 0 to disable agent callbacks or 1 to enable agent callbacks from the drop down.
 Step 8. Click Actions and then Modify by the user you would like to disable or enable callbacks.
 Step 9. Go to the Agent Interface Options section and click the plus sign to expand the section to see additional settings.