Hotkeys allow agents to hang up and disposition a call by pressing a number on their keyboard in one step rather than a series a clicks it takes to hang up, disposition, and submit a call.
Step 1. Login to your manager portal using your Admin credentials.
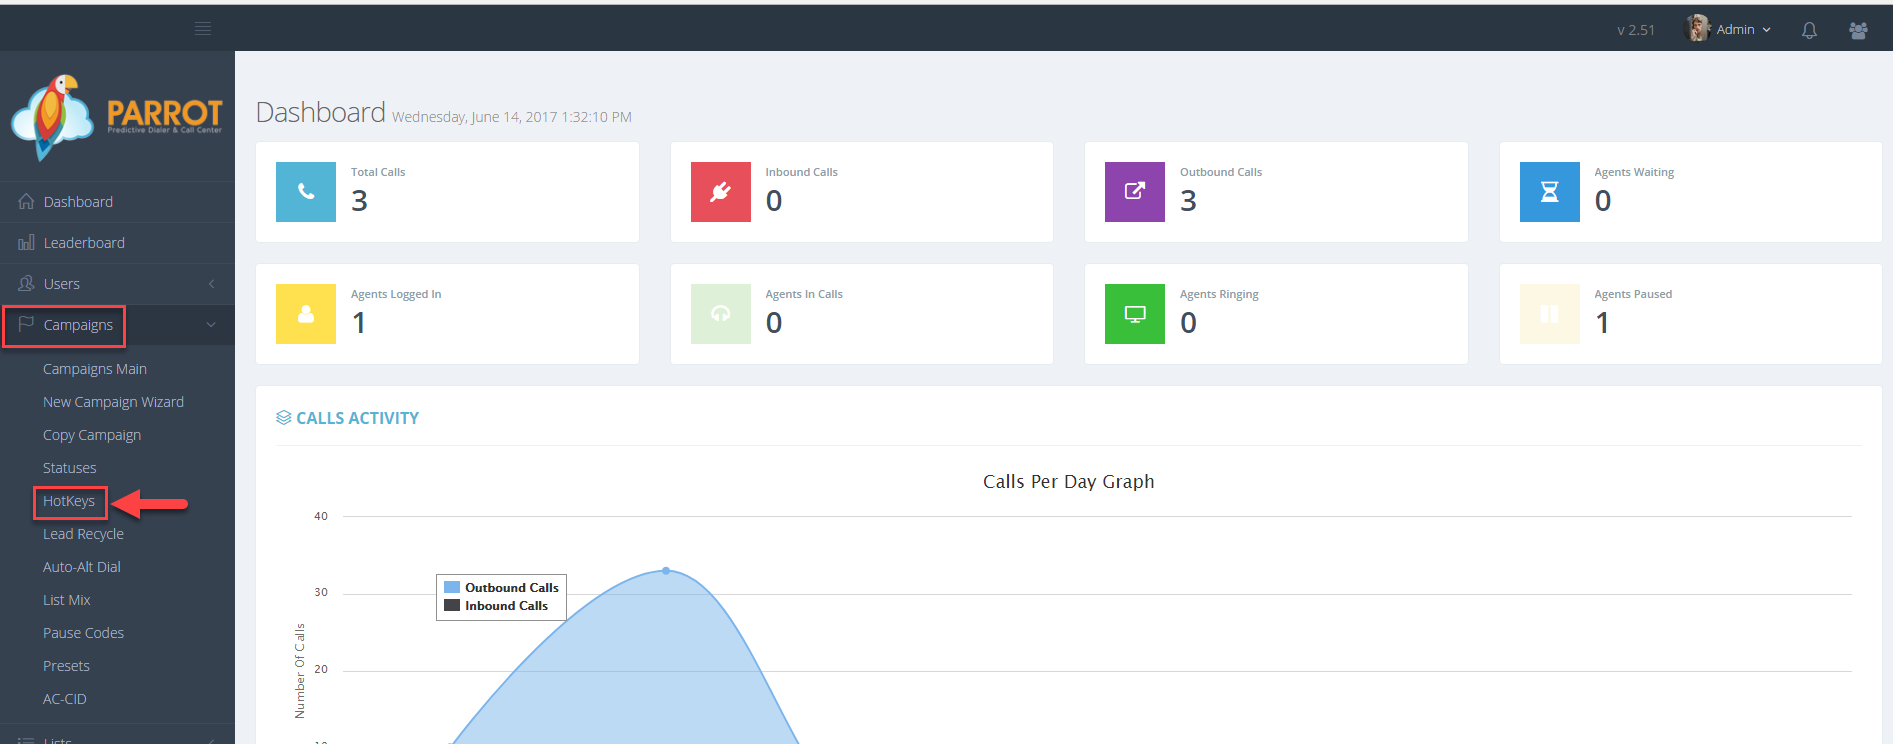
Step 2. Click on Campaigns and then Hotkeys in the left menu.
Step 3. Select the Campaign that you would like to add hotkeys to and click the Modify button for that campaign.
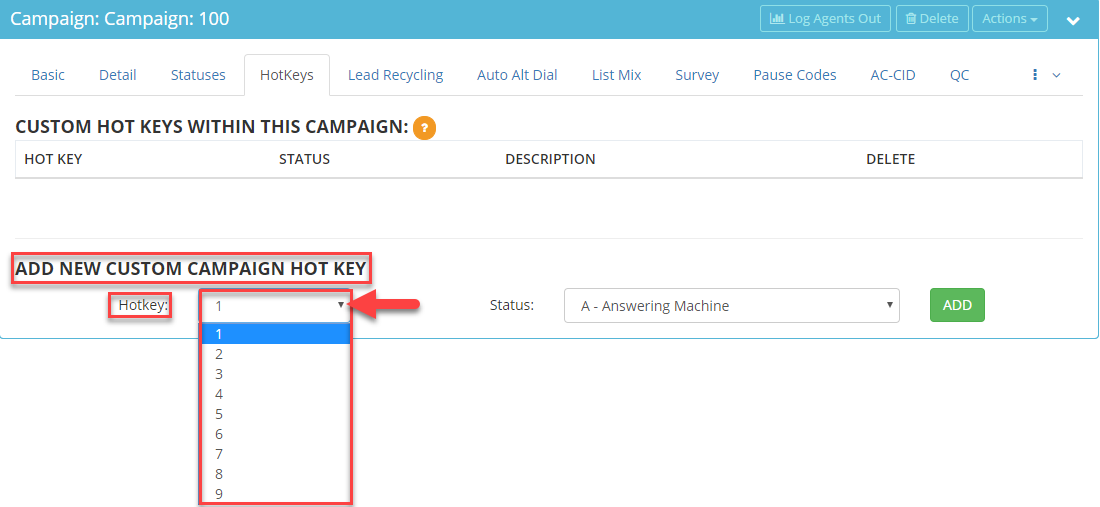
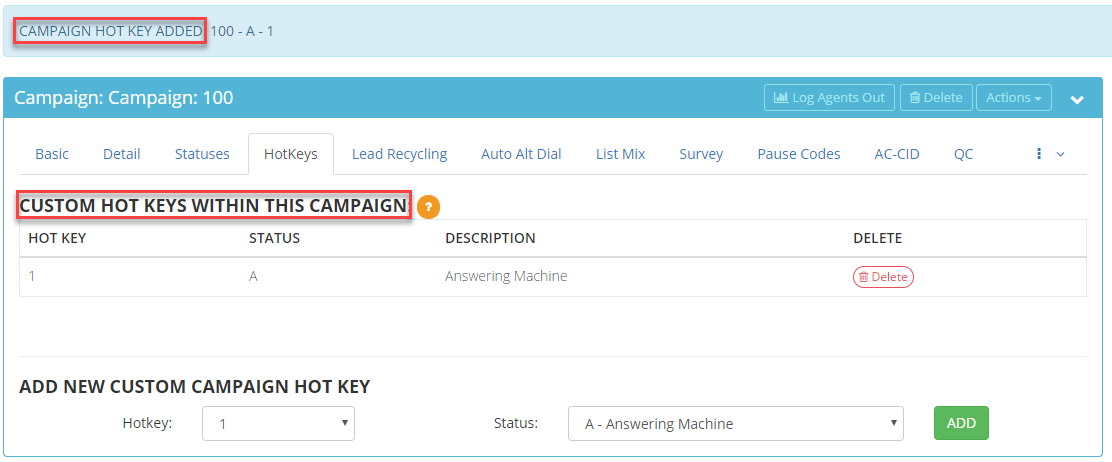
Step 4. Go to the ADD NEW CUSTOM CAMPAIGN HOT KEY section. Select a number from the Hotkey drop down field.
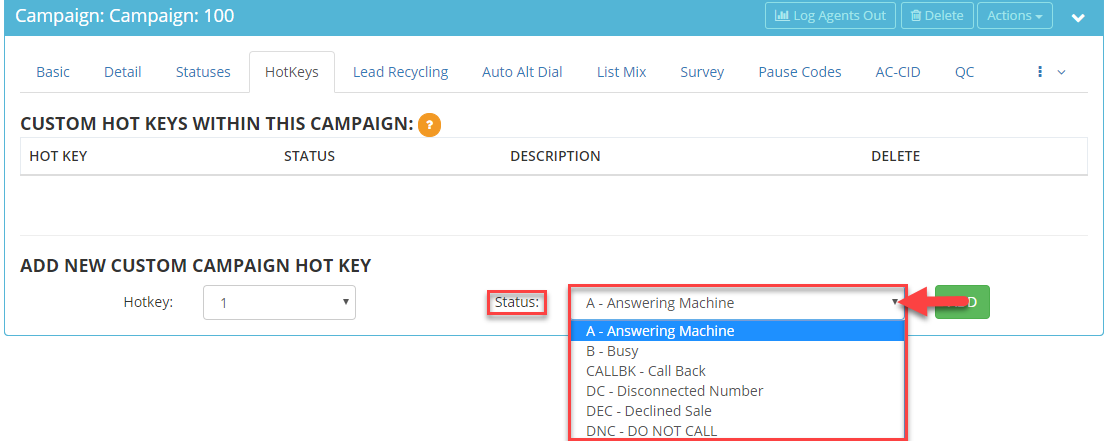
Step 5. Select a Status from the drop down to assign it to the selected hotkey number. Note: The status needs to be an “agent selectable” status in order to appear from the drop down.
Step 6. Click ADD. A confirmation message will appear at the top confirming the hotkey was added and the hotkey will appear in the CUSTOM HOT KEYS WITHIN THIS CAMPAIGN section.
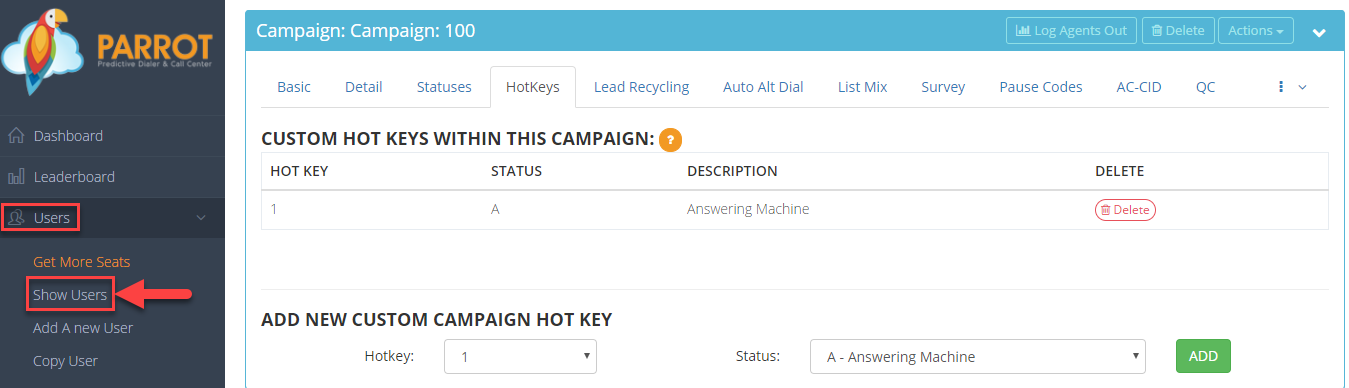
Step 7. Click on Users and then Show Users in the left menu.
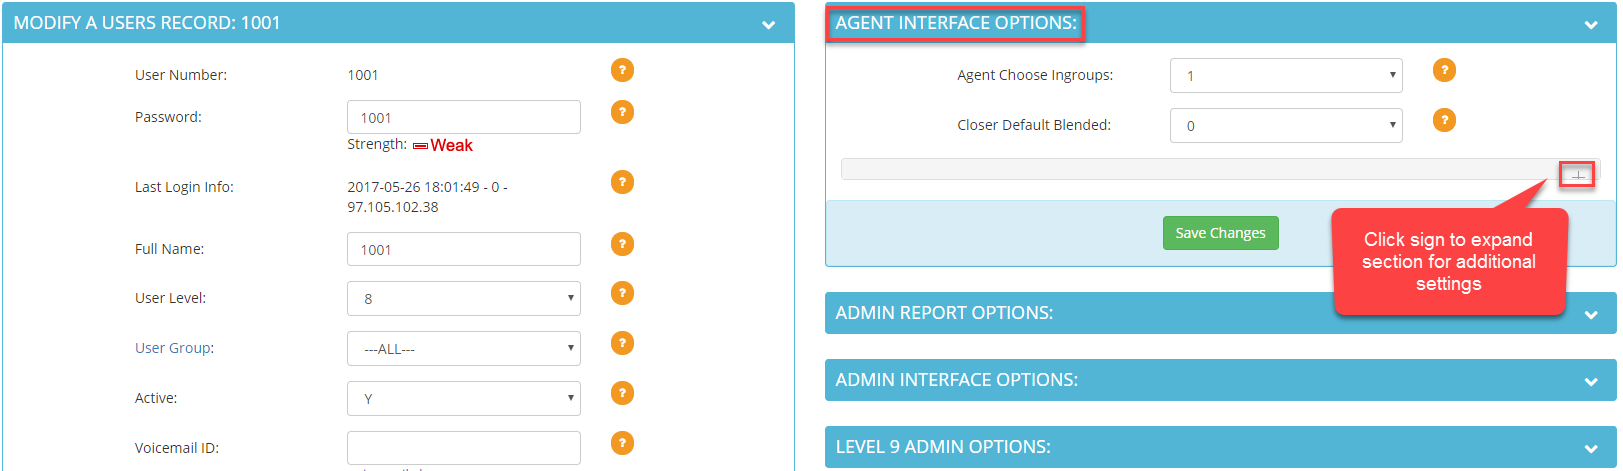
Step 8. Select the user that you would like to enable the hotkeys feature and click the Actions button then the Modify option.
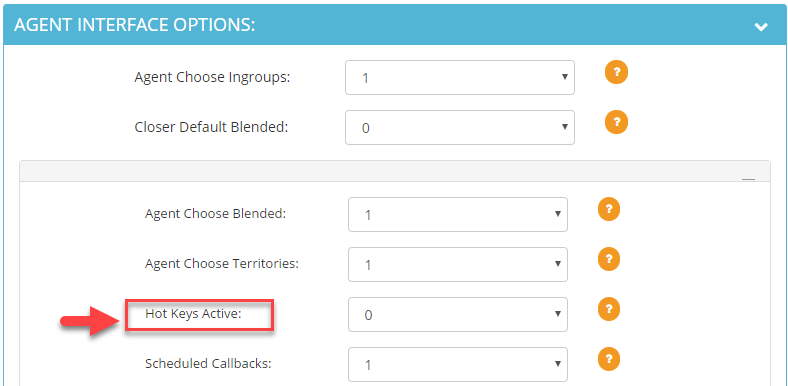
Step 9. Go to the Agent Interface Options section. Click on the plus sign to expand this section and to view the Hot Keys Active field.
Step 10. Select 1 from the drop down menu of the Hot Keys Active field to enable the hot keys feature for this particular agent.
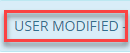
Step 11. Click Save Changes. A User Modified confirmation will appear at the top of the page.
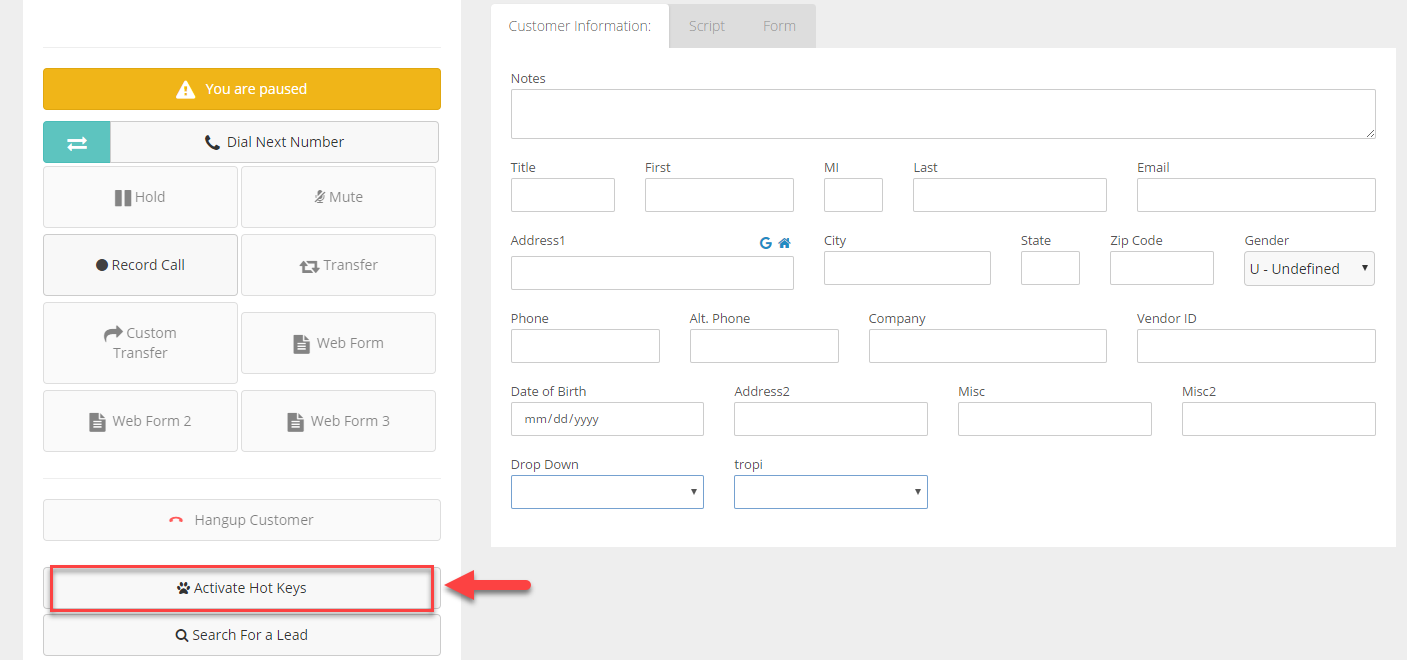
After logging in, the agent will need to click on the “Activate Hot Keys” button in the agent interface to utilize the feature.
 Step 3. Select the Campaign that you would like to add hotkeys to and click the Modify button for that campaign.
 Step 4. Go to the ADD NEW CUSTOM CAMPAIGN HOT KEY section. Select a number from the Hotkey drop down field.
 Step 5. Select a Status from the drop down to assign it to the selected hotkey number. Note: The status needs to be an “agent selectable” status in order to appear from the drop down.
 Step 6. Click ADD. A confirmation message will appear at the top confirming the hotkey was added and the hotkey will appear in the CUSTOM HOT KEYS WITHIN THIS CAMPAIGN section.
 Step 7. Click on Users and then Show Users in the left menu.
 Step 8. Select the user that you would like to enable the hotkeys feature and click the Actions button then the Modify option.
 Step 9. Go to the Agent Interface Options section. Click on the plus sign to expand this section and to view the Hot Keys Active field.
 Step 10. Select 1 from the drop down menu of the Hot Keys Active field to enable the hot keys feature for this particular agent.
 Step 11. Click Save Changes. A User Modified confirmation will appear at the top of the page.
 After logging in, the agent will need to click on the “Activate Hot Keys” button in the agent interface to utilize the feature.