How to Configure No Agent Available Settings
The settings below determine what will happen to an inbound call when no agents are logged in within call time hours, are on pause, or incall and no agent is available.
Note: If you woule like to setup calls to be sent to an agent’s voicemail when not available, you need to configure the No Agent Available Settings in the AGENTDIRECT default ingroup. Make sure your agent’s voicemail is setup: How to Setup a Voicemail Box.
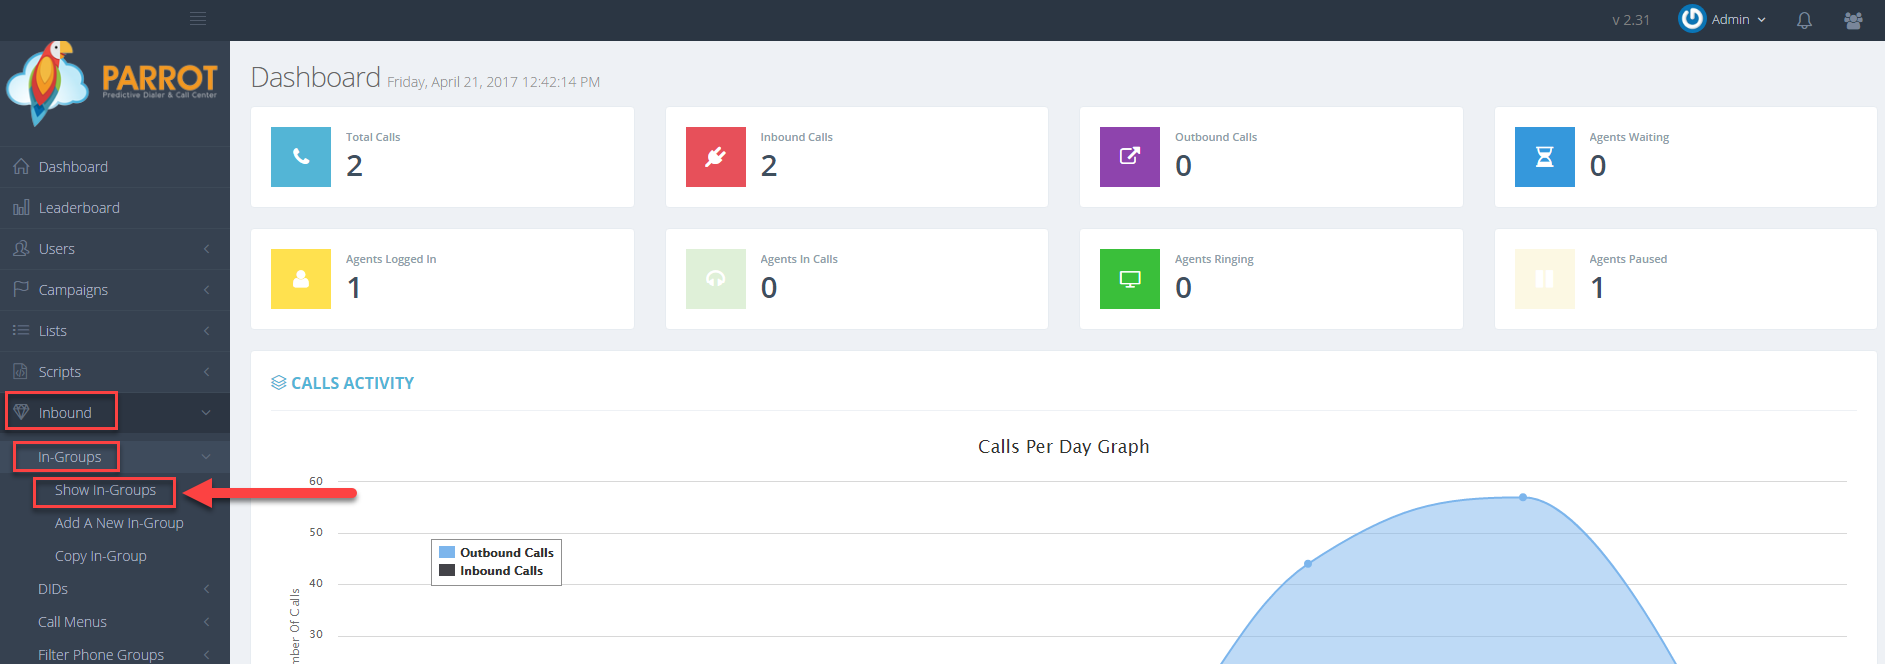
Step 1. Login to your manager portal using your Admin credentials.
Step 2. Click on
Inbound, then
In-Groups, then on
Show In-Groups in the left menu.
 Step 3.
 Select the In-Group that you would like to setup music on hold and click the
Modify button for that in-group.
 Step 4.
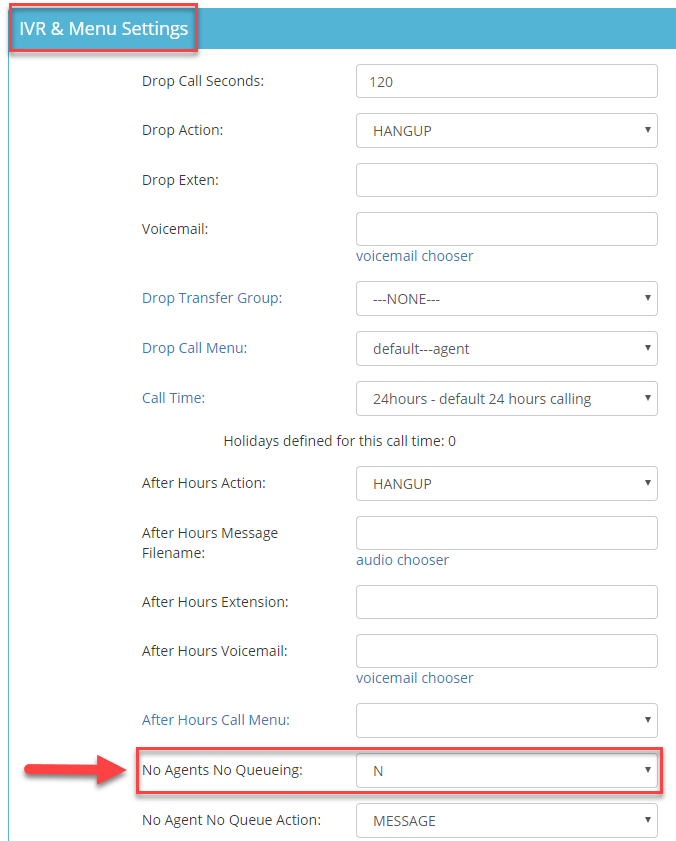
 Go to the
IVR & Menu Settings section and scroll down to view the
No Agents No Queuing field.
 Step 5.
 Select the desired setting from the drop down of the
No Agents No Queuing field:
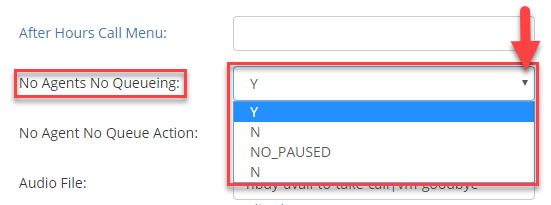 Y
Y – No inbound calls will be put into the queue if there are
no agents logged in. The
No Agent No Queue Action will determine where the call will be forwarded to. If agents are on pause, incall, or a combination of both, the inbound call will be put into the queue and the system will follow the drop call settings in addition to any other inbound settings configured. Go to Step 6.
NO_PAUSED – No inbound calls will be put into the queue if agents are on
pause or
not logged in. The
No Agent No Queue Action will determine where the call will be forwarded to. If all agents are incall, the system will put the inbound call into the queue and follow the Drop Settings and other inbound settings configured. If some agents are on pause and some are incall, the system will follow the No Agent No Queue Action. Go to Step 6.
N – Inbound calls will be put into the queue regardless if there are not agents logged in or if they are all on pause. The system will then follow the drop call settings in addition to any other inbound settings configured.
Step 6. Select the desired
No Agent No Queue Action from the drop down to determine what action to take if selected the
Y or
NO_PAUSE option above:
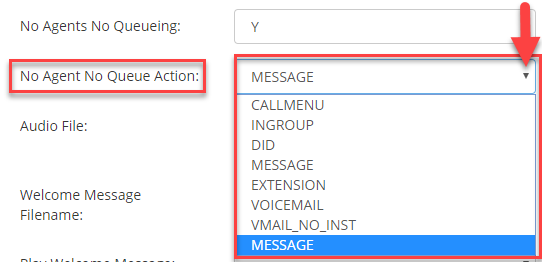 CALLMENU
 – The system will forward inbound calls to the call menu indicated from the
Call Menu drop down. Additional settings will appear once this option is selected. Go to Step 7.
INGROUP – The system will forward inbound calls to the ingroup indicated in the
Ingroup drop down. This setting is useful when there is an overflow and the next ingroup to answer can include additional agents in addition to agents from the first ingroup. Additional settings will appear once this option is selected. Go to Step 8.
DID – The system will forward inbound calls to the DID indicated in the
DID drop down. Additional settings will appear once this option is selected. Go to Step 9.
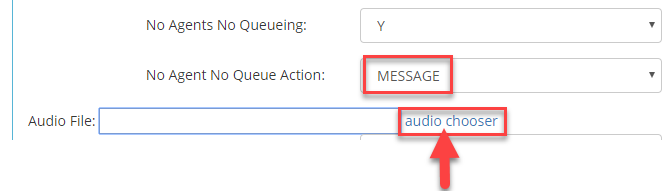
MESSAGE – The system will forward inbound calls to a message selected from the
audio chooser. Additional settings will appear once this option is selected. Go to Step 10.
EXTENSION – The system will forward inbound calls to an agent’s extension or to an external number entered in the
Extension field. Additional settings will appear once this option is selected. Go to Step 11.
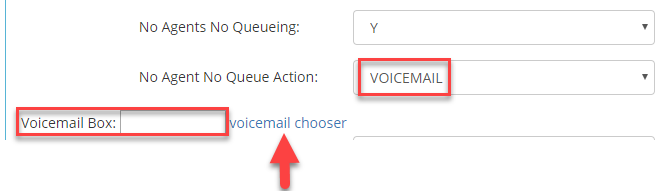
VOICEMAIL – The system will forward inbound calls to the voicemail box selected from the Voicemail Chooser. Addition settings will appear once this option is selected. Go to Step 12.
VMAIL_NO_INST – The system will forward inbound calls to the voicemail box selected from the Voicemail Chooser. Addition settings will appear once this option is selected. No instructions instructing the caller on what to do after the voicemail greeting will be played. Go to Step 12.
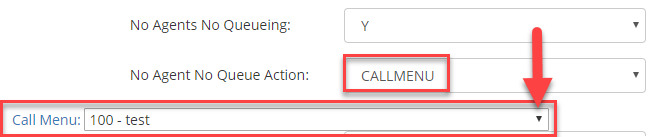
Step 7. The
Call Menu drop down will appear when
CALLMENU is selected from the
No Agent No Queue Action drop down. Select the desired call menu to forward inbound calls to. Go to Step 13.
 Step 8.
 The
In-Group drop down will appear when
INGROUP is selected from the
No Agent No Queue Action drop down. Select the desired ingroup to forward inbound calls to. See additional optional settings below or go to Step 13.
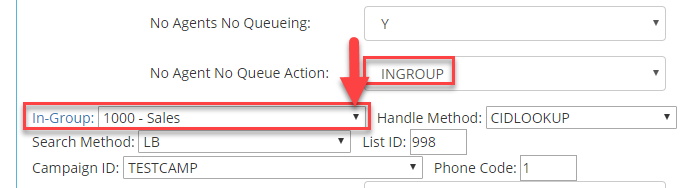
Additional
optional settings:
Handle Method – Select the desired handle method from the drop down. Default is CID.
Search Method – Select the desired search method from the drop down. Default is LB.
List ID – Enter the List ID that you want the lead’s information saved to.
Campaign ID – Only applicable if Handle Method is set to CIDLOOKUPRC.
Phone Code – Leave at 1.
Step 9. The
DID drop down will appear when
DID is selected from the
No Agent No Queue Action drop down. Select the desired DID to forward inbound calls to. Go to Step 13.
 Step 10.
 The
Audio File field will appear when
MESSAGE is selected from the
No Agent No Queue Action drop down. The default audio file setup is
nbdy-avail-to-take-call|vm-goodbye which
plays the message,
“Nobody is available to take your call at the moment. Goodbye.”

To select a different audio file, click on the
audio chooser link next to the
Audio File field and select the desired audio file to play. Ensure that you have previously uploaded your audio file(s) into the
Audio Store.
Go to Step 13.
Step 11. The
Extension field will appear when
EXTENSION is selected from the
No Agent No Queue Action drop down. Enter an
agent’s extension or a
ten digit external number in the Extension field. Leave
context at
default.
 Step 12.
 The
Voicemail Box field will appear when
VOICEMAIL or
VMAIL_NO_INST is selected from the
No Agent No Queue Action drop down. Enter the voicemail box or click on the
voicemail chooser link and select the desired voicemail box.
If you are configuring the AGENTDIRECT ingroup and would like the call to be sent to an agent’s voicemail if not available to receive a call enter AGENTVMAIL.
Go to step 13.
 Step 13.
 Scroll down and click
Save Changes.

 Step 3. Select the In-Group that you would like to setup music on hold and click the Modify button for that in-group.
 Step 4. Go to the IVR & Menu Settings section and scroll down to view the No Agents No Queuing field.