How Can We Help?
-
1. Getting Started
-
2. Campaigns
-
- How to Change the Auto Dial Level in Ratio Mode
- How to Change the Dial Method
- How to Change the Hopper Level
- How to Change the List Order
- How to Reset the Hopper
- How to Setup Alternate Number Dialing
- How to Setup Alternate Number Dialing in Manual Mode
- How to Setup Dialing According to Lead's Time Zone
- How to Setup Preview Dial
- Types of Dial Methods
- What is the Hopper?
-
3. Leads
-
Users
-
Inbound
- Getting Started with Inbound
- How to Assign an In-Group to a Campaign
- How to Assign Users to an In-Group
- How to Auto Launch a Script or Webform for Inbound Calls
- How to Configure Inbound After Hours Settings
- How to Configure Inbound Calls in Queue
- How to Configure No Agent Available Settings
- How to Configure Users to Receive Inbound Calls
- How to Create an In-Group
- How to Route a DID Number to an In-Group
- How to Setup a Welcome Message
- How to Setup Inbound Queue Hold Music
-
Scripts
-
Audio
-
Call Times
-
Reports
-
Troubleshooting
-
For Agents
< Back
You are here:
Print
How to Change the Hopper Level
How to Change the Hopper Level
The Minimum Hopper Level is the amount that the hopper refills every 60 seconds. A hopper level set too low can cause the system to run out of leads before the hopper can refill itself, therefore, causing a longer wait time for a short amount of time. We recommend setting the Minimum Hopper Level to 3 times the amount of calls you expect to make each minute. The more agents logged in and the higher the dial level, the higher you should set the Minimum Hopper Level. Note: A hopper level unnecessarily too high can overload the system. Step 1. Login to your manager portal using your Admin credentials. Step 2. Click on Campaigns and then Campaigns Main in the left menu.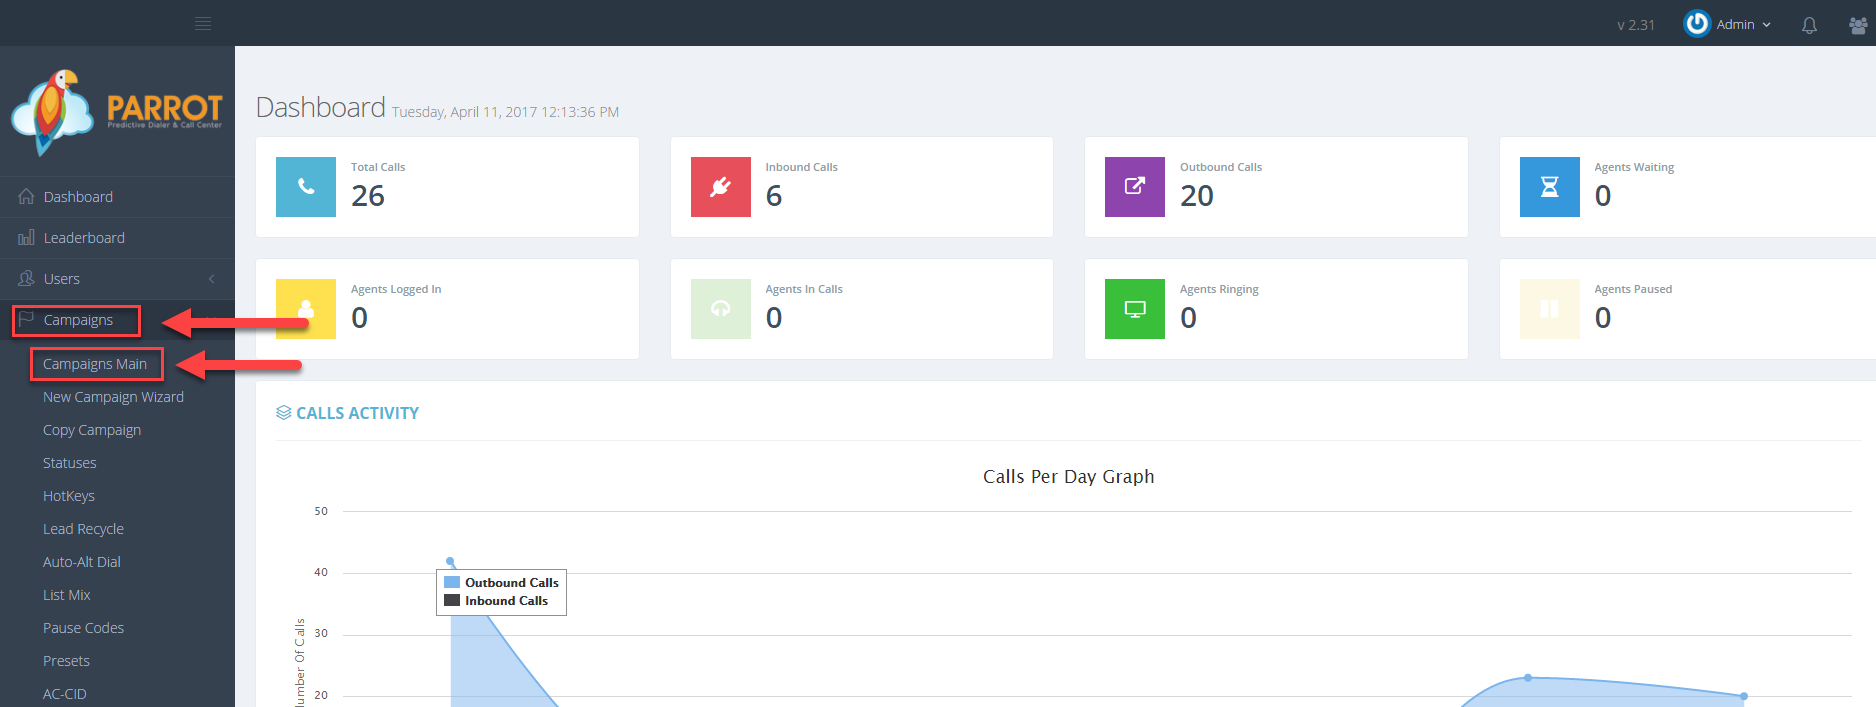 Step 3. Select the Campaign that you would like to change the hopper level and click the Modify button for that campaign.
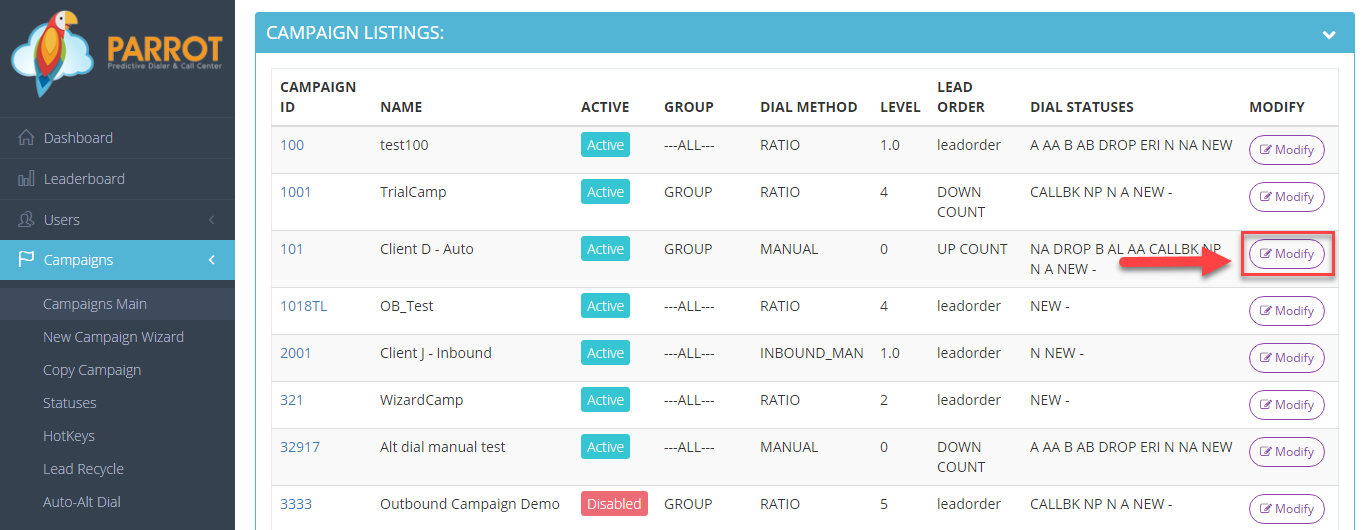
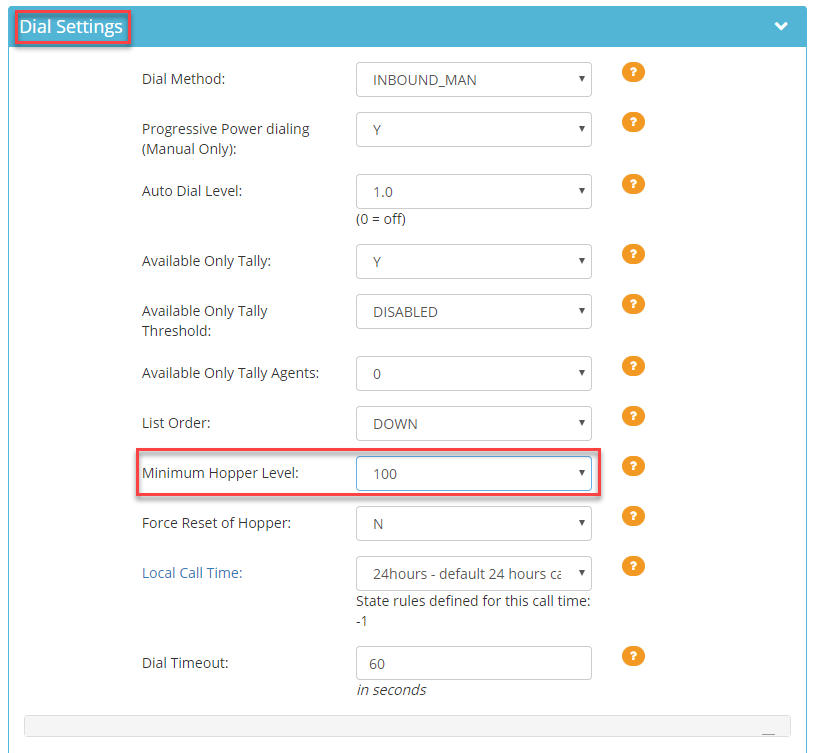
 Step 4. Go to the Dial Settings to view the Minimum Hopper Level field.
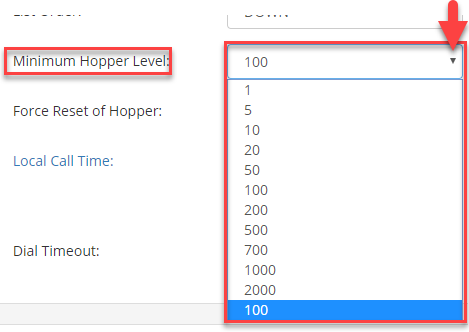
 Step 5. Select the desired hopper level from the drop down that you want the hopper to load to dial at a time.
 Step 6. Click Save Changes.