How to Modify a User Group
The purpose of User Groups is to divide agents into different groups that can be restricted to access certain campaigns. User groups also specify shifts, whether an agent needs to login with a time clock, can allow access to certain reports and define which users the agent can view and transfer calls to. By default agents are added to the AGENTS User Group.
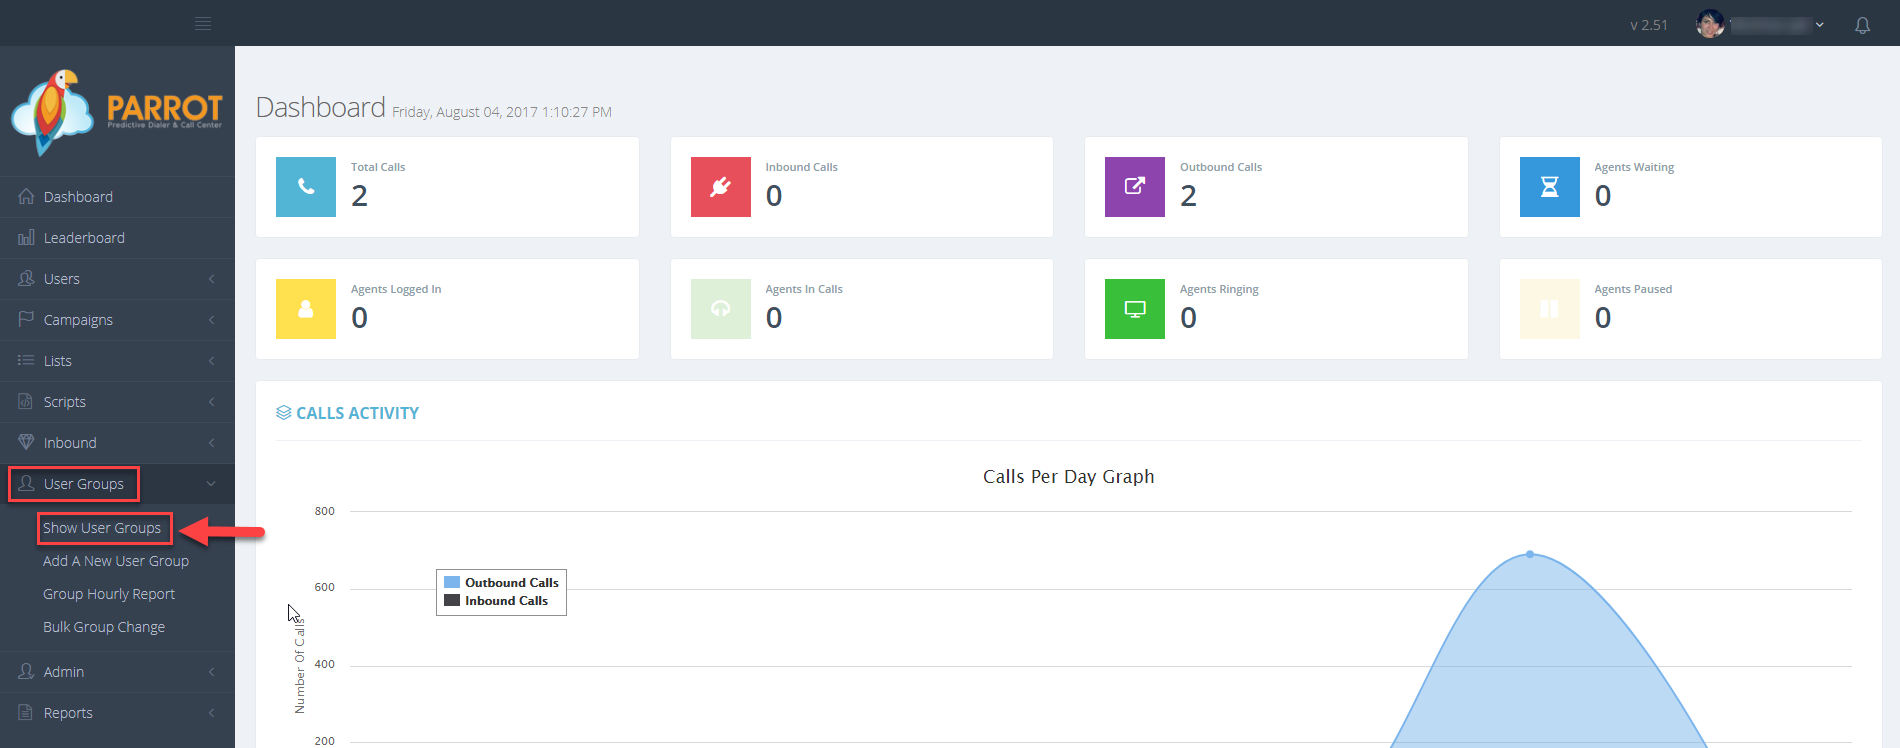
Step 1. Login to your manager portal using your Admin credentials.
Step 2. Click on
User Groups and then
Show User Groups in the left menu.
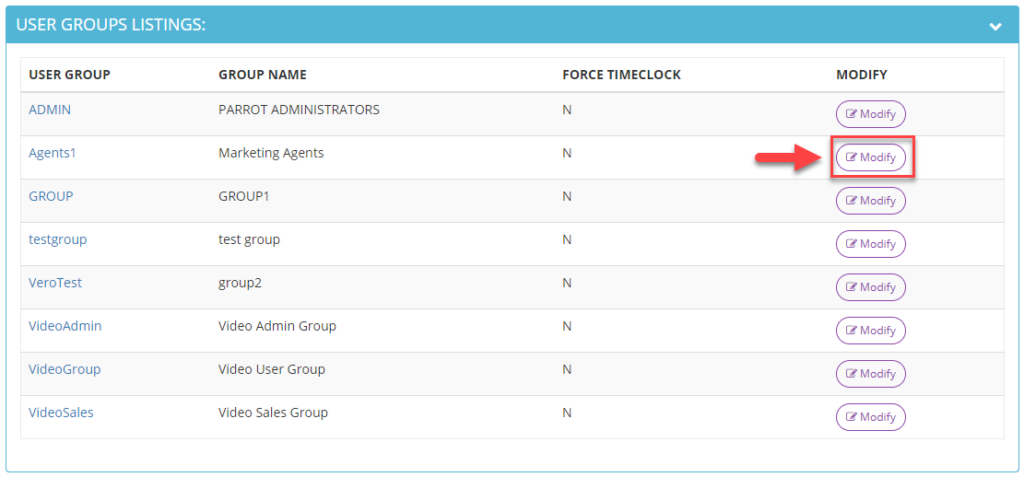
 Step 3.
 Click the
Modify button for the User Group you would like to modify settings.
 Step 4.
 Click in the
Description field to modify.
 Step 5.
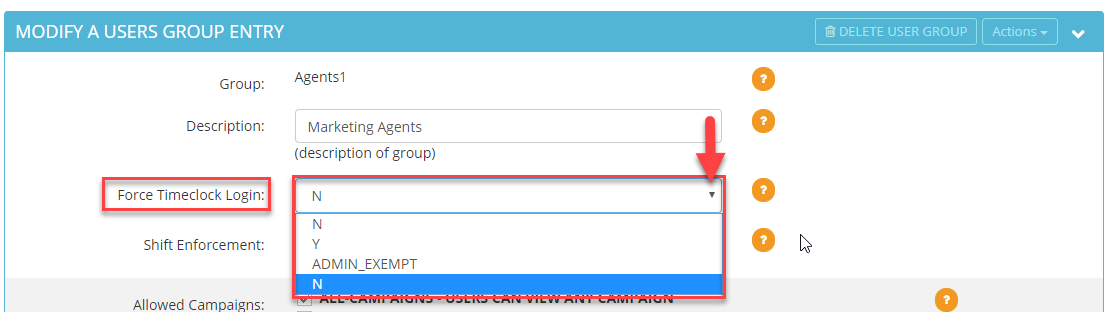
 Select the desired
Force Timeclock Login option from the drop down:
Y – Forces agents to login with a timeclock in the agent login screen.
ADMIN_EXEMPT – Exempts level 8 or 9 users from forcing them to use the timeclock feature.
N – Force timeclock is disabled.
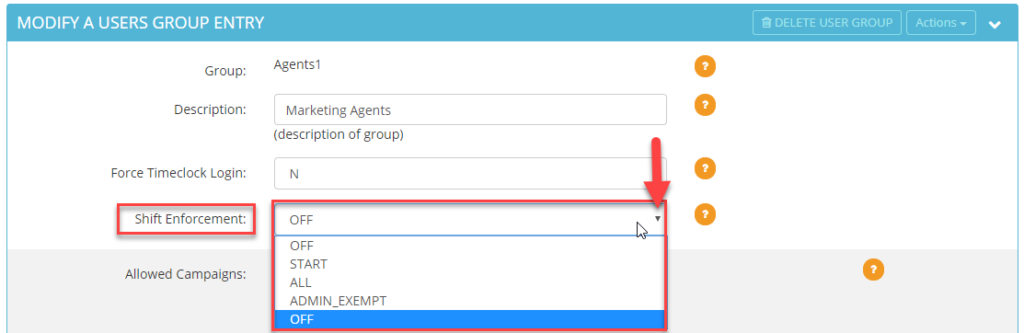
 Step 6.
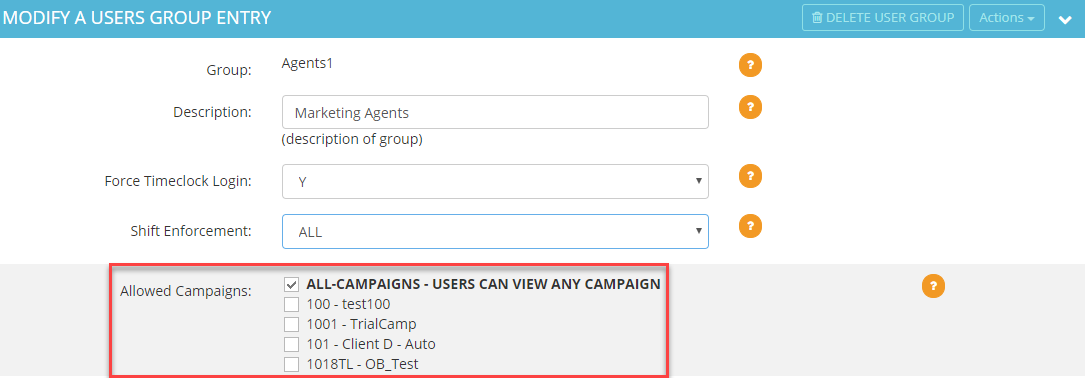
 Select the desired
Shift Enforcement option from the drop down:
START – Enforces the shift login time but will not log out an agent if they are running over the end time of their shift.
ALL – Enforces the login and logout time of a shift. System will logout agents if they over over the end time of their shift.
ADMIN_EXEMPT – Exempts level 8 or 9 users from shift enforcement.
OFF – Shift enforcement is disabled.
If START, ALL, or ADMIN_EXEMPT selected, Group Shift needs to be specified below.
To Create a New Shift, click here: How to Add a New Shift
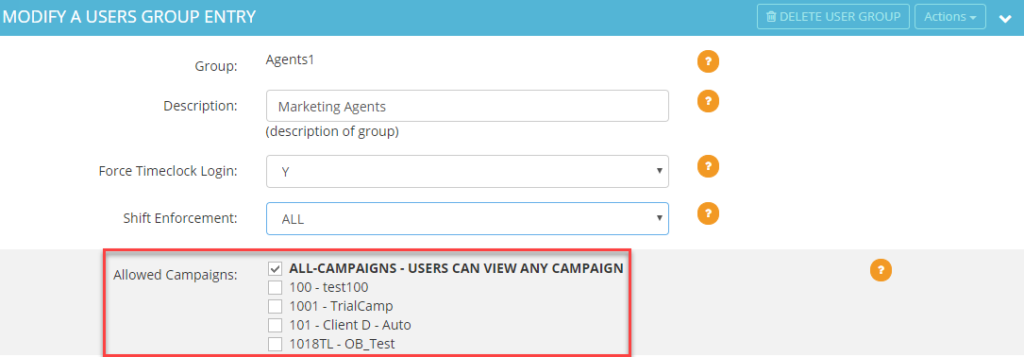
Step 7. Select the desired campaign(s) checkbox under the
Allowed Campaigns section to allow users to access and log into all or specific campaigns. Default is set for agents to be allowed to access
ALL-CAMPAIGNS.
 Step 8.
 Select the desired
Group Shift checkbox that restricts the agents’ login time. If no shift is selected and if shift enforcement is OFF, then there will be no agent login restriction.
 Step 9.
 Select the desired User Groups under the
Agent Status Viewable Groups section to allow agents to view the status of other agents and to be able transfer calls to agents in other User Groups. By default ALL-GROUPS, CAMPAIGN-AGENTS, NOT LOGGED IN AGENTS, and AGENTS are selected. If other User Groups have been created, they will appear in this list as well.
ALL-GROUPS – Users will be able to view all logged in agents in Agent Status Sidebar and be able transfer to all agents using the system.
CAMPAIGN-AGENTS – Users in this group will be able to view agents only using the same campaign in the Agent Status Sidebar and transfer only to agents using the same campaign.
AGENTS – Users in this group will be able to view logged in agents in Agents Status Sidebar and will be able to transfer to all agents within this group. Note: All agent level users are added to this group by default.
 Step 10.
 Select
Y or
N for the following fields:
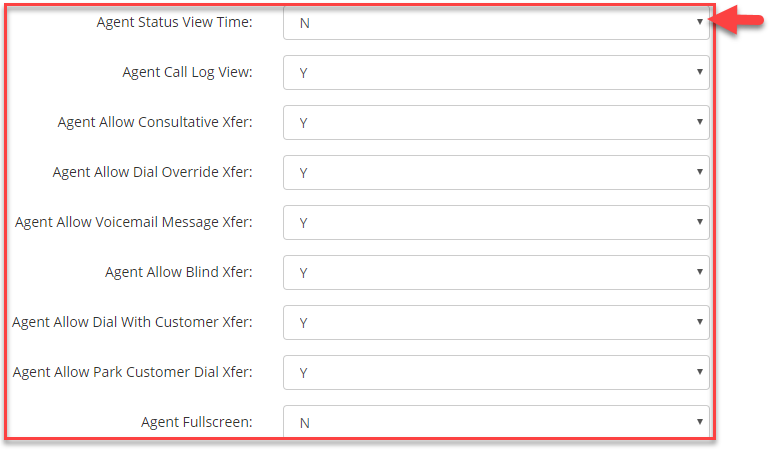
Agent Status View Time – Select Y to allow agents to see the amount of time another agent has been under a current status.
Agent Call Log View – Select Y if you want to allow agents to view their call log list in the agent screen.
Agent Allow Consultative Xfer – Select Y to enable the Consultative option from the transfer conference frame.
Agent Allow Dial Override Xfer – Select Y to enable the Dial Override option from the transfer conference frame.
Agent Allow Voicemail Message Xfer – Select Y to enable the Voicemail Message option from the transfer conference frame.
Agent Allow Blind Xfer – Select Y to enable the Blind transfer option from the transfer conference frame.
Agent Allow Dial With Customer Xfer – Select Y to enable the Dial With Customer (warm) transfer option from the transfer conference frame.
Agent Allow Park Customer Dial Xfer – Select Y to enable the Park Customer Dial option from the transfer conference frame.
Agent Fullscreen – Select Y to expand the height and width of the agent screen by removing the Agents View, Calls in Queue View, and Calls in Session View.
 Step 11.
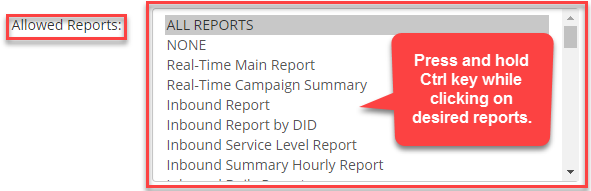
 Select the reports in the
Allowed Reports section that you want level 7 or higher users to have access to. To select multiple reports, press and hold the Crtl key and while holding the Ctrl key, click on the reports you want selected.
 Step 12.
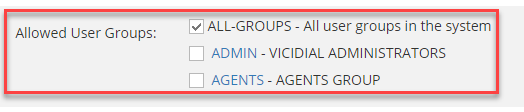
 Select the desired User Group(s) in the
Allowed User Groups sections that you allow users in this group to view and modify. Disregard this section if all users in this group are at the agent level. This section only applies to users in this group at the Admin level. For example, you may only want a certain Admin level user to access specific user groups in the system.
 Step 13.
 Select the desired Call Time checkbox in the
Allowed Call Times section that you allow users in this group to use. Disregard this section if all users in this group are at the agent level. This section only applies to users in this group at the Admin level. For example, if a level 8 user is included in this group and a Call Time of 12pm-5pm is selected, then admin users in this group would only be able to select the 12pm-5pm Local Call Time in the Campaign settings.
Step 14. Click
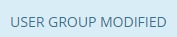
SUBMIT. A confirmation will appear at the top stating the group was modified.

 Step 3. Click the Modify button for the User Group you would like to modify settings.
 Step 4. Click in the Description field to modify.
 Step 5. Select the desired Force Timeclock Login option from the drop down:
Y – Forces agents to login with a timeclock in the agent login screen.
ADMIN_EXEMPT – Exempts level 8 or 9 users from forcing them to use the timeclock feature.
N – Force timeclock is disabled.
Step 5. Select the desired Force Timeclock Login option from the drop down:
Y – Forces agents to login with a timeclock in the agent login screen.
ADMIN_EXEMPT – Exempts level 8 or 9 users from forcing them to use the timeclock feature.
N – Force timeclock is disabled.
 Step 6. Select the desired Shift Enforcement option from the drop down:
START – Enforces the shift login time but will not log out an agent if they are running over the end time of their shift.
ALL – Enforces the login and logout time of a shift. System will logout agents if they over over the end time of their shift.
ADMIN_EXEMPT – Exempts level 8 or 9 users from shift enforcement.
OFF – Shift enforcement is disabled.
Step 6. Select the desired Shift Enforcement option from the drop down:
START – Enforces the shift login time but will not log out an agent if they are running over the end time of their shift.
ALL – Enforces the login and logout time of a shift. System will logout agents if they over over the end time of their shift.
ADMIN_EXEMPT – Exempts level 8 or 9 users from shift enforcement.
OFF – Shift enforcement is disabled.
 If START, ALL, or ADMIN_EXEMPT selected, Group Shift needs to be specified below.
To Create a New Shift, click here: How to Add a New Shift
Step 7. Select the desired campaign(s) checkbox under the Allowed Campaigns section to allow users to access and log into all or specific campaigns. Default is set for agents to be allowed to access ALL-CAMPAIGNS.
If START, ALL, or ADMIN_EXEMPT selected, Group Shift needs to be specified below.
To Create a New Shift, click here: How to Add a New Shift
Step 7. Select the desired campaign(s) checkbox under the Allowed Campaigns section to allow users to access and log into all or specific campaigns. Default is set for agents to be allowed to access ALL-CAMPAIGNS.
 Step 8. Select the desired Group Shift checkbox that restricts the agents’ login time. If no shift is selected and if shift enforcement is OFF, then there will be no agent login restriction.