How Can We Help?
How to Load Leads
How to Load Leads
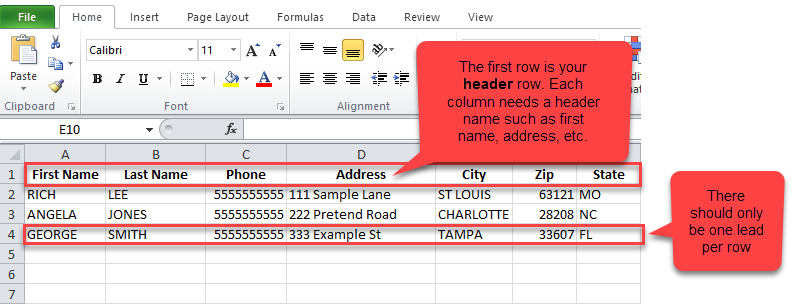
Ensure you have Added a List and that your lead file is in the correct file format before uploading:- .csv (comma delimited) or .xlsx file format
- The file should have headers at the top of each column with no blank rows at the top
- Each lead should be on one row only
- No commas or other special characters other than parentheses, dashes, and spaces should be present in the phone number field
- Note that blank rows within will cause “bad records” to upload
Step 1. Login to your manager portal using your Admin credentials.
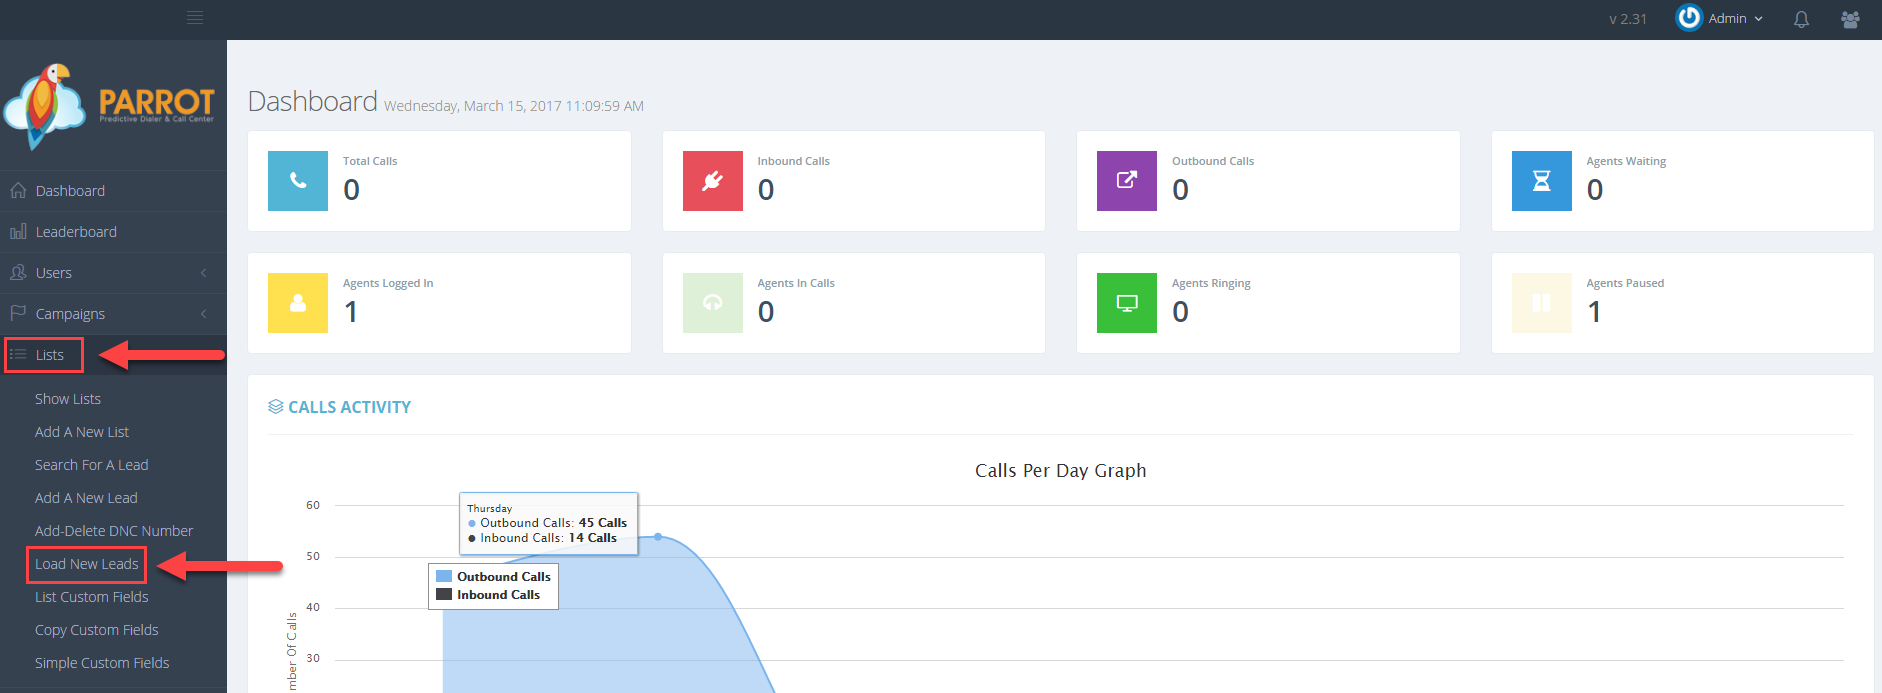
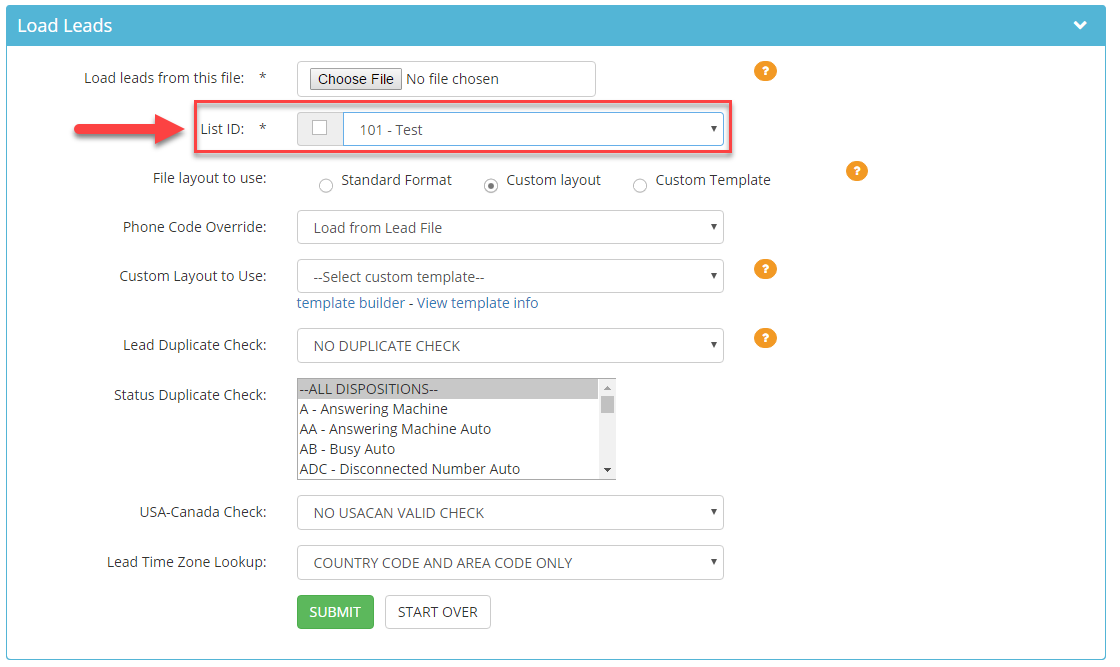
Step 2. Click on lists and then load new leads in the left menu.
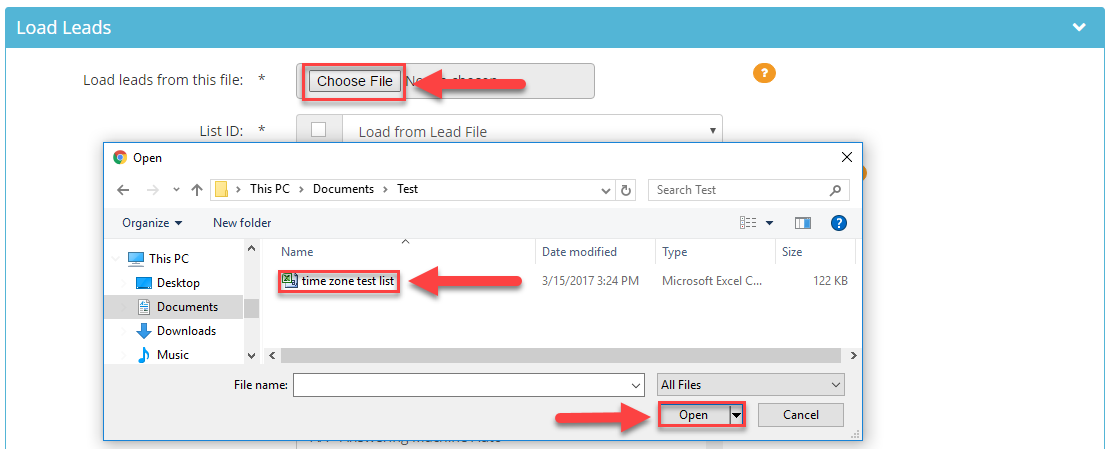
Step 3. Select choose file to locate the file to be uploaded. Select the file and click open.
Step 4. Select the List ID from the drop down to add the calling file into
Step 5. Leave all the other fields at the default settings. You can select check for duplicates in the lead duplicate check. You also have the option to do a Phone Code Override, Status Duplicate Check, a USA-Canada Check, and a Lead Time Zone Lookup.
Step 6. Click submit to view the mapping page.
Step 7. Map the headers of your file to the labels on the left. The Parrot column on the left includes the customer information fields that the agent can view when making calls. The File data column on the right includes your headers from the columns or row 1 of the file you uploaded.
Example: The PHONE NUMBER field from the Parrot column will be mapped with “phone” from the drop down menu. Since “phone” is the name of the header or column C (which contains all the phone numbers) in the list file. Map only the fields you want to be displayed. Note: The order of columns doesn’t need to match the order of the Parrot labels as long as you map the fields correctly. The only required field is the phone number field. All other fields to map are optional.
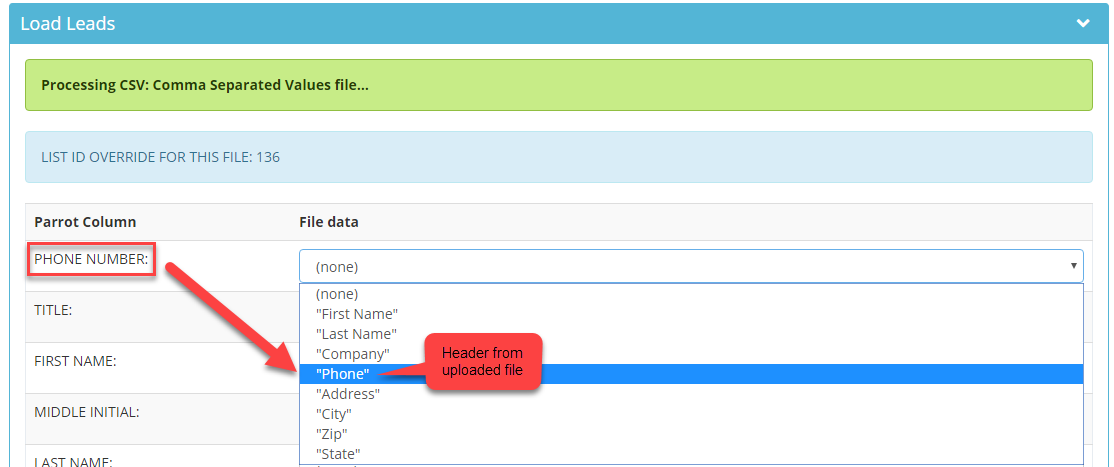

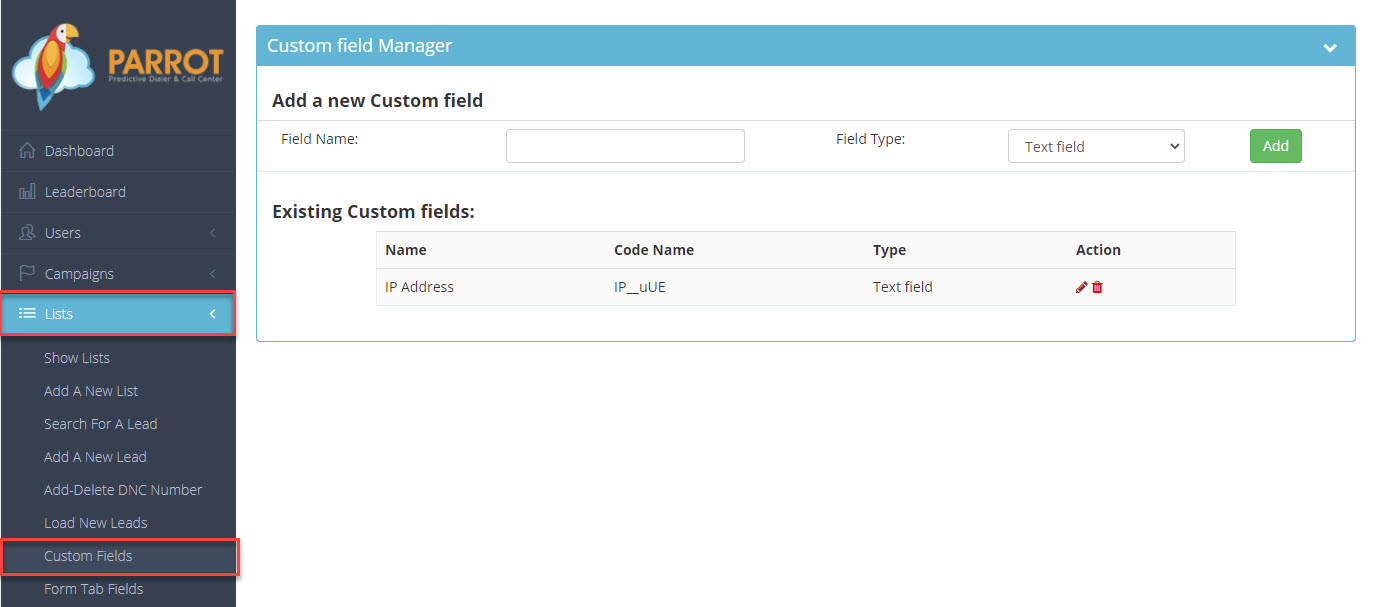
List files that have additional data fields and are not included in the parrot column fields will need to be added via the custom field settings.
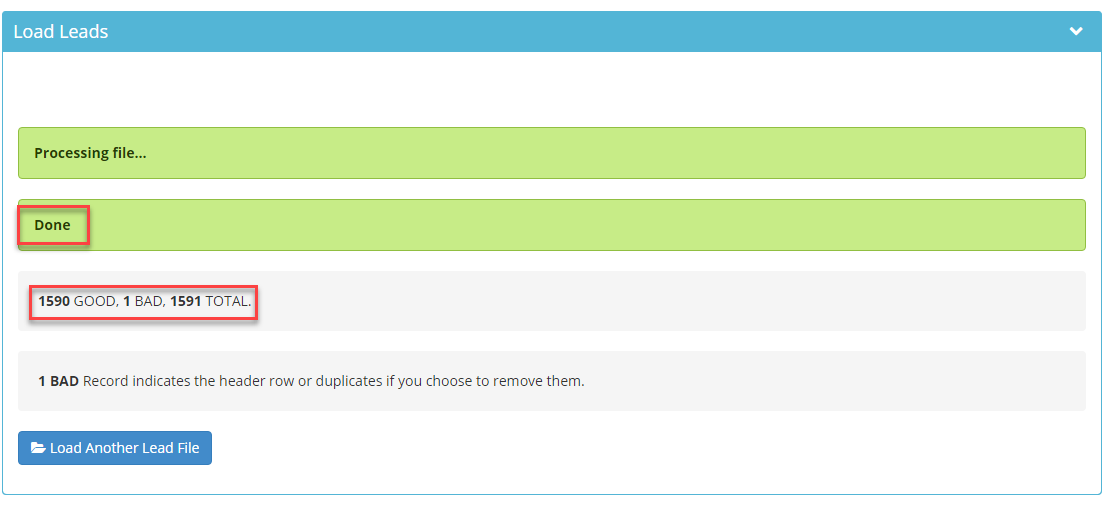
Step 8. Click OK TO PROCESS to continue uploading the leads. A confirmation page will appear indicating how many records are good, bad, and the total records uploaded. You can also continue to load another lead file from this page. Note: There will always be at least one bad record, which indicates the header row from your lead file.