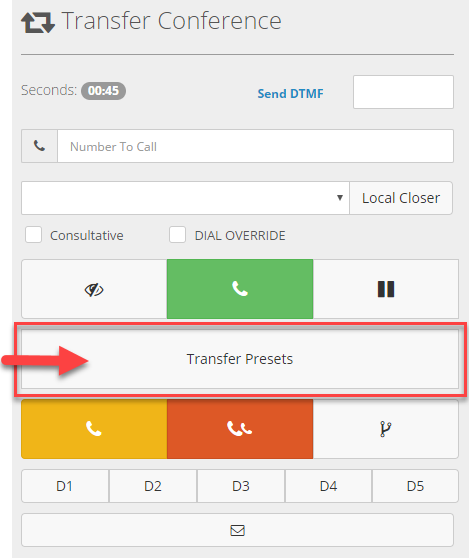
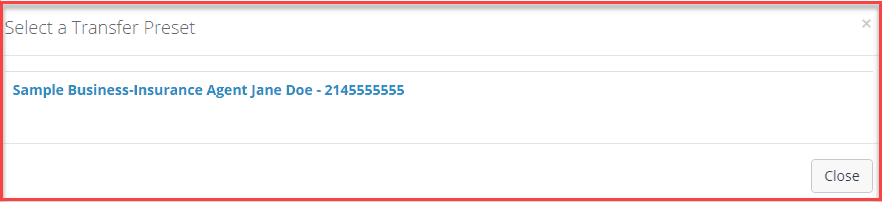
The transfer presets menu is a useful external or outside transfer feature if you would like your transfer number presets labeled to include a business or contact name and if you have more than five phone numbers that your agents transfer leads to on a regular basis. Instead of manually dialing the phone number, the agent will click on a “Transfer Presets” button in the transfer conference frame and a menu with names and phone numbers will appear for your agents to choose from. When the agent clicks on a name, the number will populate in the transfer number field and the agent can transfer the call using the blind or warm transfer options.
Step 1. Login to your manager portal using your Admin credentials.
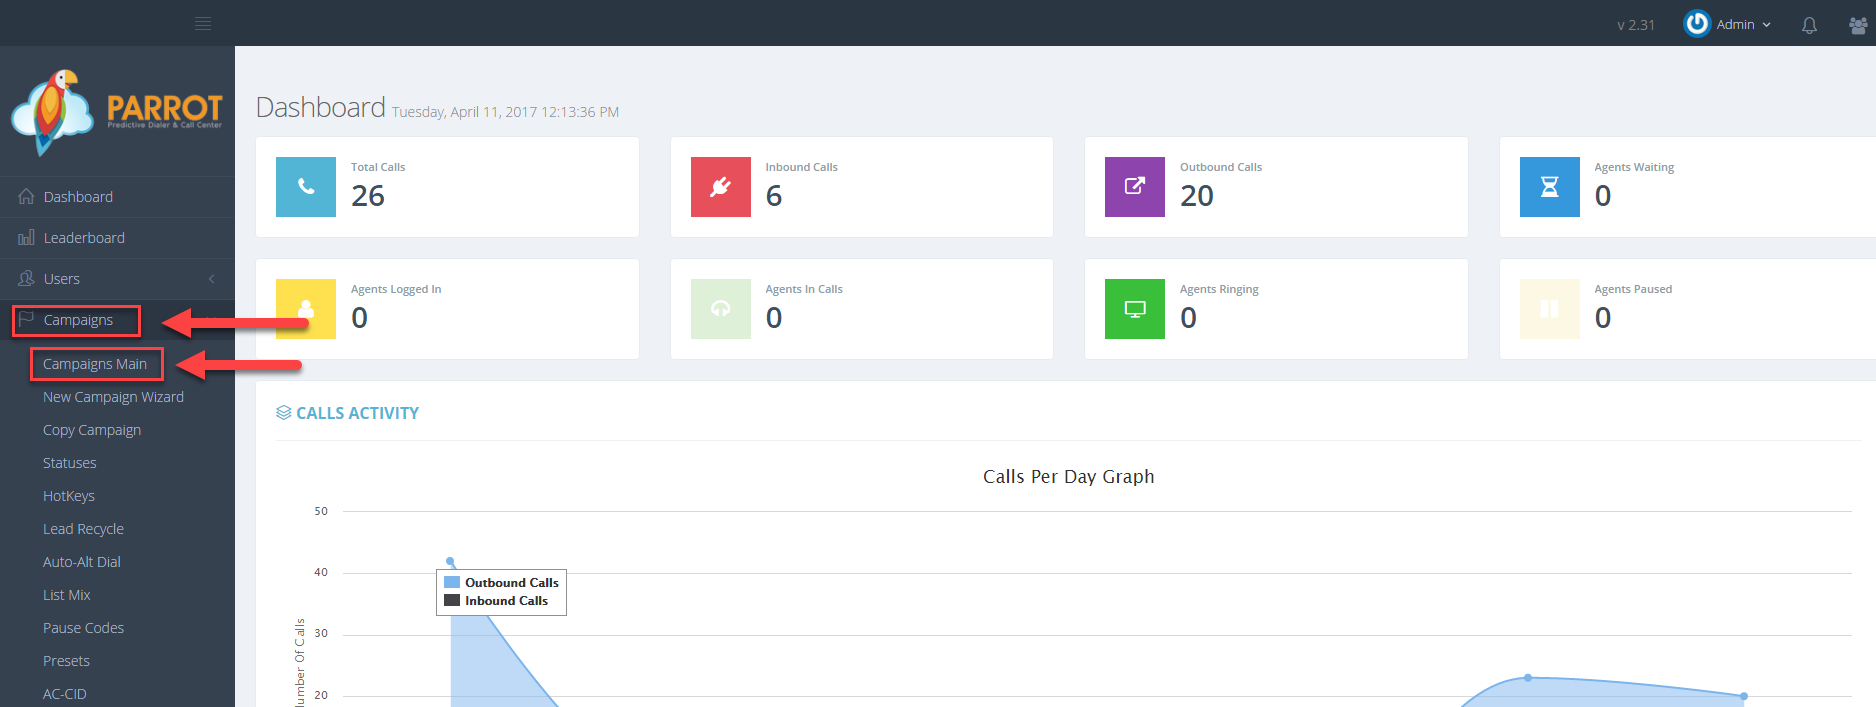
Step 2. Click on Campaigns and then Campaigns Main in the left menu.
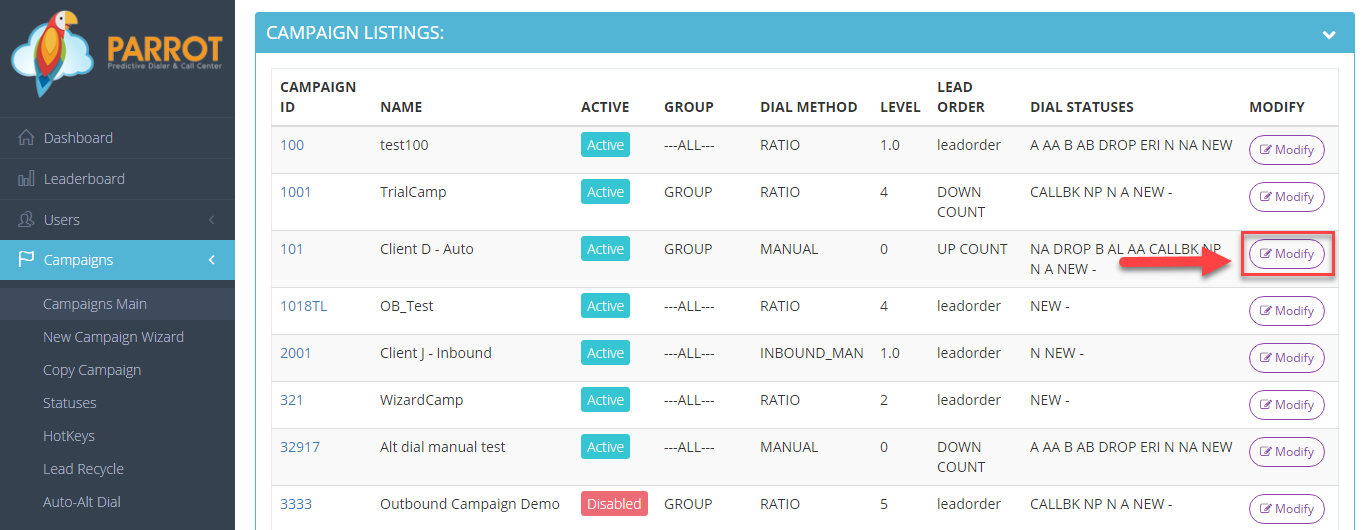
Step 3. Select the Campaign that you would like to setup the transfer presets menu and click the Modify button for that campaign.
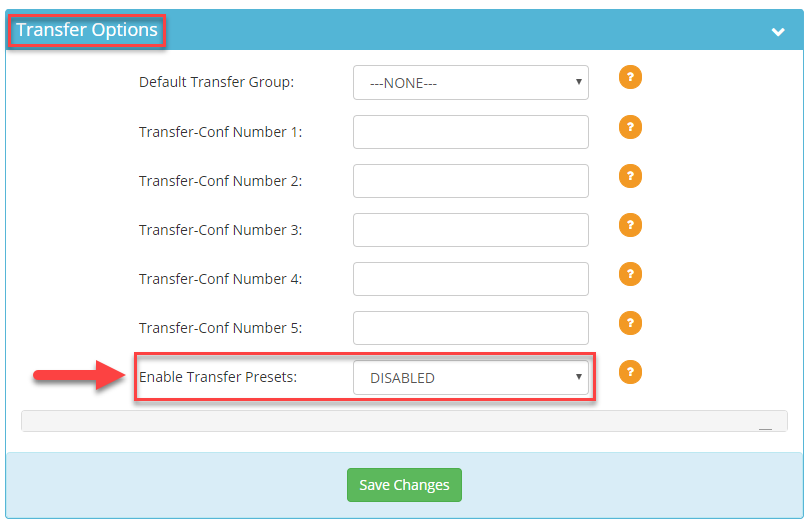
Step 4. Go to the Transfer Options section to view the Enable Transfer Presets field.
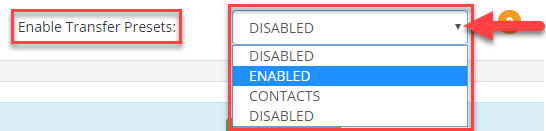
Step 5. Select ENABLED from the drop down of the Enable Transfer Presets field to allow the Transfer Presets button to appear in the Transfer Conference Frame of the Agent Interface.
Step 6. Scroll to the bottom of the Transfer Options section and click Save Changes.
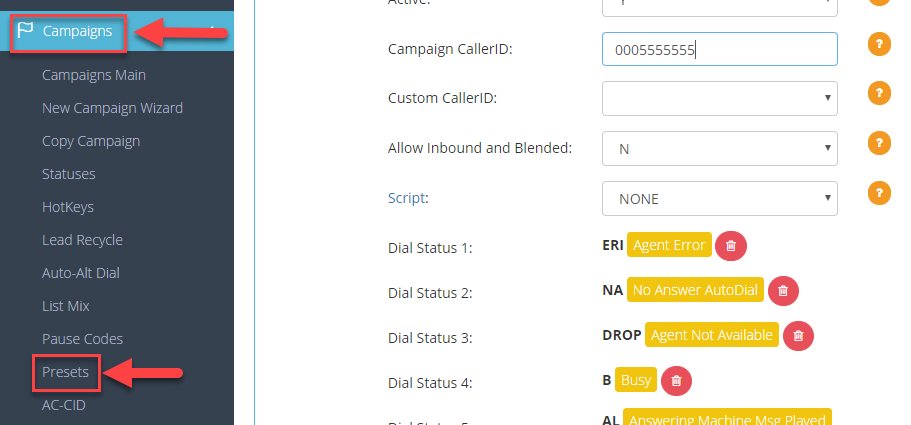
Step 7. Click on Campaigns and then Presetsin the left menu.
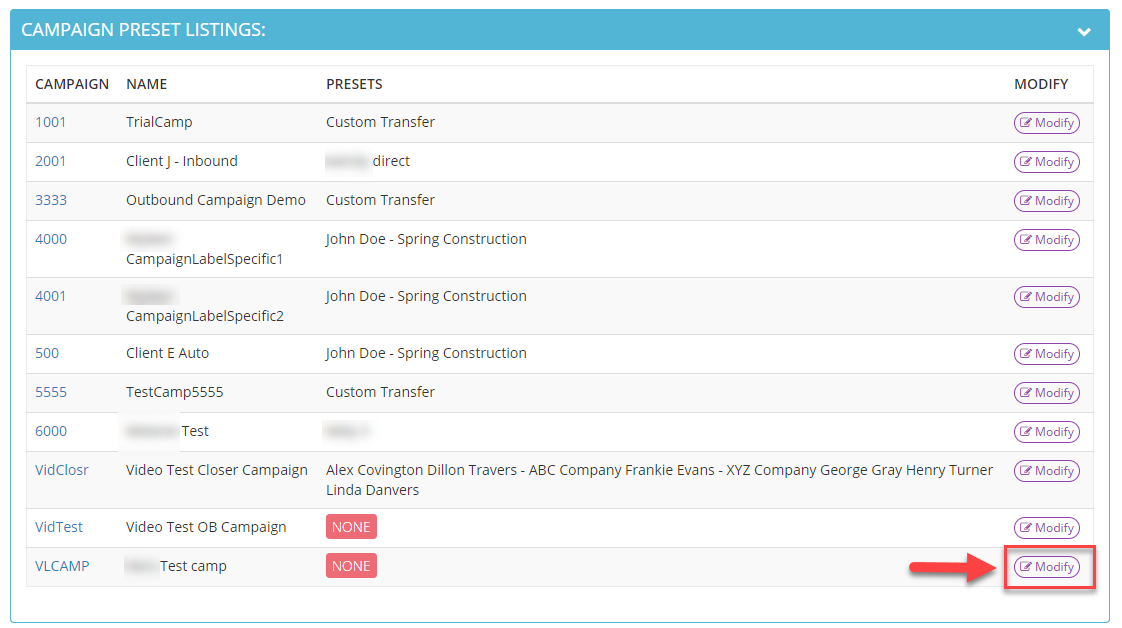
Step 8. Select the Campaign that you would like to add the transfer number presets to and click Modify for that campaign.
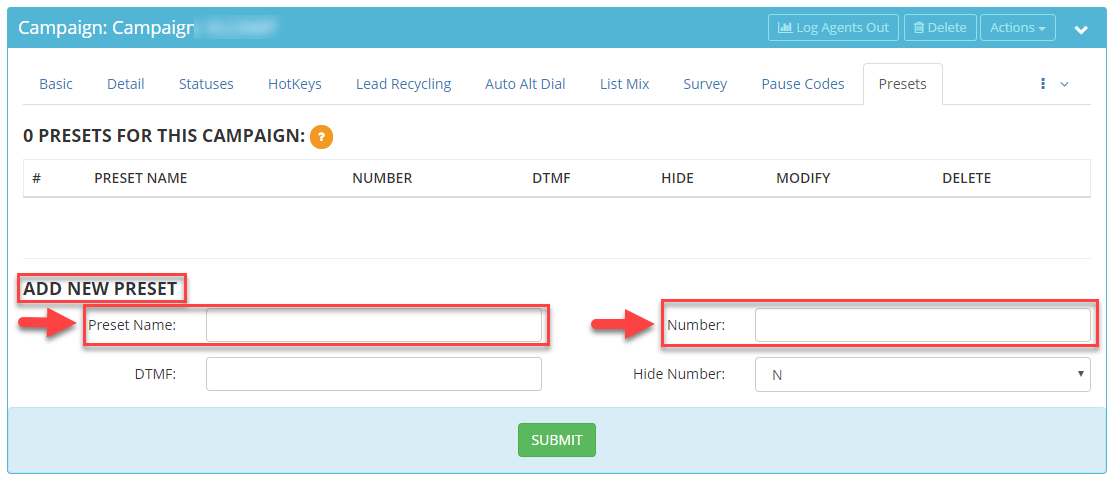
Step 9. Go to the Add New Preset section. Enter a Preset Name (such as a business or contact name) and the Number.
If you would like to hide the preset number from the agent, choose Y from drop down of the Hide Number field.
Step 10. Click Submit. A confirmation message will appear at the top confirming the preset was added. The preset will also appear in the Presets for this Campaign section.
 Step 1. Login to your manager portal using your Admin credentials.
Step 2. Click on Campaigns and then Campaigns Main in the left menu.
Step 1. Login to your manager portal using your Admin credentials.
Step 2. Click on Campaigns and then Campaigns Main in the left menu.
 Step 3. Select the Campaign that you would like to setup the transfer presets menu and click the Modify button for that campaign.
 Step 4. Go to the Transfer Options section to view the Enable Transfer Presets field.
 Step 5. Select ENABLED from the drop down of the Enable Transfer Presets field to allow the Transfer Presets button to appear in the Transfer Conference Frame of the Agent Interface.
 Step 6. Scroll to the bottom of the Transfer Options section and click Save Changes.
 Step 8. Select the Campaign that you would like to add the transfer number presets to and click Modify for that campaign.
 Step 9. Go to the Add New Preset section. Enter a Preset Name (such as a business or contact name) and the Number.
 If you would like to hide the preset number from the agent, choose Y from drop down of the Hide Number field.
 Step 10. Click Submit. A confirmation message will appear at the top confirming the preset was added. The preset will also appear in the Presets for this Campaign section.

