How to Configure Inbound Calls in Queue
The inbound drop call settings determine what happens to an inbound call once it has been in queue waiting for an agent for a certain amount of time.
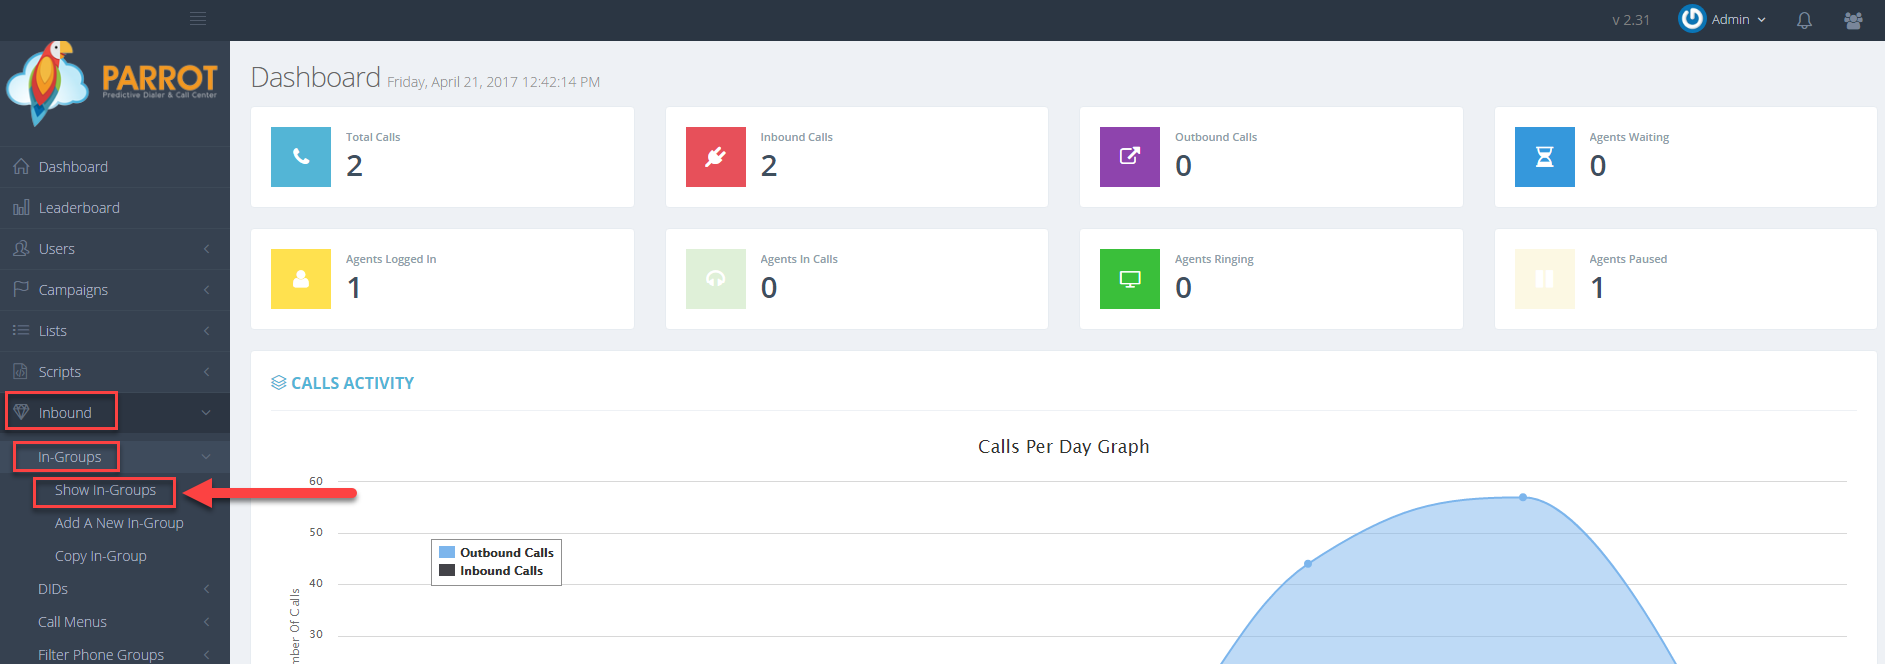
Step 1. Login to your manager portal using your Admin credentials.
Step 2. Click on
Inbound, then
In-Groups, then on
Show In-Groups in the left menu.
 Step 3.
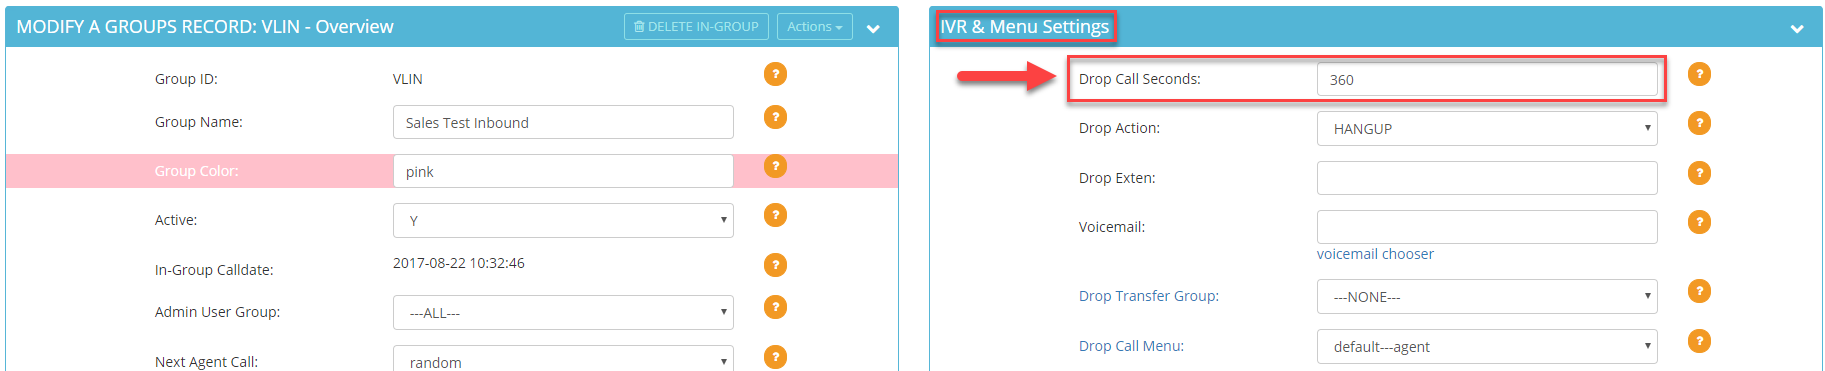
 Select the In-Group that you would like to configure inbound settings and click the
Modify button for that in-group.
 Step 4.
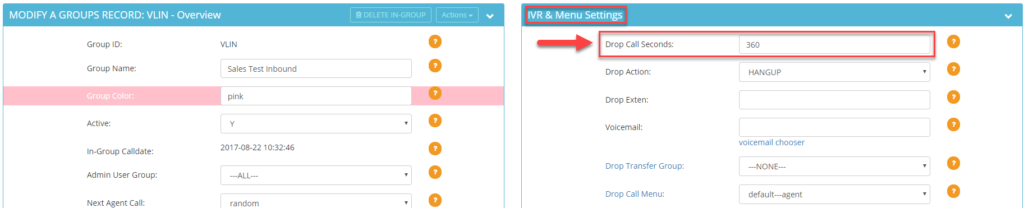
 Go to the
IVR & Menu Settings section to view the
Drop Call Seconds field. Enter the
number of seconds you want an inbound call to stay in the queue before an action indicated in the Drop Action field will be performed.
 Step 5.
 Select the desired drop action from the
Drop Action field once the call has reached its drop call seconds limit:
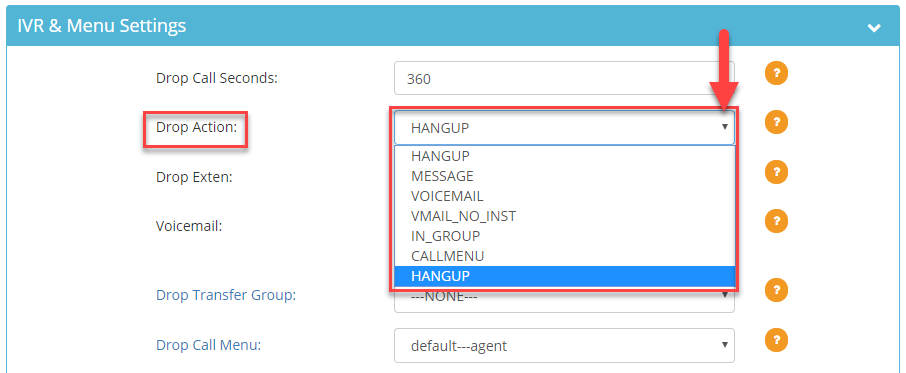 HANGUP
 – The system will hangup the call after the drop seconds limit is reached. Go to Step 10.
MESSAGE – The system will forward the call to the external number or an agent’s extension indicated in the
Drop Exten field after the drop seconds limit is reached. Go to Step 6.
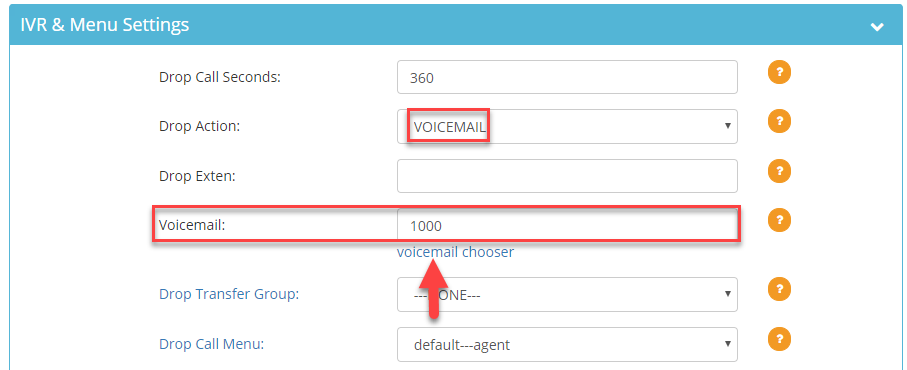
VOICEMAIL – The system will forward the call to the voicemail box selected from the
Voicemail Chooser after the drop seconds limit is reached. Go to Step 7.
VMAIL_NO_INST – The system will forward the call to the voicemail box selected from the
Voicemail Chooser after the drop seconds limit is reached. No instructions instructing the caller on what to do after the voicemail greeting will be played. Go to Step 7.
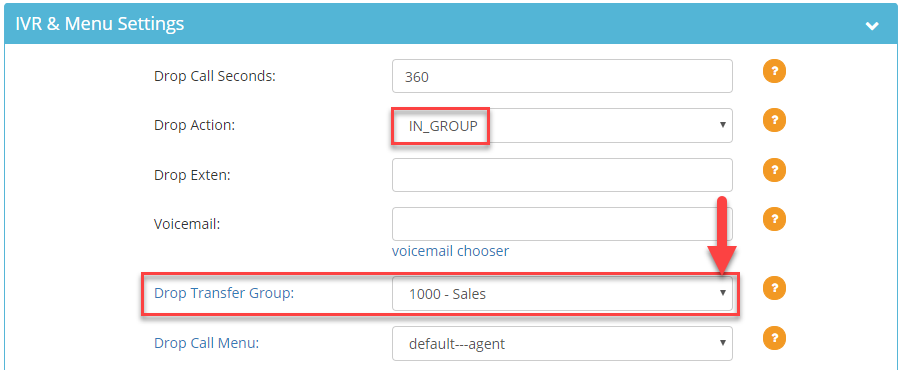
INGROUP – The system will forward the call to the ingroup indicated in the
Drop Transfer Group field after the drop seconds limit is reached. Go to Step 8.
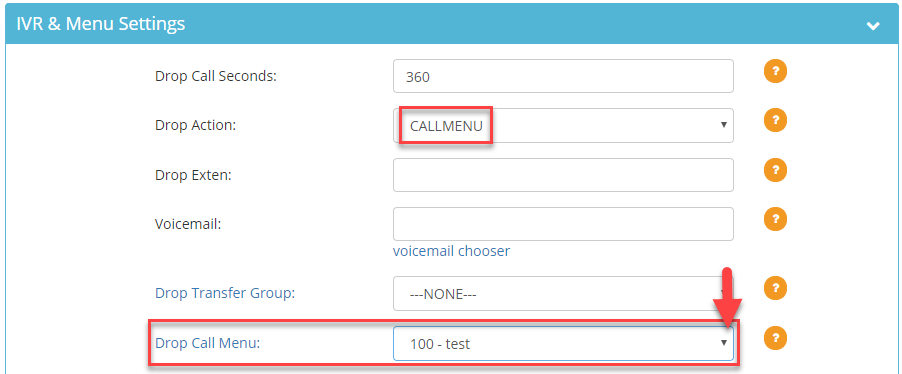
CALLMENU – The system will forward the call to the call menu indicated in the
Drop Call Menu field. Go to Step 9.
Step 6. Enter an
agent’s extension or a
ten digit external number in the
Drop Exten field that you want calls forwarded to once the drop seconds limit is reached.
 Step 7.
 Click on the
Voicemail Chooser link and select the voicemail box by clicking on the blue link that you want calls forwarded to once the drop seconds limit is reached.
 Step 8.
 Select the ingroup from the
Drop Transfer Group drop down that you want calls forwarded to once the drop seconds limit is reached.
 Step 9.
 Select the call menu from the
Drop Call Menu drop down that you want calls forwarded to once the drop seconds limit is reached.
 Step 10.
 Scroll down and click
Save Changes.

 Step 3. Select the In-Group that you would like to configure inbound settings and click the Modify button for that in-group.
 Step 4. Go to the IVR & Menu Settings section to view the Drop Call Seconds field. Enter the number of seconds you want an inbound call to stay in the queue before an action indicated in the Drop Action field will be performed.
 Step 5. Select the desired drop action from the Drop Action field once the call has reached its drop call seconds limit: