Get Started with the Parrot Agent Interface
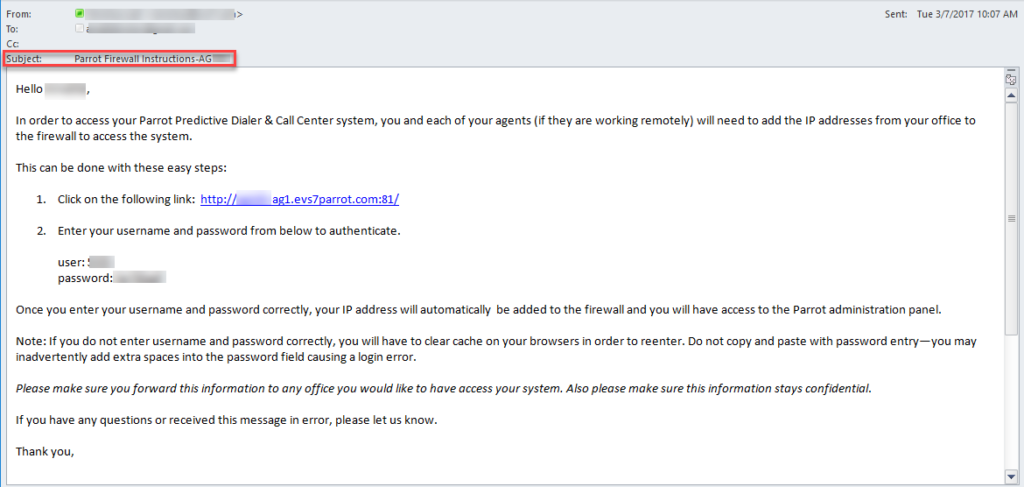
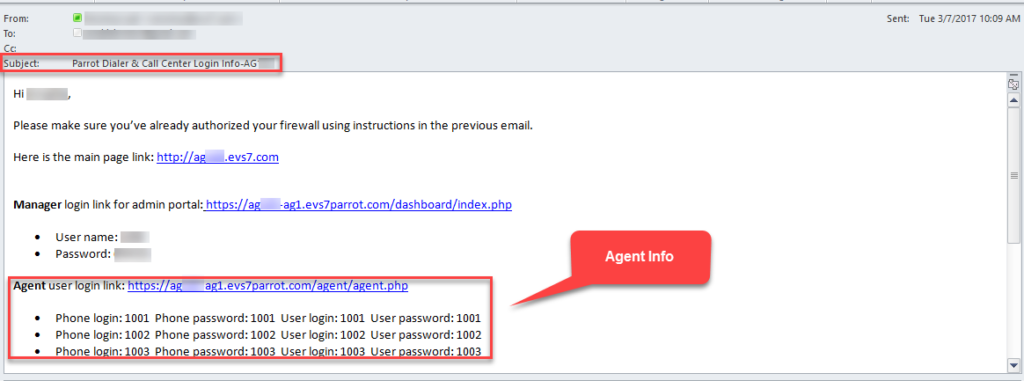
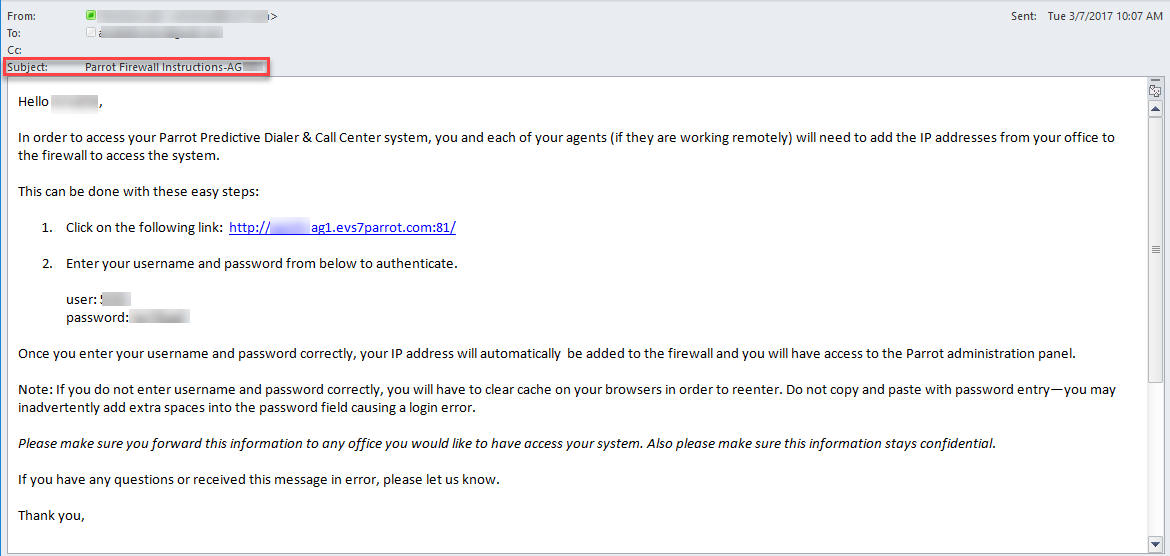
Admins will need to give
remote agents the
firewall authorization info and
ALL agents the
user login link and
login credentials before performing the steps below. This information can be found in the emails with the subject “Parrot Firewall Instructions-AGXX” and “Parrot Dialer and Login Info”.
For instructions on how to authorize the firewall,
click here:
Firewall Authentication
 Step 1.
 Open your Chrome web browser and in the address bar enter the Parrot agent user login link provided by the manager.
 Step 2.
 Enter your Phone Login, Phone Password, User Login, and User Password provided by the manager.
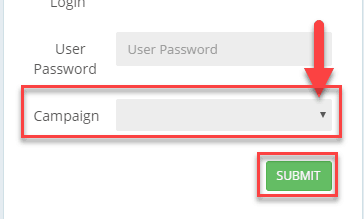
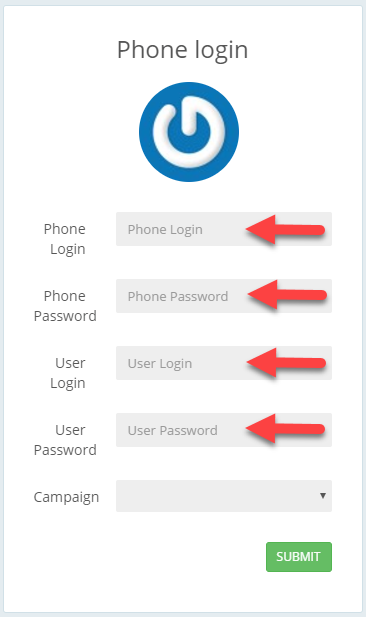 Step 3.
 Select the desired
Campaign from the drop-down. Click
Submit.
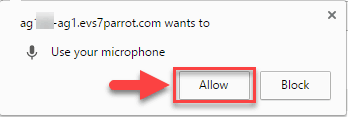
 Step 4.
 Allow the microphone. A notification will pop up on the upper left-hand side requesting to allow your microphone. Click
Allow. This notification only appears upon initial login.
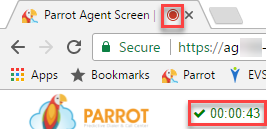
 Note:
Note: A green check mark, timer, and red dot in the browser tab will appear to confirm the connection is successful. A voice prompt stating, “Parrot dialer login successful” will be heard to confirm that the headset is working properly.
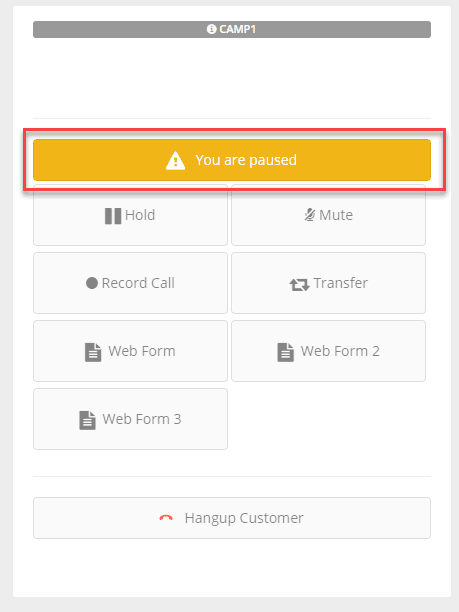
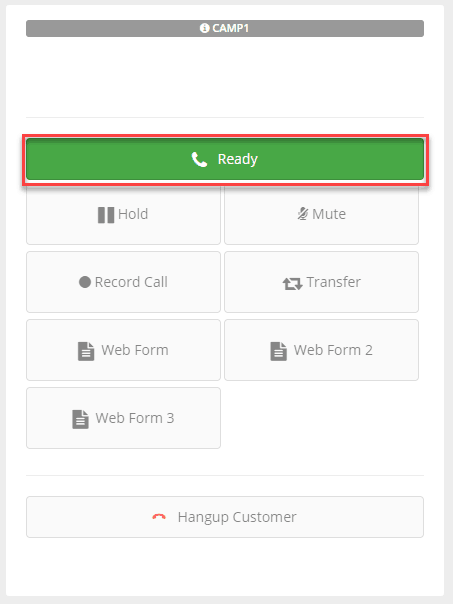
 Step 5.
 Get on ready mode.
An orange
“You are paused” button will appear on the left side to indicate the agent is on
pause mode. To begin making outbound calls and/or to receive inbound or transferred calls click on the “You are paused” button. The button will turn green and will state “Ready” to indicate the agent is on ready mode. The system will automatically dial leads loaded into the system when the agent is on “ready” mode.
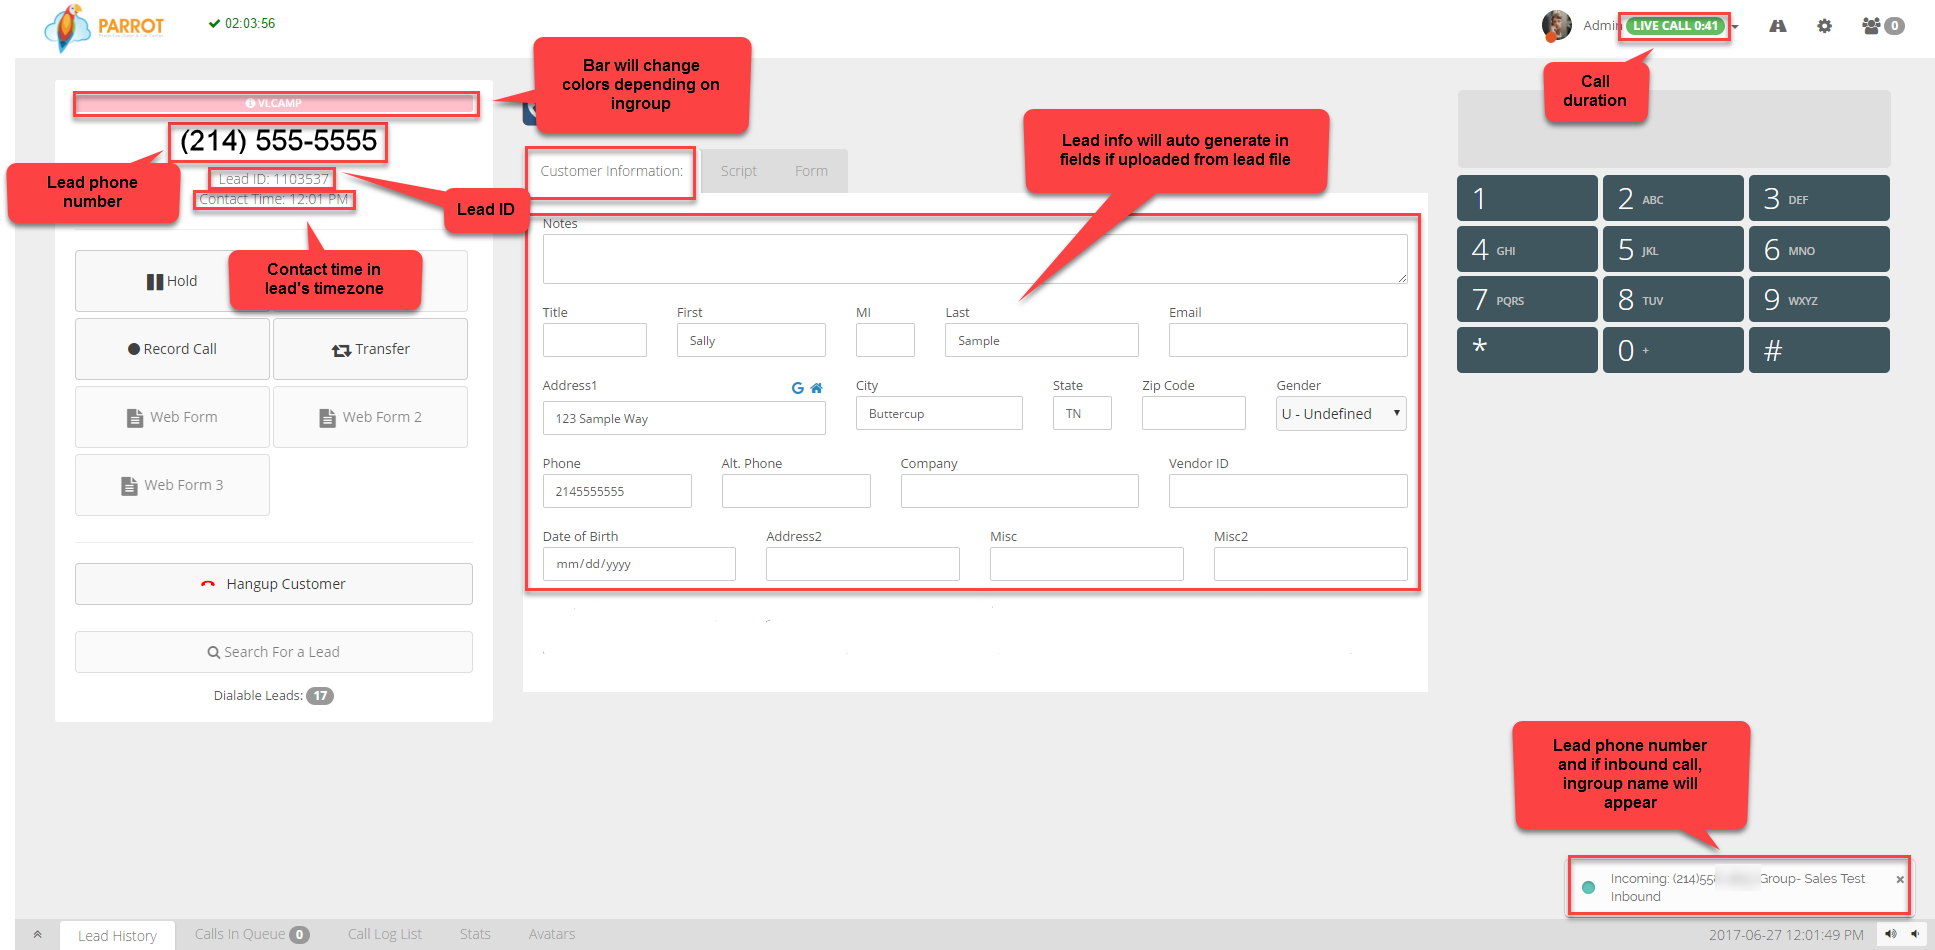
 Step 6.
 Receive a live call.
When a live call is connected to an agent, the following information will
show:
- Lead phone number
- Lead ID
- Call duration
- Lead contact time in their time zone
- Lead information on Customer Information Tab will appear with data loaded from lead file for outbound calls. Lead information for inbound calls will only appear if the lead’s information is loaded into the system.
- Bar above lead phone number will change in-group color for inbound calls.
- Name of in-group on bottom right side for inbound calls only.
When a live call is connected to an agent, the agent will
hear:
- For outbound calls using the ratio and adapt dial methods (several lines at a time), a “bloop” sound will be heard on the AGENT SIDE ONLY indicating the customer has already said “hello”. Note: It is important for the agent to start talking immediately after the “bloop” to avoid further delay between the agent and lead.
- For inbound calls, a “ding” sound will be heard.
- Ringing, answering machines, busy signals, and disconnected messages will be heard on manual, inbound_manual, and progressive power dialing modes.
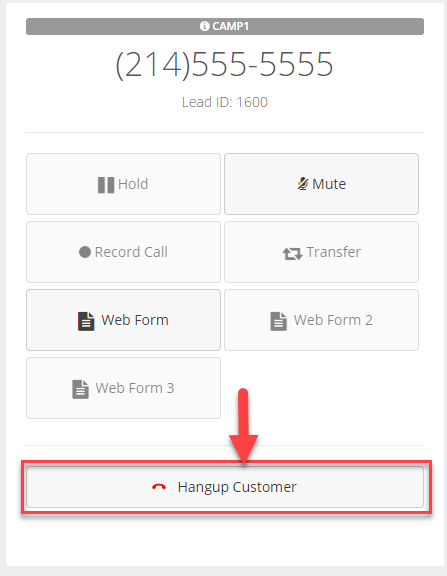
Step. 7. Hangup and disposition the call. Click on the hangup button on the left side to display the dispositions or statuses. Click on the desired disposition and click
Submit.
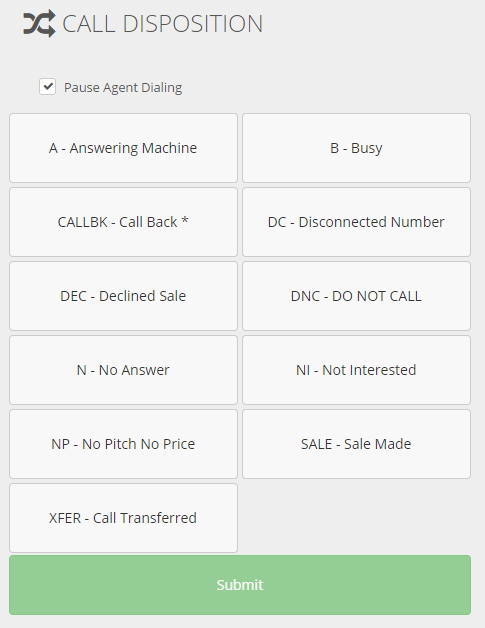
The agent will automatically return to “ready” mode unless “pause agent dialing” is selected from the disposition screen where in that case, the agent will go into “pause” mode once the call has been dispositioned.
 For instructions on how to authorize the firewall, click here: Firewall Authentication
 Step 1. Open your Chrome web browser and in the address bar enter the Parrot agent user login link provided by the manager.